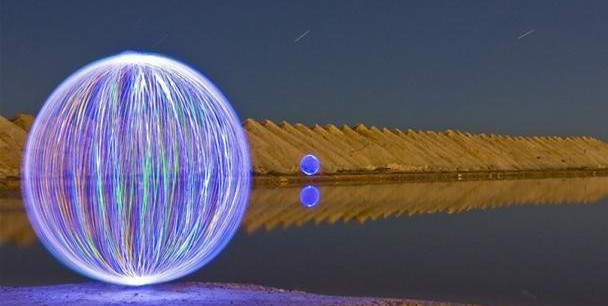
Do you have a camera that’s capable of controlling how long of an exposure it takes? With this and any small light source, you can make a really awesome illuminated image like the one featured above. Combine this with the hacking skills that you’ve hopefully learned from reading Hackaday, and the visual possibilities are endless.
Let’s look at the background of this entertaining light hacking technique, and how you can make images like this yourself!
What is Light Graffiti?
You may have seen images of streaks or simple shapes, or even complicated drawings embedded in a photograph of a dark environment. If it wasn’t just a poor photo, there’s a good chance that what you saw is light graffiti.
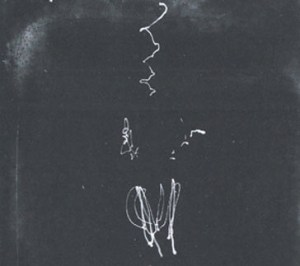
Although you might think that this is a relatively new art form, it’s been around since at least the late 1800’s, when [Marey] and [Demeny] demonstrated the first known light graffiti photograph (or light painting as it’s also known). Although technology has changed, the basic concept is the same.
A photograph records the light that hits the sensor or film on a camera, but has no concept of time per se. Because of this light (or anything visible) moving in front of the camera appears to be in all the points where it moved in the resulting photograph. If you take a long exposure photograph of a dark area, and move an illuminated object in front of it, this can be controlled to make whatever shape you want.
What equipment is needed/what I use
To make your own light graffiti art, you’ll need a camera capable of varying the exposure time (most likely a DSLR), a light source, and a dark environment. I use a Canon T2i with a remote triggering device to shoot with. If this camera is set on “bulb,” one can signal the camera to start then stop whenever you’re done with your shape. Alternatively, it can be triggered for a set amount of time. During this exposure, you can manipulate the light in front of the camera to create a light graffiti (LG) effect.
Besides the exposure time, one has to also set up the ISO (digital film sensitivity) correctly so as not to capture too much or too little light. Additionally, focusing can be a problem in the dark. To help with this, you can shine a light near where you’re going to be doing your graffiti, then focus on this point. Be sure to set the autofocus off when actually shooting to avoid any problems.
Traditional light graffiti
A really easy quick experiment to see what this art form is all about would be to set your camera up for a long exposure and trigger it while looking at a light. Move it around, and you’ll see a streak on your digital film. Taking this concept farther, you can go out at night with a tripod and move a light in front of the lens. LEDs would be the obvious first choice for a light source. On the other hand, anything that is on fire, especially something emitting sparks can look really great for light graffiti. Caution should be used if you go in this direction to make sure you don’t burn yourself or start another fire.
Although fun by themselves, when attached to a string, LEDs can be used to create a vortex effect, or even an orb as seen in this post’s first image, and in other excellent photos on this page. When you’re twirling your light source around, dark clothing is helpful to keep yourself from appearing in the picture too much.
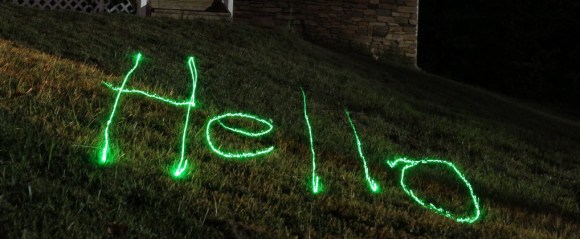
Using a laser pointer, as seen here, works well for drawing or writing on whatever your target object is. Just open the shutter and treat the laser just like you would a normal pen.
“Hacker” Light graffiti
When you’re ready to move beyond “traditional” light graffiti tools, some of the hacking skills featured here on Hackaday can be quite helpful. Light bars, like this simple LED arrangement that I made, or this color light bar using a programmable LED strip are excellent “hacker” choices. An LED-enabled CNC machine is another option, and I’ve even experimented with using a quadcopter for LG. Given a better (automatic) control scheme, this could be really stunning.
If you’re still wondering what LG is all about, check out the video below for some people from Boston University creating some really great “traditional” light graffiti photos:
[youtube=http://www.youtube.com/watch?v=5NKe6MJUpiU&w=470&h=315]
Final Word
Although cameras capable of this kind of shooting aren’t generally cheap, if you have one, I would highly recommend trying this technique out. I’ve enjoyed my experiments, but if you have any tips to share about getting a great LG shot, be sure to let us know in the comments! Like many other photographic techniques, LG is easy to get into, but takes a lot of effort to truly master.
 Jeremy Cook is a Mechanical Engineer with a degree from Clemson University, and works in manufacturing and process automation. Additionally, Jeremy is an avid maker and former Hackaday staff writer. When he’s not at work or in the garage, you can find him on Twitter @JeremySCook, his projects blog JCoPro.net, or on his photography-related blog DIYTripods.com.


Ill Just leave this right here
http://froknowsphoto.com/the-pixelstick-is-one-of-the-coolest-photography-gadgets-ever/
Some inspirations with this technique:
Attila Csorgo: http://www.orbit.zkm.de/?q=node/376
Tokihiro Sato: http://www.dandeliarts.com/UploadPic/200982215105133521.jpg
And of course, Picasso: http://petapixel.com/assets/uploads/2011/11/picassolight_mini.jpg
This is more commonly known as “light painting” by us photographers, in fact this is the only time I’ve ever heard it called graffitti, even with those G.R.L. weirdos who play with projectors.
Also, you don’t need a dslr at all, any ordinary cheapo digital model within like the last 5 years will have a knob setting for shutter priority. set it to 30 seconds, put on the 3 or 10 second timer thats been in digitals for at least 10 years, then go play with your glow sticks. This also works when trying to shoot lightning.
Definitely an incredible photo! Unfortunately I can’t take credit for it though. I’ve tried the technique myself, but that photo is pretty incredible. There are a lot more cool photos like that in the linked source: http://graffiti-street-art.wonderhowto.com/inspiration/magical-orbs-graffiti-light-0116324/
Crap, replied to the wrong person!
Oh my. The lightsphere photo is positively surreal and lovely. Nice work.
– Robot
Definitely an incredible photo! Unfortunately I can’t take credit for it though. I’ve tried the technique myself, but that photo is pretty incredible. There are a lot more cool photos like that in the linked source: http://graffiti-street-art.wonderhowto.com/inspiration/magical-orbs-graffiti-light-0116324/
Definitely an incredible photo! Unfortunately I can’t take credit for it though. I’ve tried the technique myself, but that photo is pretty incredible. There are a lot more cool photos like that in the linked source: http://graffiti-street-art.wonderhowto.com/inspiration/magical-orbs-graffiti-light-0116324/
A great group on G+ arranged an event in Edmonton where I got to do this for the first time. Some of the results were spectacular. It’s a very cool medium.
Search #yegfirespin on Google Plus ( http://goo.gl/yNR5SB ) to see some of the amazing pictures from the event.
If you get the chance to try this, do it.
We used to do that back in the film days – then you’d shoot a roll or seven, send them in, and wait to see what you got and if any shot was usable. Now the digital revolution makes it sooooo much cooler since you get the results right then and can tweak as needed.
Yeah, it’s crazy to think how much has changed in the last 15 years or so. It has to be so much easier to perfect your photographic technique with instant feedback!
If you have a Canon PowerShot, put CHDK on your SD card and use the extra options it gives you. You even can build your own usb remote for it.
Interesting – if you run CHDK on an SD card, does it modify your camera permanently, or does it go back to “factory” settings with another card?
CHDK (and Magic Lantern – for DLSR’s) are ‘independent programs that runs alongside Canon’s own software. Each time you start your camera, CHDK or Magic Lantern is loaded from your memory card.’ Here is a good article on shutter speed overriding in CHDK. IIRC, the longest exposure time that CHDK will allow is 2048 seconds, to prevent camera sensor heat damage. (FWIW, the shortest that the software supports is 1/100,000th of a second.) Want an individual model will support? YMMV.
CHDK makes no permanent changes to your camera, remove the SD card with the firmware upgrade and the camera boots to the original (crippled) firmware.
More information:
http://chdk.wikia.com/wiki/CHDK
Coincidentally, my first humble light paintings were posted to my flickr stream tonight:
http://www.flickr.com/photos/91789568@N00/sets/72157637967495043/
They’re done with a polargraph (plotter, drawbot) and a LED “gondola” I designed. The 3D files necessary for printing the gondola will be posted to Thingiverse when the site stops treating me like a punk (it’s wigging out at the moment). Discussion about using the gondola will be on the polargraph forum here:
http://www.polargraph.co.uk/forum/polargraphs-group2/building-hardware-forum3/kongos-led-gondola-for-light-paintings-thread251.0/#postid-1398
Nice job! Scaled up, that would look awesome in the woods or wherever else you thought of.
I recently finished a servo driven laser drawing thingy using an Arduino and Processing for drawing on long exposure photos. It was for your trinket contest! (but I missed the deadline)
There’s an in-depth post about how I made it, complete with code (and hackaday’s logo) here:
http://blog.elamperti.com/2013/11/drawing-with-a-laser/
I hope someone finds it useful! :/
Cool project, bro! Instead of servos, why don’t you try using the same laser guiding mechanism as The Peachy Printer?
I wonder: Could one project images of hoodies and coloured people loitering for the security cameras to pick up & give the old bill some much needed exercise?
Did this on my phone!!! FTW!!
http://www.geekdope.com/2014/01/how-to-create-light-graffiti-with-phone.html
Some cameras such as the VTech Kidizoom Plus come with three fun preschool games
as well as easy to use photo editing software. Digital Feature Analysis Data (DFAD) Level 2 for Aircraft Simulations.
For hours of fabulous fun, check out this Strawberry Shortcake remote
control car.
The Secret For swarovski crystal value
My spouse and I stumbled over here by a different web page and thought I should check things out.
I like what I see so now i am following you. Look forward to checking out your web page again.