 While most homebrew video game development has focused on the original NES, Atari consoles, and has produced a few SNES games, there is another console out there that hasn’t seen much love. Sega’s classic console, the Genesis or Mega Drive, depending on where you’re from, was an extremely capable machine with amazing capabilities for its time. [Chris] figured the Mega Drive would make a good target for an all-in-one development kit, and with a lot of work he managed to put one together.
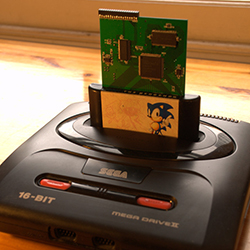
The standard cartridge for the Genesis or Mega Drive is just a simple ROM chip wired directly into the console’s address space. [Chris] took a cheap FPGA and some dual port ram to create a seamless interface between the modern world and the inside of this ancient console, allowing him to load every Mega Drive game off an SD card, as well as use modern tools to modify old games, or even create new ones.
To demonstrate his dev kit, [Chris] took a copy of Sonic 1, and using the debugger and GDB, gave himself infinite lives. It’s a very cool demonstration, searching through all the commands executed by the Megadrive CPU with the standard Linux debugging tools.Going through the trace, [Chris] found the instruction that decremented that value representing Sonics lives, replaced it with NOPs, in effect giving himself infinite lives. This is a lot like how the Game Genie works, only using much, much better tools.
Of course a USB dev kit wouldn’t be much use if it could only modify existing games. The real power of [Chris]’ work comes from being able to develop your own demos, games, and homebrew apps.
[Chris] needed to write a small homebrew Mega Drive app for the ROM loader portion of his dev kit using SGDK. Disassembling his own code with the dev kit, he was able to take a look at the instructions, and potentially even modify his loader.
It’s a really impressive technical accomplishment, and something that could be a boon to the extremely small homebrew scene for the Mega Drive. All the boards, code, and everything else are available over on [Chris]’ github, with the entire project written up on hackaday.io. Videos below.


Any DIY projects like this for NES or SNES (project files, schematics, code, BoM)?
Finally, something a question I can contribute an answer to! For SNES the best project I know of is SD2SNES – http://sd2snes.de/blog/
Project files are available on GitHub – https://github.com/mrehkopf/sd2snes
I own the Deluxe Edition that was put together via Stone Age Gamer.
I’ll take a look through my links and see if I can find anything for the NES. I know there’s several universal carts (I own one), and a dev board (have to find the link) though I don’t think the pcbs are available.
I believe sd2snes is just the SD-card interface; it doesn’t do any of the remote-debugging or bus-cycle tracing of the UMDK.
Actually, it would probably be straightforward to make a NES/SNES bridge for the UMDK FPGA board and port the machine-code monitor. Unfortunately there’s no GDB support for the 6502 and the last GDB release with 65816 support is 13 years old.
Funnily enough I actually wrote / found the infinite life cheat for sonic 1 for game genie.. It was my first job after I left school at 16. I was hired by a little games company called Optimus software in Stockton uk to hack all the genesis and snes games and create the cheats for it.. I did this on the genesis using a special cartridge that let my plug the carts into an amiga where I could look though the rom. Then I had a special genesis where I could alter 2 bytes of rom , using an address and replacement bytes.
For snes I used a logic analyser. And another special cart.. The cheats I found were then loaded I to a special program which would spit out the special game genie codes..
It is very well done! I have to wonder, though, if I was developing a game from scratch or doing deep reverse engineering, I’d probably first try using a software emulation of the machine. A good emulator provides a lot more productive environment (eg, easy snapshotting and restoration of state, complete and simple visibility into machine state). Still, no doubt, such a hardware debugger would be invaluable for tracking down issues where the emulator isn’t faithful enough to reality.
http://krikzz.com/index.php?route=product/product&product_id=55
and? $143 each without cart.
http://shop.retrogate.com/Mega-EverDrive-MEGA-ED.htm
Awesome. Not sure I understand how the debugger can read the registers, but I guess for breakpoints and such it just overwrites its vector table… which is interesting: That means the vectors are re-implemented on each cartridge (if the cartridge is in their address space).
The debugger can read and write the 68000 registers because the first thing the monitor[1] does when it starts is to save the registers to a well-defined region of SDRAM, where they can be read or written by the host[2]. When the monitor exits, it loads the 68000 state from the same region of SDRAM, thereby picking up any changes the host made.
Breakpoints are implemented by writing the monitor address to the illegal instruction vector, then temporarily writing the illegal instruction opcode to the breakpoint address. When the breakpoint is hit, the 68000 throws an illegal instruction exception and returns control to the monitor.
Single-stepping is implemented in the same way, but it uses the 68000’s built-in trace mechanism, where a trace exception is thrown (you guessed it, back to the monitor) after just one instruction has been executed.
TBH all the debug stuff was made *much* easier by the fact that my SDRAM controller interleaves MD reads & writes with the host’s reads & writes, so the only orchestration that is necessary is the polling (on both sides) of a semaphore at a certain address in SDRAM.
[1]https://github.com/makestuff/umdkv2/blob/20140524/gdb-bridge/monitor/monitor.s#L97
[2]https://github.com/makestuff/umdkv2/blob/20140524/gdb-bridge/mem.c#L547
That’s awesome. I was going to read into the source after work, but you’ve saved me a lot of time. This is something I’d like to recreate for something like an NES, but the hardware stuff is beyond what I know as a lowly software engineer :)
“and using the debugger and GDB”… GDB is the debugger.
Wow, it looks great! Is there a possibility to use this approach to debug on running Arduino? I use the AvrStudio to test the code (offboard) but after some time running, the board just freezes; it would be great if I could then just activate a debugger, feeding the .elf file and step through the code (cpp code :) ). I am a beginner in this kind of low level programming, this seems like a solution but I can’t elaborate – limited knowledge :(
This approach is possible with the MegaDrive because it uses separate components for the CPU and memory, so you can alter the memory it’s executing from under its feet in order to observe what it does, and even control what it does.
Conversely, an Arduino contains an AVR microcontroller, where the CPU and memory[1] are both in the same chip. So no, this approach will not work.
However, I do believe there’s a JTAG-accessible debugger built into some of the AVRs, offering hardware breakpoints and single-stepping. To get that working you can either buy a JTAGICE dongle from Atmel or if you prefer DIY there are some options[2][3].
[1]Two separate memories, actually – the AVR has a Harvard architecture so its code lives in flash and its data lives in a separate SRAM address-space
[2]http://amtek.wordpress.com/2011/07/20/make-your-own-avr-jtag-debugger/
[3]http://aquaticus.info/jtag