While schools have been using robots to educate students in the art of science and engineering for decades now, not every school or teacher can afford to put one of these robots in the hands of their students. For that reason, it’s important to not only improve the robots themselves, but to help drive the costs down to make them more accessible. The CodiBot does this well, and comes in with a price tag well under $100.
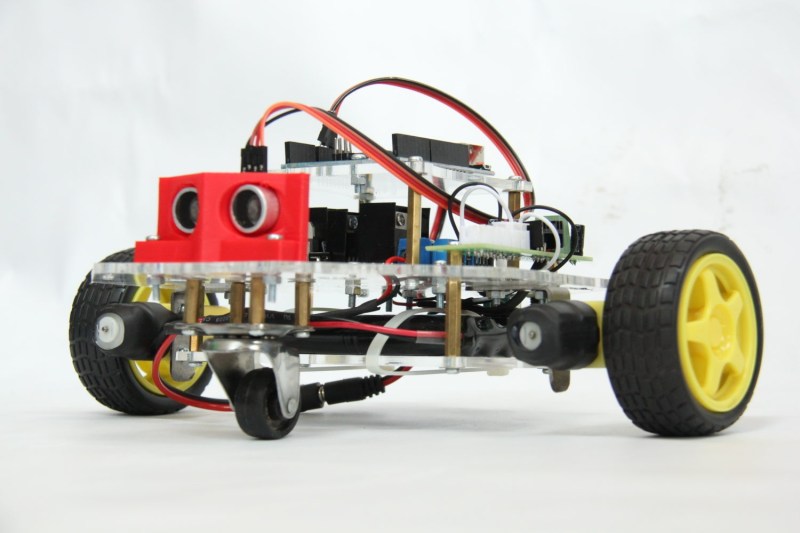
The robot itself comes pre-assembled, and while it might seem like students would miss out on actually building the robot, the goal of the robot is to teach coding skills primarily. Some things do need to be connected though, such as the Arduino and other wires, but from there its easy to program the robot to do any number of tasks such as obstacle avoidance and maze navigation. The robot can be programmed using drag-and-drop block programming (similar to Scratch) but can also be programmed the same way any other Arduino can be.
With such a high feature count and low price tag, this might be the key to getting more students exposed to programming in a more exciting and accessible way than is currently available. Of course, if you have a little bit more cash lying around your school, there are some other options available to you as well.


In Switzerland you can find a nice educational robot too : the Thymio, developped by the EPFL (Lausanne Federal Institutes of Technology) https://www.thymio.org/en:thymio
NiCd battery? Really?
It’s a viral ad for a $8 AliExpress Kit.
my thoughts exactly!
Reasons like cheap, toxic, unreliable, short lifetime, low power density – what else we got?
Oh yes – in old plane designs you get the center of gravity right with heavy nicd batts.
$100 is a lot for an education bot. You could do this for a lot less.
You’re not wrong but keep in mind the target demographic, Teachers who don’t necessarily have the time, parts bin, or background to source a robot to teach kids with.
yeah seems expensive… and have a wire going under the “axle” axis?
If anyone knows of better options pls post links – I’m honestly interested.
Old mindstorms brick NXT’s could probably be found on auction sites, classifieds or someones garage for a decent price. The new kits are cool but priced steep (200 – +500 USD).
While looking for scratch on an arduino (which I found, S4A) I found the mBot v1.1 which retails for 70-80USD. No idea if it’s any good but it’s got the same trike style frame w/ ultrasonic sensors.
There’s a multitude of simple line follower bot kits out there for pretty cheap; 20-30USD. Some use only components (LDRs to control motor speed) others can be programmed. Along with dozens of BEAM bot circuits for simple solar wigglers and line followers, but you’ll need soldering skills for them and a basic explanation of electronics if you want the kids to get anything more than amusement out of them.
With a little prep by the instructor you could probably link a generic RC car to a computer by hacking the transmitter to interface with the computer. Higher end transmitters have direct link cables for flight simulators, someone’s probably reversed the protocol.
Little stationary arm robots can still provide decent lessons and serve to get kids interested in automation.
I bought my granddaughter the MakeBlock Starter Robot kit a while ago and we put it together in a day. We didn’t do much programming then. I then bought her a string of LEDs that plug into the arduino compatable board and she set up some scratch programs for that. She also played with scratch to move the robot around. I wrote a quick arduino sketch for the lights and showed her the speed difference between that and scratch. I thought it was a nice setup.
There used to be a guy making/selling his take on this idea called a tadpole. His site https://sites.google.com/a/rocketbrandstudios.com/rocket-brand-studios/home
It doesn’t seem he is in the business of selling them anymore, but, you might be able to get a small batch from him. It really depends on whether or not he has any stock of hardware left.
The Edison robot seems to be a good deal for teachers and students. I have never used one but have seen them around. https://meetedison.com/
If you search for arduino bot on aliexpress you find things like this: https://www.aliexpress.com/item/tracking-Motor-Smart-Robot-Car-Chassis-Kit-Speed-Encoder-Battery-Box-2WD-Ultrasonic-module-For/32818647133.html
Elegoo has one that is under $75, and does much more.
http://a.co/5g7bWRu
Pretty Cool, however too many screws for kids to handle with and no tutorials at all!
Always interesting to me how I can get a multi-axis-stabilized flying drone with a video camera (cheap, but so what) for a fraction of the cost of a wheeled robot like this. Shenzhen is straight magic.
if you want a cheap start into educational robotics.. nearly nothing beats the price of the roboslam kit
https://roboslam.wordpress.com
If I were sourcing a bunch of robots for a class perhaps one per kid or one per pair of kids I would go for something like this. (assuming I could get the school to pay). If I was making the whole class share just a few robots though… if I didn’t need to worry about making everything exactly the same for ease of support… I would do it entirely different.
Just go to the toy section of the local thrift shop. You will probably find a bunch of cheap RC cars priced for almost free because all their remote controls have been lost. Buy that. Remove the top shell and the electronics.. throw them away. Now you have a platform with a battery holder, power switch, motors, steering linkage and wheels. Perfect! Just drill a couple of holes and bolt on some kind of flat board. Now get a cheap Arduino clone an H-bridge board. and maybe a terminal strip for neatness.
That’s your basic bot right there and it’s hardly any different than the $100 wonder! Go ahead and splurge for some distance sensors, and bluetooth modules from the same cheap chinese webpage you got the Arduino and H-Bridge from. Browse around that site and look for other cheap accessories. With a little imagination you will come up with all kinds of stuff.
This bot isn’t very practical to purchase since it has to be shipped from Pakistan according to its project page.