Pac Man On The Colour Computer 3

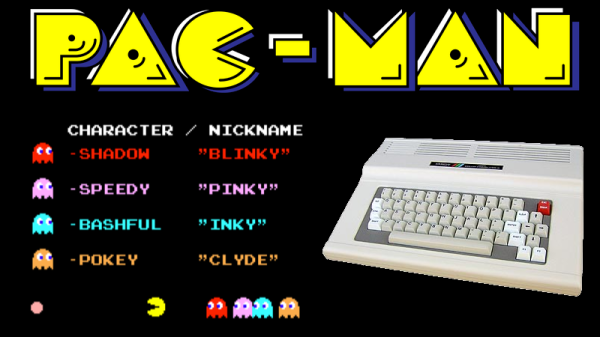
The 1980s were the heyday of the venerable Z80, a processor that found its way into innumerable home computers, industrial systems, and yes — arcade machines. However, not everyone had a Z80 based machine at home, and so sometimes porting is required. [Glen] is tackling this with a port of Pac Man to the Radio Shack Colour Computer 3.

The key to any good arcade port is authenticity – the game should feel as identical to the real thing as possible. The Atari 2600 port got this famously wrong. Porting to the Colour Computer 3 is easier in theory – with more RAM, a Motorola 6809 CPU running at a higher clock rate, and a more powerful graphics subsystem, fewer compromises need to be made to get the game to run at a playable speed.

The way [Glen] tackled the port is quite handy. [Glen] built a utility that would scrape a disassembled version of the original Pac Man Z80 code, look up the equivalent 6809 CPU instruction, and replace it, while placing the original Z80 code to the side as a comment. Having the original code sitting next to the ported instructions makes debugging much easier.

Level 256 as seen in [Glen]’s port.
There was plenty of hand tweaking to be done, and special effort was made to make sure all the data the original code was looking for was accessible at the same addresses as before. There was also a lot of work involved in creating a sprite engine that would reliably display the game video at a playable frame rate.

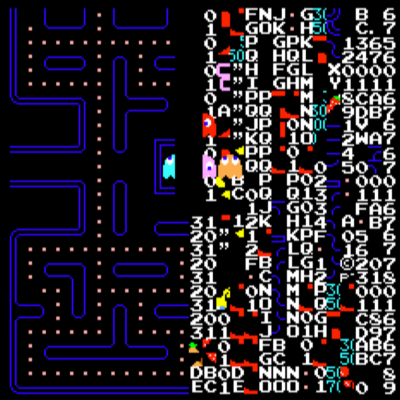
Overall, the port is highly faithful to the original, with the game code being identical at the CPU level. [Glen] reports that the same patterns used on the arcade machine can be used to complete the mazes on the Colour Computer 3 version, and it faithfully recreates the Level 256 bug as well. It’s an impressive piece of work to create such an authentic port on a home computer from 1986.

For another classic port, but with the temporal vectors flipped, check out Portal 2 on the Apple II.


Raspberry Pi AI Plays Piano

[Zack] watched a video of [Dan Tepfer] using a computer with a MIDI keyboard to do some automatic fills when playing. He decided he wanted to do better and set out to create an AI that would learn–in real time–how to insert style-appropriate tunes in the gap between the human performance.

If you want the code, you can find it on GitHub. However, the really interesting part is the log of his experiences, successes, and failures. If you want to see the result, check out the video below where he riffs for about 30 seconds and the AI starts taking over for the melody when the performer stops.

Continue reading “Raspberry Pi AI Plays Piano”

The ESP32… On A Chip

The new hotness in microcontrollers is the ESP32. This chip, developed by Espressif, is the follow-on to the very popular ESP8266, the cheap, low-power, very capable WiFi-enabled microcontroller that came on the scene a few years ago. The ESP32 is another beast entirely with two powerful cores, WiFi and Bluetooth, and peripherals galore. You can even put an NES emulator in there.

While the ESP32 is significantly more powerful, it has for now been contained in modules. What would really be cool is a single chip loaded up with integrated flash, filter caps, a clock, all on a 7x7mm QFN package. Meet the ESP32-Pico-D4 (PDF). It is, effectively, an ESP32 on a chip. It’s just the ticket if you’re trying to cram wireless, fast microcontroller wizardry into a small package.

At its heart, the ESP32-Pico is your normal ESP32 module with a Tensilica dual-core LX6 microcoprocessor, 448 kB of ROM, 520 kB of SRAM,  4 MB of Flash (it can support up to 16 MB), Wireless with 802.11 b/g/n and Bluetooth 4.2, and a cornucopia of peripherals that include an SD card, UART, SPI, SDIO, LED and motor PWM, I2S, I2C, cap touch sensors, and a Hall effect sensor. It’s quite literally everything you could ever want in a microcontroller.

Disregarding the just barely hand-solderable package and the need for a PCB antenna, the ESP32-Pico requires very few support components. Really, the only thing going on in the reference schematic is a bunch of bypass caps. This is, by far, the easiest and smallest method to put WiFi, Bluetooth, and a powerful microcontroller in a project. It will surely be a very, very popular chip for hobbyist electronics for years to come. Of course, it will be even more popular if Espressif also manages to put this chip in a QFP package in addition to the QFN.

Unfortunately, apart from the PDF released by Espressif, the details on the EPS32-on-a-chip are sparse. We don’t know when we’ll be able to get our grubby hands on a tray, tube, or reel of these chips. That said, there’s enough information here to start designing a breakout board. Have at it — we’d love to see what the community comes up with.

Shout out to [Dave] for the tip.

Hackaday Prize Entry: SNAP Is Almost Geordi La Forge’s Visor

Echolocation projects typically rely on inexpensive distance sensors and the human brain to do most of the processing. The team creating SNAP: Augmented Echolocation are using much stronger computational power to translate robotic vision into a 3D soundscape.

The SNAP team starts with an Intel RealSense R200. The first part of the processing happens here because it outputs a depth map which takes the heavy lifting out of robotic vision. From here, an AAEON Up board, packaged with the RealSense, takes the depth map and associates sound with the objects in the field of view.

Binaural sound generation is a feat in itself and works on the principle that our brains process incoming sound from both ears to understand where a sound originates. Our eyes do the same thing. We are bilateral creatures so using two ears or two eyes to understand our environment is already part of the human operating system.

In the video after the break, we see a demonstration where the wearer doesn’t need to move his head to realize what is happening in front of him. Instead of a single distance reading, where the wearer must systematically scan the area, the wearer simply has to be pointed the right way.

Another Assistive Technology entry used the traditional ultrasonic distance sensor instead of robotic vision. There is even a version out there for augmented humans with magnet implants covered in Cyberpunk Yourself called Bottlenose.

Continue reading “Hackaday Prize Entry: SNAP Is Almost Geordi La Forge’s Visor”

Other Machine Co. Changes Name, Logo, Apparently Nothing Else

The name Other Machine Co. is now dead. In a post to the company blog, Other Machine Co. is now Bantam Tools. This news comes just months after the announcement that [Bre Pettis], one-third of the founders of MakerBot, investor in Glowforge, and undeservingly the most hated man in the 3D printer community, purchased Other Machine Co.

Over the past few years, the Othermill, Other Machine Co.’s main product, has gained a reputation for being a very, very nice CNC mill capable of producing PCBs with 6 mil trace and space. Additionally, the Othermill was excellent at very fine CNC work including wax carving jewelry, very neat inlay work on wood, and any other CNC task that doesn’t involve anything harder than aluminum and can fit inside the machine itself.

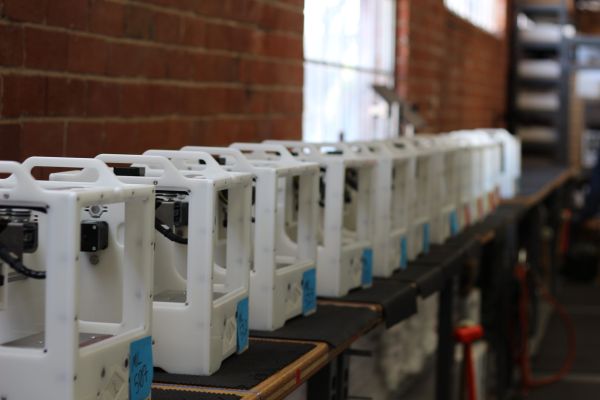
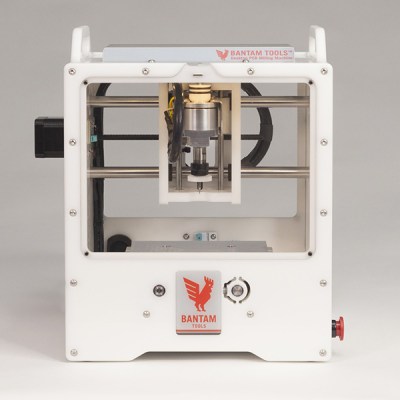
As of right now, the only change to the Othermill is the name — it’s now the Bantam Tools Desktop PCB Milling Machine. According to a Wired press release, this name change also comes with a change in focus. Bantam Tools will not focus on hobbyist makers, but instead to professionals that need PCBs and other small milling jobs done right now. For the record, I cannot recall the Othermill ever being advertised directly to ‘hobbyist makers’ — it has always seemed the target audience was professionals, or at least people who would make money from the stuff produced on their mill.

Other changes to the Othermill have been in the works for months. Since the time of the acquisition, Other Machine Co. / Bantam have introduced a PCB probing system, a desperately needed fine dust collection system, and automated material thickness probing. These new projects for Bantam mills are compatible with the old Othermill.

Ask Hackaday: How Small Is Your Shop?

Electronics, metalwork, carpentry, sewing — however you express your inner hacker, you’ve got to have a place to work. Most of us start out small, assembling projects on the kitchen table, or sharing space on a computer desk. But eventually, if we’re lucky, we all move on to some kind of dedicated space. My first “shop” was a corner of the basement my Dad used for his carpentry projects. He built me what seemed at the time like a huge bench but was probably only about five feet long. Small was fine with me, though, and on that bench I plotted and planned and drew schematics and had my first real lesson in why you don’t reach for a soldering iron without looking first. My thumb still bears that scar as a reminder.

Many of us outgrow that first tiny space eventually, as projects (and accumulated junk) outpace the available space. Some of us go on to build workspaces to die for; personally, I feel wholly inadequate whenever I see Frank Howarth’s immense wood shop, with its high ceilings, huge windows for natural light, and what amounts to a loading dock. Whenever I see it I think The work I could do in there!

Or could I? Is bigger necessarily better when it comes to workspaces? Would more space make me a better craftsman?

Continue reading “Ask Hackaday: How Small Is Your Shop?”

Visual Futurist Syd Mead Will Keynote At Hackaday Superconference

What does the future actually look like? Chances are what you see in your mind when presented with that question is heavily influence by Syd Mead. He is an industrial designer, but his body of work — which includes some of the most iconic Sci-Fi movies ever filmed — built a much more interesting job title for him: Visual Futurist.

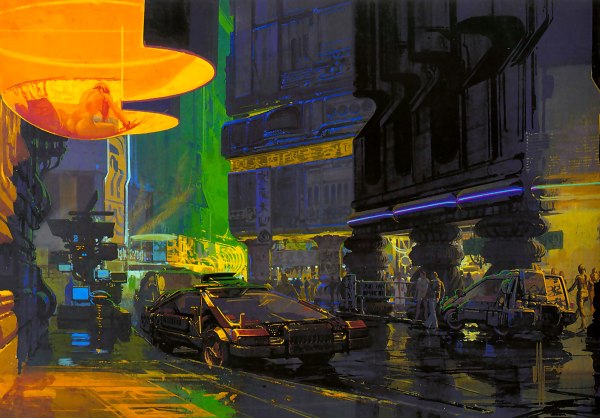
Meet Syd Mead as he presents a keynote talk at the 2017 Hackaday Superconference this November 11 and 12 in Pasadena, California.

Philip K. Dick wondered Do Androids Dream of Electric Sheep?, but when it came time to build those sheep and the world they live in, director Ridley Scott looked to Syd Mead to determine what the future in Blade Runner actually looked like. He invented a world, one that was actually built through the practical sets and props widely used in the days before computer graphics became the norm. Syd’s work is also seen in Star Trek: The Motion PictureAlien, and the iconic designs for the movie Tron. And his prolific work has continued to appear on the silver screen ever since, with Elysium and Tomorrowland as some of his more recent work.

How does one invent the future, even through decades of progress? That’s the role of hardware creators — to envision what we want and need tomorrow, not today or yesterday. Syd Mead is a hardware creator and his hardware has been built time and again to inspire all of us for where we’re going with technology. Take that ride along with Syd at the Hackaday Superconference. Get your tickets now.

[Main image credit: Blade Runner concept art by Syd Mead]