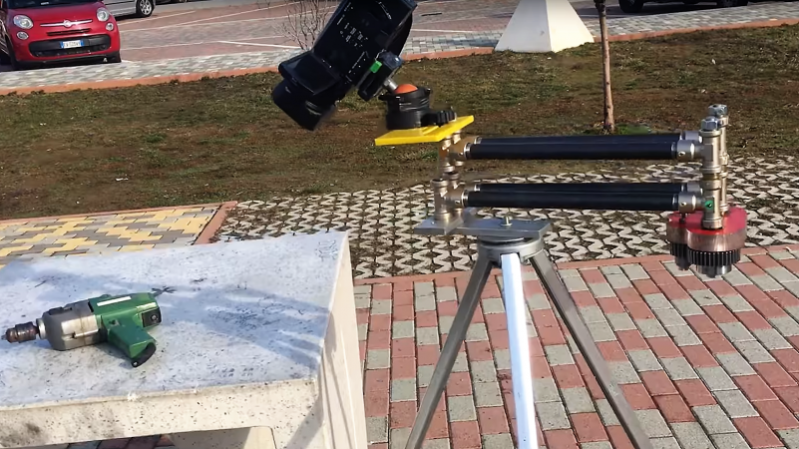
It’s depressingly easy to make bad videos, but it only takes a little care to turn that around. After ample lighting and decent audio — and not shooting in portrait — perhaps the biggest improvements come from stabilizing the camera while it’s moving. Giving your viewers motion sickness is bad form, after all, and to smooth out those beauty shots, a camera slider can be a big help.
Not all camera sliders are built alike, though, and we must admit to being baffled while first watching [Rulof Maker]’s build of a smooth, synchronized pan and slide camera rig. We just couldn’t figure out how those gears were going to be put to use, but as the video below progresses, it becomes clear that this is an adjustable pantograph rig, and that [Rulof]’s eBay gears are intended to link the two sets of pantograph arms together. The arms are formed from threaded pipe and tee fittings with bearings pressed into them, which is a pretty clever construction technique that seems highly dependent on having the good fortune to find bearings with an interference fit into the threads. But still, [Rulof] makes it work, and with a little epoxy and a fair amount of finagling, he ends up with a complex linkage that yields the desired effects. And bonus points for being able to configure the motion with small adjustments to the camera bracket pivot points.
We saw a similar pantograph slider a few months back. That one was 3D-printed and linked with timing belts, but the principles are the same and the shots from both look great.
Thanks to [Altmarcxs] for the tip.


I don’t get what the smaller gears are needed for. Wouldn’t you get essentially the same setup using only the two bigger gears?
If the two larger gears were to rotate together, then the one gear moves clockwise while the other moves counter clockwise. The smaller gear’s job is to make sure the two larger gears moves in the same direction.
If one of the large gears turns clockwise, then it drives the smaller gear counter clockwise, and the smaller gear in turn drives the other larger one clockwise.
This is the basic principal with gears, two gears that mesh together will change the direction of rotation. As long as we only have gears with teeth on their circumference. With internal gears, then one can do fancier things.
But though yes. We could have had the same arm setup with only two gears.
If one of the larger gears is connected to the lower arm, while the other is connected to the top arm. Downside here is that likely need a different setup, not to mention that it will not be symmetrical.
So technically, it is a bit of picking what poison one wants to deal with, one needs more fancy linkages, the other is having more gears.
Look again, 2 slightly larger gears would work exactly the same in this application, or a toothed belt & pulley setup, or even a properly tensioned belt.
Gears run counter to each other, so they also could be run directly. There is no reduction in the setup, so they are run 1:1, and only the larger gears have linkages attached.
2 Gears spin opposite directions. A belt would make them rotate the same.
While I do agree that having the two smaller gears is unnecessary for obtaining the same rotational behaviour, a belt wouldn’t do it unlessit’s twisted.
That would be true in case there was just one small gear but this setup has two. The two big gears turn in opposite directions (as he says in the video) and it would indeed work the same without the small gears, as Matthias said. My guess is that sufficiently big gears simply weren’t available so he used the gears he could find.
Great!
In the video i recognized piazza Marmolada in Turin!
This build and its configration reminds me of the C-pan arm I had been baffled about last year (https://9.solutions/portfolio-item/c-pan-camera-guide-arm/). Nice to see this DIY achieve similar effect, not sure what Patented features make up the Cpan product
Time for two 16 Bit encoder and a BLDC! Better performance, less space, easier to adjust…
Sad thing is, after all that effort, the footage isnt THAT stable or smooth…….
All that work, then he uses a wood screw to secure the Tee to the shaft. Man, I’ve been there too. Wrong tool for the job? Yes. Good enough. Yep. Ship it!
I thought it was an amazingly good build given the equipment he had to work with. On the flip side, it looks like he did go through some cash on the gears, tees, nipples, and bearings. As far as the movement being a bit rough, he just built the thing and is still getting used to it. I think it is a nice build.