Motorized Camera Slider Rides On Carbon

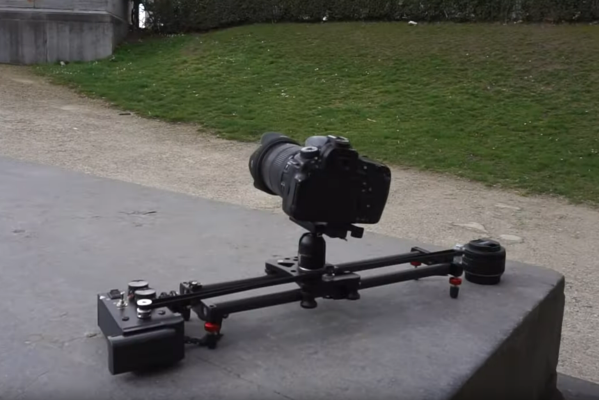
While not every camera mount needs to have six degrees of freedom, one or two can be extremely helpful in the photographic world. In order to make time-lapse shots with some motion or shots that incorporate some parallax, a moving camera mount or dolly is needed, and this small one builds upon a pre-existing, although non-motorized, camera slider.

The slider is an inexpensive model from everyone’s favorite online warehouse, with rails that are at least coated in carbon, if not made out of it entirely, to ensure smooth camera motion. To add the motorization to automatically move the camera, a stepper motor with a belt drive is used which is controlled by an Arduino. A few limit switches are added, letting the dolly perform different movement patterns automatically, and a pair of potentiometers for fine and coarse speed control are included as well, letting the camera take both time-lapse and video while using this mount at various controllable speeds.

With everything tucked into a relatively small box at one end of the dolly, the build is both accessible and functional. The code for the microcontroller is also available on the project’s GitHub page for anyone looking to replicate or build upon the project. And, for those looking to add more degrees of freedom to their camera setups, take a look at this DIY pan and tilt mount.

Continue reading “Motorized Camera Slider Rides On Carbon”

See What You’re In For When Buying And Moving A Lathe

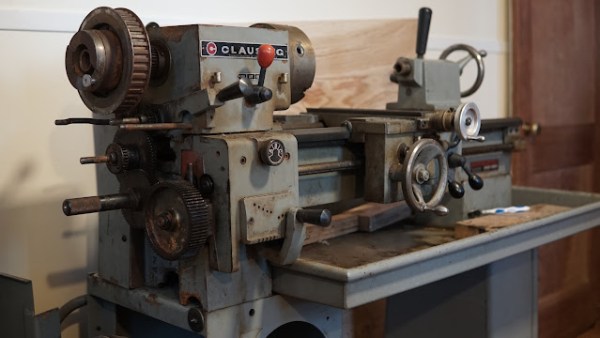
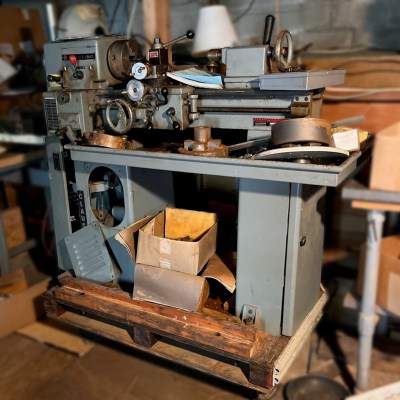
Sometimes, with patience and luck, one can score a sweet deal on machinery. But for tools that weigh many hundreds of pounds? Buying it is only the beginning of the story. [Ben Katz] recently got a lathe and shared a peek at what was involved in moving a small (but still roughly 800 pound) Clausing 4901 lathe into its new home and getting it operational.

The lathe had sat unused in a basement, but was ready for a new home.

Moving such a stout piece of equipment cannot simply be done by recruiting a few friends and remembering to lift with the legs. This kind of machinery cannot be moved and handled except with the help of other machines, so [Ben] and friends used an engine hoist with a heavy-duty dolly to get it out of the basement it was in, and into the bed of a pickup truck. Separating the lathe from its base helped, as did the fact that the basement had a ground-level egress door which meant no stairs needed to be involved.

One also has to consider the machine’s ultimate destination, because not all floors or locations can handle nearly a thousand pounds of lathe sitting on them. In [Ben]’s case, that also meant avoiding a section of floor with a maintenance trapdoor when moving the lathe into the house. Scouting and knowing these things ahead of time can be the difference between celebratory pizza and deep dish disaster. Pre-move preparation also includes ensuring everything can physically fit through the necessary doorways ahead of time; a task that, if ignored, will eventually explain itself.

With that all sorted out, [Ben] dives into cleaning things up, doing function checks, and in general getting the lathe up and running. He provides some fantastic photos and details of this process, including shots of the 70s-era documentation and part diagrams.

Watch the first chips fly in the short video embedded below. And should you be looking at getting a lathe of your own? Check out our very own buyer’s guide to lathe options.

Continue reading “See What You’re In For When Buying And Moving A Lathe”

DIY Camera Dolly Costs More Time Than Money

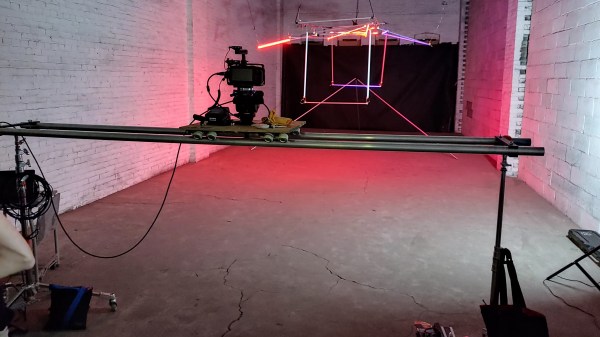
A camera dolly can be fantastic filmmaking tool, and [Cornelius] was determined to create his own version: the “Dope” DIY Dolly. The result not only upped his production quality, but was also entirely in line with his DIY approach to filmmaking in general.

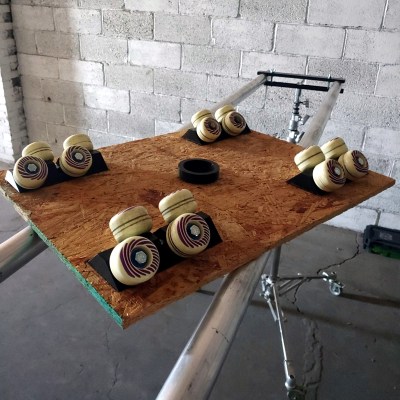
A basic dolly design is straightforward enough: a flat platform with wheels, and some aluminum tubing upon which to roll. But while dolly assemblies are easy to purchase or rent, [Cornelius] found that his DIY version — which used easily sourced parts and about 80 hours worth of 3D printing — provided perfectly acceptable results, while opening the door to remixing and sharing with like-minded filmmakers.

Interested? Download the STL files to get started on your own version. As for the track, smooth metal pipe is best, but sometimes track made from PVC can do the job. [Cornelius] has a few additional STL files for those planning to make a base from 1″ PVC pipe, and those are on a separate download link near the bottom of the project page (here’s that link again.) Watch the Dope Dolly in action in the brief video embedded below.

On the other hand, if you prefer your DIY camera equipment to be on the smaller and more complicated end of the spectrum, be sure to check out this multi-axis camera slider.

Continue reading “DIY Camera Dolly Costs More Time Than Money”

A Camera Slider With A Twist

“Scope creep” is often derided as an obstacle between your idea and the delivery of a finished project. That may be, but sometimes the creep is the whole point. It’s how we end up with wonderful builds like this multi-axis differential camera slider.

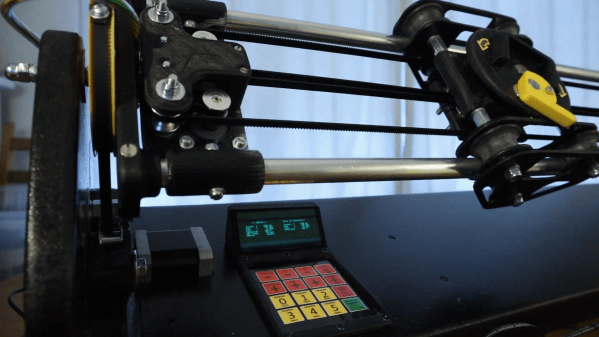
We mention scope creep because that’s what [Jan Derogee] blames for this slider’s protracted development time, as well as its final form. The design is a bit unconventional in that it not only dollies the camera left and right but also works in pan and tilt axes, and it does this without putting any motors on the carriage. Instead, the motors, which are located near the end of the slider rails, transmit power to the carriage via loops of 217timing belt. It’s a little like the CoreXY mechanism; rotating the motors in the same direction and speed slides the carriage, while moving them in opposite directions pans the camera. A Sparkfun Pro Micro in the controller coordinates the motors for smooth multi-axis motion, and the three steppers — there’s a separate motor for the tilt axis — sound really cool all working at the same time. Check out the video below for the full story.

We’ve seen a few fun projects from [Jan] before. Check out his linear clock, the persistence of phosphorescence display, or his touchpad for retrocomputers.

Continue reading “A Camera Slider With A Twist”

Simple Camera Slider Adds A Dimension Or Two To Your Shots

Camera sliders are a popular build, and properly executed they can make for impressive shots for both time-lapse sequences or real-time action. But they seem best suited for long shots, as dollying a camera in a straight line just moves subjects close to the camera through the frame.

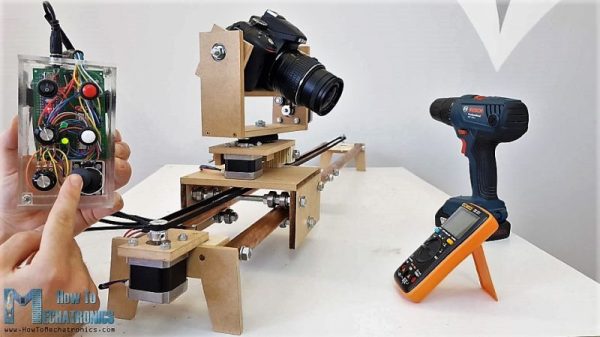
This slider with both pan and tilt axes can make moving close-ups a lot easier. With his extremely detailed build log, [Dejan Nedalkovski] shows how he went about building his with only the simplest of materials and tools. The linear rail is simply a couple of pieces of copper pipe supported by an MDF frame. The camera trolley rides the rails on common skateboard bearings and is driven by a NEMA-17 stepper, as are the pan and tilt axes. [Dejan] also provided a barn-door style pivot to tilt the camera relative to the rails, allowing the camera to slide up and down an inclined plane for really interesting shots. The controller uses an Arduino and a joystick to drive the camera manually, or the rig can be programmed to move smoothly between preset points.

This is a step beyond a simple slider and feels a little more like full-blown motion control. We’ve got a feeling some pretty dramatic shots would be possible with such a rig, and the fact that it’s a simple build is just icing on the cake.

Continue reading “Simple Camera Slider Adds A Dimension Or Two To Your Shots”

Pipes, Tees, And Gears Result In Smooth Video Shots

It’s depressingly easy to make bad videos, but it only takes a little care to turn that around. After ample lighting and decent audio — and not shooting in portrait — perhaps the biggest improvements come from stabilizing the camera while it’s moving. Giving your viewers motion sickness is bad form, after all, and to smooth out those beauty shots, a camera slider can be a big help.

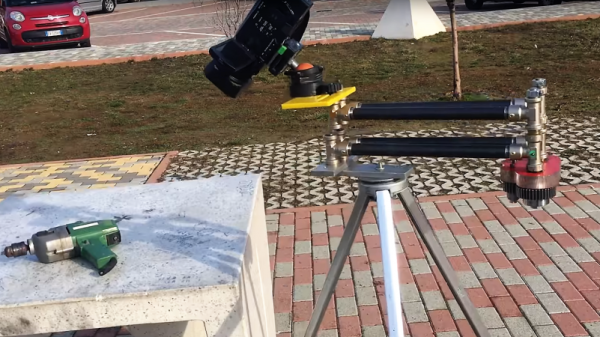
Not all camera sliders are built alike, though, and we must admit to being baffled while first watching [Rulof Maker]’s build of a smooth, synchronized pan and slide camera rig. We just couldn’t figure out how those gears were going to be put to use, but as the video below progresses, it becomes clear that this is an adjustable pantograph rig, and that [Rulof]’s eBay gears are intended to link the two sets of pantograph arms together. The arms are formed from threaded pipe and tee fittings with bearings pressed into them, which is a pretty clever construction technique that seems highly dependent on having the good fortune to find bearings with an interference fit into the threads. But still, [Rulof] makes it work, and with a little epoxy and a fair amount of finagling, he ends up with a complex linkage that yields the desired effects. And bonus points for being able to configure the motion with small adjustments to the camera bracket pivot points.

We saw a similar pantograph slider a few months back. That one was 3D-printed and linked with timing belts, but the principles are the same and the shots from both look great.

Continue reading “Pipes, Tees, And Gears Result In Smooth Video Shots”

Hello 3D Printed Dolly

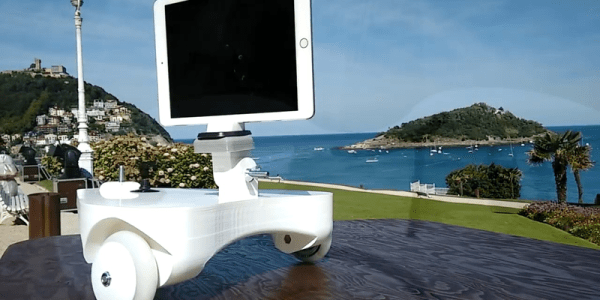
[Ivan] likes to take time lapse videos. Using his 3D printer and a stepper motor he fashioned a rig that allows him to control the camera moving any direction on a smooth floor.

The dolly has a tripod-compatible mounting plate and scooter wheels. An Arduino runs the thing and a cell phone battery provides power. A pot sets the speed and [Ivan] provides code for both a linear pot, which he suggests, and for a logarithmic pot, which he had on hand. You can see a video of the results below.

Continue reading “Hello 3D Printed Dolly”