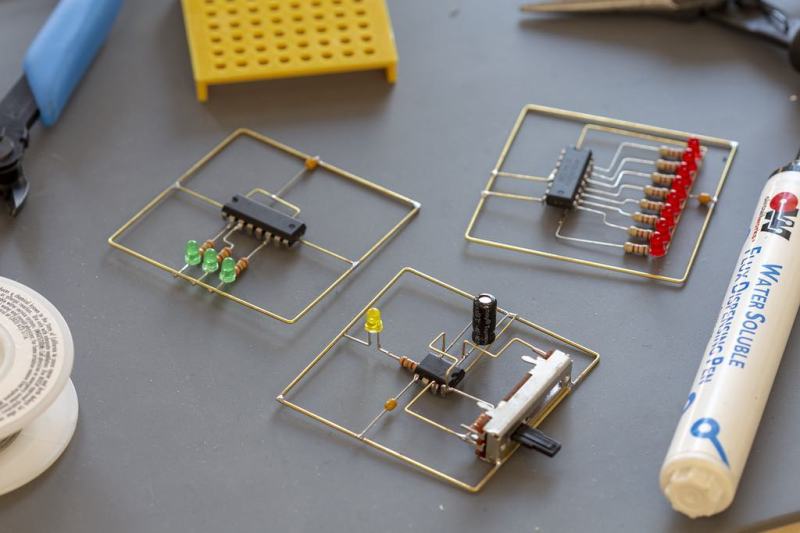
The technique of assembling circuits without substrate goes by many names; you may know it as flywiring, deadbugging, point to point wiring, or freeform circuits. Sometimes this technique is used for practical purposes like fixing design errors post-production or escaping tiny BGA components (ok, that one might be more cool than practical). Perhaps our favorite use is to create art, and [Mohit Bhoite] is an absolute genius of the form. He’s so prolific that it’s difficult to point to a particular one of his projects as an exemplar, though he has a dusty blog we might recommend digging through [Mohit]’s Twitter feed and marveling at the intricate works of LEDs and precision-bent brass he produces with impressive regularity.
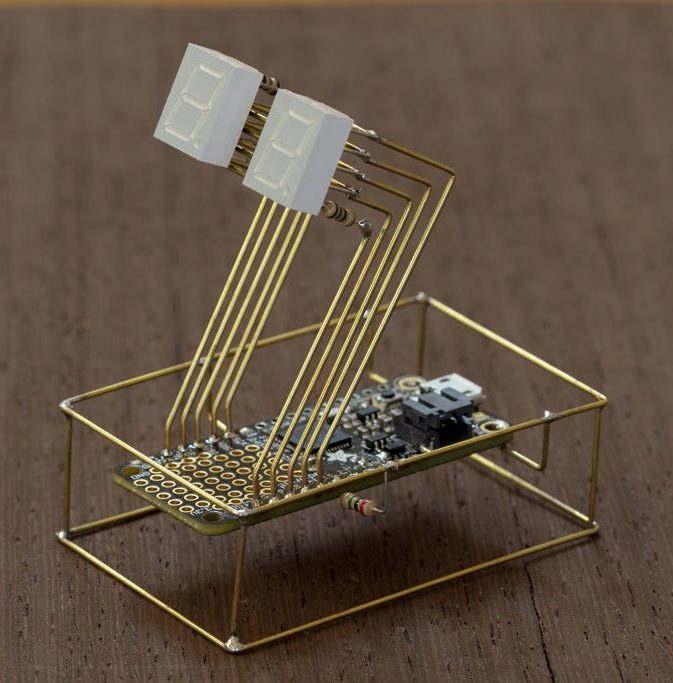
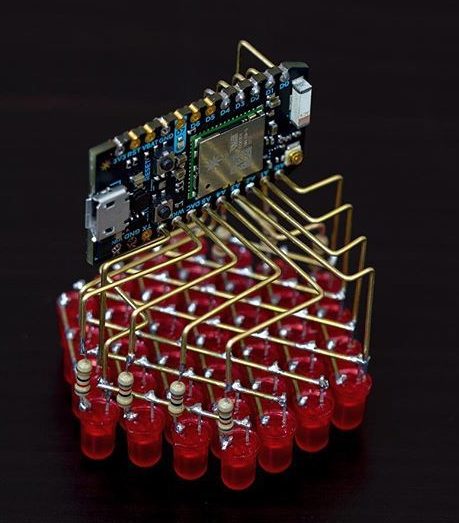
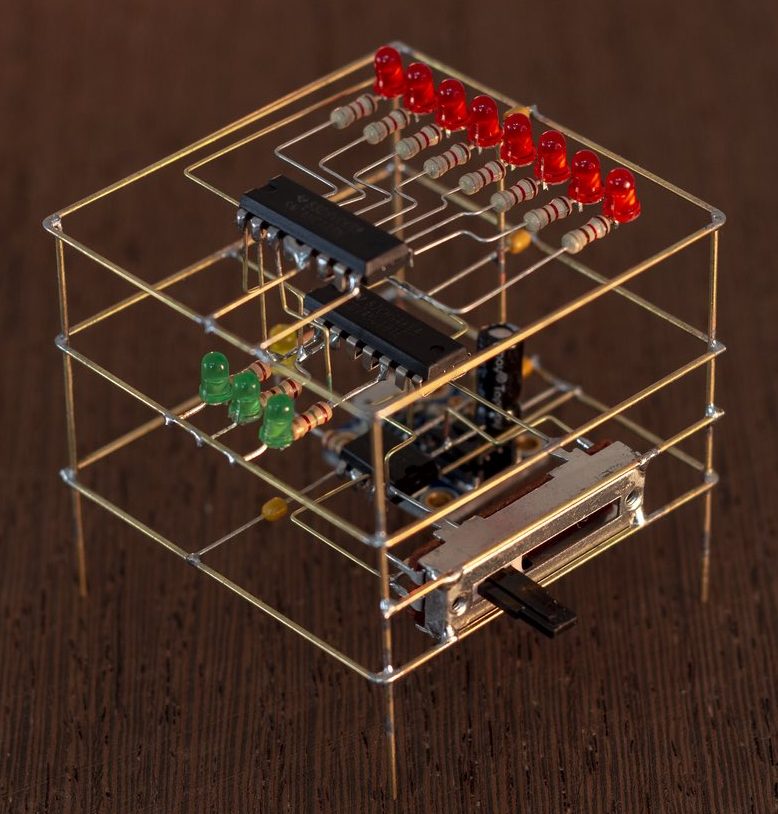
So where to begin? Very recently [Mohit] put together a small wheeled vehicle for persistence of vision drawing (see photo above). We’re pretty excited to see some more photos and videos he takes as this adorable little guy gets some use! Going a little farther back in time there’s this microcontroller-free LED scroller cube which does a great job showing off his usual level of fit and finish (detail here). If you prefer more LEDs there’s also this hexagonal display he whipped up. Or another little creature with seven segment displays for eyes. Got those? That covers (most) of his last month of work. You may be starting to get a sense of the quality and quantity on offer here.
We’ve covered other examples of similar flywired circuits before. Here’s one of [Mohit]’s from a few years ago. And another on an exquisite headphone amp encased in a block of resin. What about a high voltage Nixie clock that’s all exposed? And check out a video of the little persistence of vision ‘bot after the break.
Thanks [Robot] for reminding us that we hadn’t paid enough attention to [Mohit]’s wonderful work!


this is steampunk electronics – i love it
That would be tubes. Lot’s of tubes.
Eeeehhh let’s figure out some other term..
They are beautiful though.
Victorian electronics.
Artistically Structured Circuits
ASC make sure you pronounce it with a soft c
/Joke
I agree they look very good.
Beautiful!
:o)
Really nice stuff there
Freeform electronics is another term.
https://www.pinterest.com/pin/293437731950522858/
And here’s a 1920s homebrew radio receiver. Apparently this style of wiring was popular in the DIY world then.
http://lthimonnier.wixsite.com/murena/poste-batterie-le-synchrone?lightbox=dataItem-im0ivm1p
That was before PCBs. Back in the days of vacuum tubes, everything was point-to-point inside the chassis with tag strips as intermediaries.
So, is this brass wire ? Copper is too soft for such work, and is always sold as coil…
That’s what it says in the labeled diagram, at least for the more structural tubes. Maybe it’s a mix of both?
it is brass rod.
What guage? Any ideas? Looking to buy some.
maybe it was stripped from domestic wiring?
The first step would be to learn to straighten a coil then ;)
Clamp one end of a piece of wire in a vise. Grab the other end with a pliers and pull until it breaks. You will have a nice, straight piece of wire. !8 gauge copper works well, tinned or not.
Now cast it in clear resin :D
https://runawaybrainz.blogspot.com/2012/04/audio-crystal-cmoy-freeform-headphone.html
Hmm, yeah cool nice art and reminder post, thanks. I’ve done a little of this with smd 1206 res/caps and the odd SOT few years ago as part illustration/experiment (can’t be bothered with veroboard), good fun with great chance to explore some obverse art too, good practice for soder/soldering neophytes across continents, doh ;-)
Cheers
Looks great!
As noted in other comments, this not new. Decades ago I worked with an IC designer who would mock up an entire IC design on copper wire with components soldered to it. Sometimes it would be a meter more across his desk. Then he would take over to layout and say “here, lay this out”.
No one is suggesting that this is new. It is extremely cool to look at though.
Nobody said it was new. They just said it was awesome. And they were right.
The Mona Lisa is _not_ the first painting ever made! I demand a refund. :)
Do you have any pictures of the meter-long designs? We would love to see them!
Exactly what I was thinking! That would make a great write up…
Encourages people to think more three-dimensional.
That sounds like something Bob Pease would have done.
Nothing is new. This isn’t DARPA!
This is just pure Electro-art (Electro-p*rn?), I remember the headphone amp, that was genius how he ensures the sockets won’t fill up.
I’ve done similar for later epoxy potting (Black Epoxy mix), but never this amazingly and beautifully done level of quality.
Also, I’ve used thicker copper enameled wire that I twisted for strength as the carrier. It was just to get the job done, nothing more.
See this post above: https://hackaday.com/2018/11/19/flywire-circuits-at-the-next-level/#comment-5476320
Very Pretty Work!
My pleasure :)
I love everything about this. Great work!
Since I’m recently playing with electronics I got intrigued by this method. Seems to be a good skill for when you’re running out of pcb’s. ????
I recall seeing a clock made of 1000’s of transistors and it was constructed as a 3d sculpture however this person likes to build audio sculptures.
http://www.electronicbeats.net/the-feed/hear-an-interactive-sound-sculpture-inspired-by-radical-modern-art/
How could I forget …..
https://www.pinterest.com/pin/697213586031791440/
ewww pinterest. I’m suddenly not pinterested any more….
Oh wow, those are wonderful!
I thank you for letting me see these. Beautiful.
There’s something so satisfying about that up-and-over the chip wire in one of the three shown in the image at the top. The rest of that circuit is basically 2D but that one detail I find delightful.