Whether you’re a programmer, gamer, writer, or data entry specialist, the keyboard is an extension of your nervous system. It’s not so much a tool as it is a medium for flow — for being in the zone. So I think it’s only natural that you should care deeply about your keyboard — how it looks, how it sounds, and above all, how it feels to finger-punch those helmeted little switches all the live-long day. That’s my excuse, anyway.
It might surprise you that mechanical keyboard switches can be modified in a number of ways. Depending on what you want from your keyboarding experience, you can make switches feel lighter or less scratchy, quiet them down, or tighten up any wobble in the housing. Why would you want to do this? Because customization is fun. Because electromechanical things are awesome, and because it’s fun to take switches apart and put them back together again. Because it’s literally hacking and this is Hackaday.
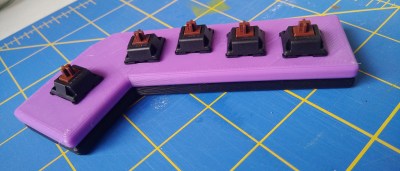
I got into switch modding because I wanted to put Cherry clears in my dactyl, but worried that they would take too much force to actuate and wear my fingers out. So I bought some really light (39g) springs and was really looking forward to swapping them into the clears, but they just don’t work. Like, physically. Slider goes down, slider gets stuck. It will come back up, but only if I hit it again and smear my finger to the side a bit at the same time. Those springs must be too weak to return clear sliders.
I took this as a sign that I should suck it up and use browns instead. After all, no one else has to know what my sliders look like. While I was opening switches, I tried out one of these super-light springs in a brown, thinking maybe they wouldn’t have to go to waste. Not only did the lighter spring work in the brown, it felt pretty nice. It’s hard to imagine how a whole keeb would feel based on a single switch, but if you can gather a handful and snap them into a plate to riffle your fingers over them, well, it’s probably close enough to a full keyboard to get a good feel for whatever mod you’re doing.
Open for Business
Please note that I only have experience modding Cherry MX switches and their perfectly cromulent clones, so that’s what I’m gonna talk about here. There are a few notable differences between the two, especially in the way the housings are designed. A tool that opens a Cherry won’t necessarily open a clone switch.
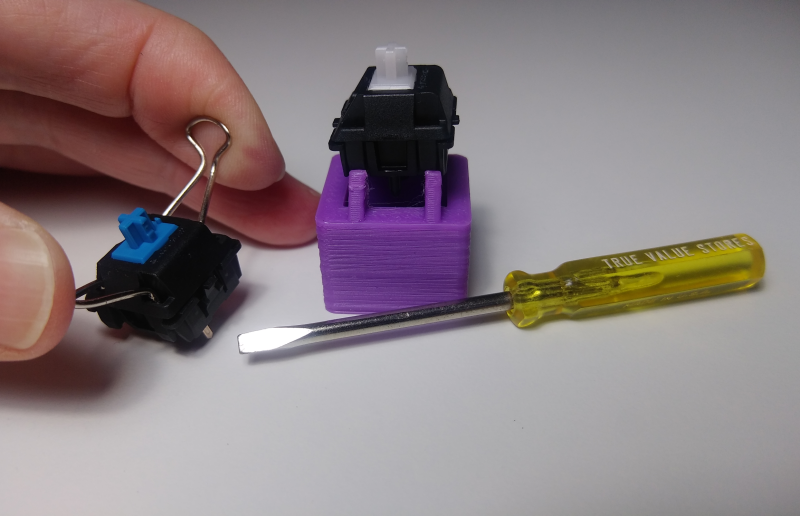
There are a bunch of ways to open switches in general. You can use a tiny flat head screwdriver to open most any kind of switch, as long as you know where to put it. I printed a switch opener that made it through about 10 switches before one of the teeth broke off. The second one lasted much longer after I switched from shoving switches squarely down on the teeth to working the teeth under the switch housing clips one side at a time.
Then I came across the bent binder clip method. I think it’s really fun to do it this way, but the method is a bit on the brute force side. If you liberate the spring steel handles from a binder clip, you can bend the ends into a little tool that opens switches from the top like a pair of keys. These are a little difficult to make without a real, bolted-down bench vise, but I managed by holding it in place with locking pliers and doing my bending with regular pliers.
A Little Cushion for the Pushin’
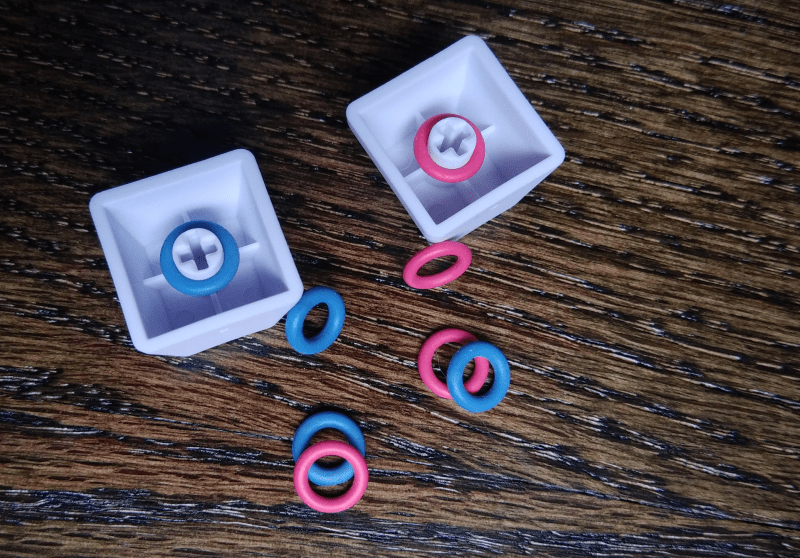
Most mods must be done with loose switches, but not all. Don’t want to go through all the trouble of pulling or de-soldering all the switches on your daily driver? That’s understandable. Some keyboard noise comes from bottoming out — pushing the keys all the way down when typing. About the easiest and most reversible thing you can do to mod a switch is pull off the keycap and stick an o-ring on the keycap stem. You can even use those tiny rubber bands meant for orthodontia. If they feel too mushy, all you have to do is pull the keycap again and try another size of o-ring.
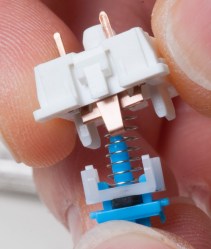
Some people like the feel of clicky switches like blues and greens but they can’t stand the clicky sound. Or maybe they grow tired of the sound after awhile, or they love the sound but everyone else is breathing down their necks about that awful machine-gun keyboard. Clicky switches get their clicks in different ways, and some of them can’t be quieted without losing the feel that comes with it.
Clicky Cherry MX switches are kind of special, because they are also built to be tactile. They have an extra piece of plastic on the stem called a click jacket. If you feel like spending the time and aren’t afraid of opening switches, you can make a clicky Cherry MX more like a sharp tactile by putting a little piece of rubber called a j-spacer between the slider and the click jacket. This is called a jailhouse mod, and it works by immobilizing the click jacket. The tactile bump is still there, but the noise is dampened.
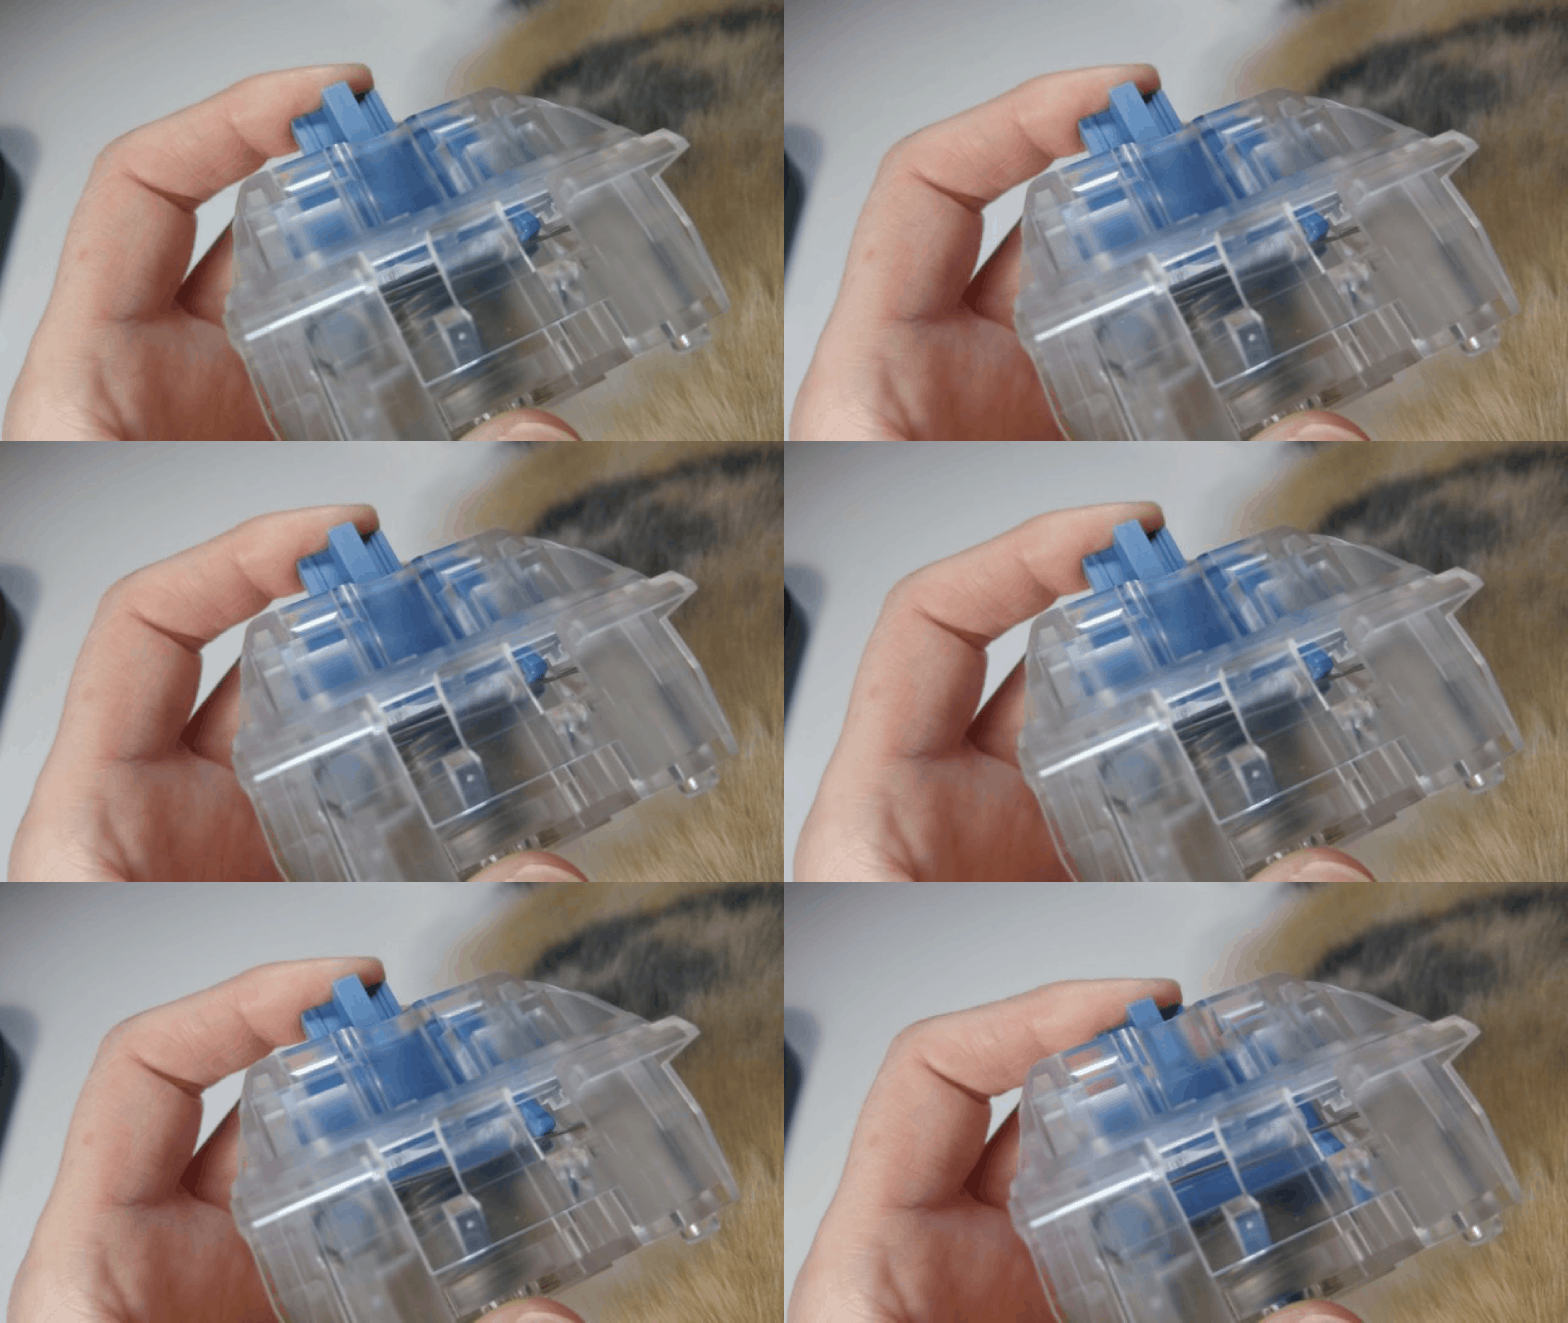
Clicky Kailh switches work very differently. Instead of an extra piece of plastic on the slider, there’s a horizontal spring-loaded bar that gets plucked by a protrusion on the shaft of the slider. You’re pretty much stuck with o-rings to quiet most of these types of switches down, but o-rings don’t do anything against clickiness. They will still function with the click bar removed, but since that thing does double duty, the feel will be linear.
Spring Fling
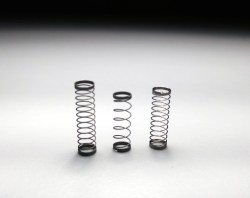
Are you a gamer or a speed typer who feels slowed down by your keyboard? Are your fingers tired at the end of the day? If you don’t mind opening switches, changing out the springs is something that’s easy to do and completely reversible. Lighter springs can make a huge difference in the way a keyboard feels.
I’m replacing the stock springs in my Cherry browns because I want the lowest-force possible typing experience without sacrificing tactility. The stock brown springs actuate somewhere around 45-50g of force, and the new ones only take 39g.
If you’re not so much into experimentation, there are a couple of well-known spring mods among the community, such as Ergo Clears — Cherry MX clear sliders with springs from reds, blues, or browns. These are so well-liked that there is now a commercial version called Zealios.
Lube Job
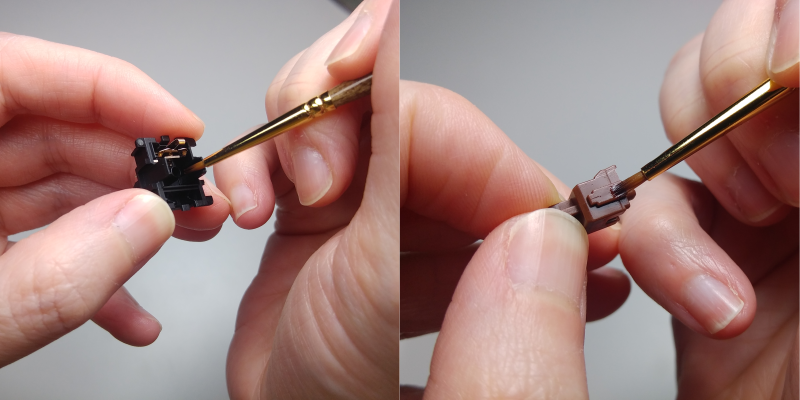
This is where things get serious and irreversible. A little lube can go a long way, especially if you’re using a grease and not a liquid. It all depends on what the switch is like to begin with, and what you want out of it.
Lubing switches is a bit of a slippery slope. I don’t say that to discourage anyone away from trying it — quite the opposite, in fact. I suggest easing into it slowly, trying the least amount of lube in the fewest places, and adding more until it feels like you want it to feel.
You can see above where I lubed the browns for my dactyl. I only applied it to the business parts of the slider and the corresponding rails inside the housing. I didn’t want to overdo it and make the switches feel mushy. The other places that make sense to lube are up inside the slider where the spring goes, the floor of the housing where the other end of the spring goes, and the spring itself. I’ve heard that some people straight up soak all their springs in lube and pull them out with tweezers.
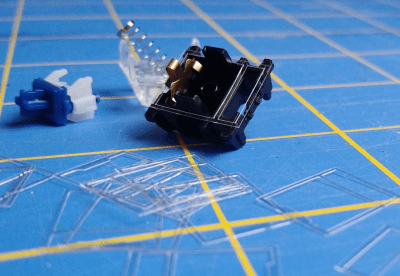 Switch Films and Stickers
These are basically the same thing, except that switch films are generally a little bit thicker than stickers, and stickers are adhesive whereas films are not. Both of them serve the same purpose — reducing wobble in your switch housings.
I thought films would be easier to work with than stickers, and better overall because of the material. I found it was true until I tried to put the switches back together and found myself wishing the films were stuck down.
Some say that switch wobble and the subsequent need for gaskets is an invented problem. I disagree. If your switches are PCB-mounted and rely on solder joints for stability instead of snapping into a plate first, there’s definitely room for wobble. Switches break in over time, and there are always going to be switches that get used more than others. I would also posit that taking switches apart to add lube or change out the spring might introduce wobble. If switch stickers or films work for you, what’s the harm? Who cares? They’re cheap, and they come in a bunch of nice colors that will peek out all around the edge of the housing.
Do What You Feel
How many more n00bs could you pwn if every key press felt like perfection? How much more work could you get done if typing became something to look forward to? The point of all of this is to personalize the feel of your keyboard, meaning that nothing is really set in stone except that some stuff physically won’t work. Inventing your own mods is part of the fun. So go crack open some switches!




The golden rule of motorcycle maintenance applies here as well: if at the end of your efforts, the engine power has been reduced by less than 30%, the tuneup can be considered a success.
You’ve worked at a Harley Davidson dealership?
B^)
I thought their deal was to replace the plugs with any that wouldn’t foul or burn out before the customer got off the lot, because the right ones were dropped off the truck in order to fit more caps and t-shirts in the shipment.
But seriously. Modding your keyboard or keyboard ergonomics in general is kinda like computer case modding – people are doing it by “intuition”, making random changes or following “trendsetters”, and claiming improvements that are either impossible to measure, or suffer from a self-imposed Hawthorne effect. Basically, why fuel line magnets seem to work for people who buy them.
Basic biomechanical facts suggest that the stress of typing on joints and tendons is proportional to force over distance, which consists of the accelerations and static forces and vibrations that must be sustained or suffered due to pressing keys and moving fingers. The users’ wrists should also be as straight as possible, not angled upwards, so as to not constrict the carpal tunnel or cause static muscle tension in the arm (so don’t flip those tabs).
The best keyboard therefore should be as compact as possible with the least distance between keys as comfortable, with keys that travel the shortest possible distance, that actuate with only enough force to stop accidental keystrokes, and bottom with a soft stop. They keys should not require the typist to manually reverse the action, but instead should have a progressively increasing spring-back to keep the key from sinking in deeper than necessary, and to return the key as soon as it has been registered. All sorts of mechanical noise or vibration for “tactile feedback” is unnecessary shocks on the fingers an energy lost in the typing process.
When the key switch is designed to buckle so that the initial pressure will carry it through to the contact point – such that when the key moves, it will follow through by the momentum of the finger – the only tactile feedback necessary is the proprioceptive feedback from the muscles sensing that the key has moved.
All this actually suggests a compact, slim, laptop style scissor-switch keyboard with good quality dome switches – not a clicky clacky mechanical keyboard with tall spread-out keycaps. In my experience, the fastest, most comfortable keyboard I’ve ever used was an Asus Eee PC 901, which only had the flaw of not including a numpad and proper arrow keys. I’ve tried to find a stand-alone version that would be as good, but no luck as of yet.
There is of course very slim mechanical switches as well, such as Razer’s ultra-low profile switch
https://i.stack.imgur.com/aRTjv.png
But they have two problems: hard bottoming instead of progressive force, and the keyboards are all chicklet/island layout which adds unnecessary gaps between the keys.
I can’t say that I really agree with your conclusions, even if some of the ideas are reasonable.
“as compact as possible” is probably not the greatest if it deviates from the .75″ spacing that we’re all used to. I think, for me at least, that’s pretty near ideal spacing for my fingers anyway, so YMMV, but seeing as virtually all pc keyboards are the same pitch, nobody’s been messing with this much anyway. When people talk about key spacing being wrong, it’s generally either in their head, or they’re misinterpreting things like keycaps with smaller lands on top being “wider spacing” because they see more gap between keys.
Traveling the shortest distance vertically is probably not a major concern when most mecahnical keyboard switches have a fairly short actuation distance anyway, and I don’t think the switch needs to buckle to give the necessary proprioceptive feedback. I don’t think “inertia” of the finger is what’s causing them to move past the actuation point. It’s simply that you’ve applied enough force to overcome the tactile bump, and will overshoot to the bottom of the switch, since the spring rate is much lower than the force you’re applying. I’ve used short actuation switches, and I don’t think they really make much difference, since I push them just as far as I do normal mechanical switches.
If you want to reduce impacts in typing, I think what you want is a linear switch.
Unlike with a rubber dome, you don’t have to bottom them at all to make them type. Most people still do bottom them, but over time, once you get used to it, you’ll quickly learn how hard to push the keys so you don’t bottom them hard, and you can just bounce your fingers neatly off the springs. This is mostly impossible with the “tactile bump” that everyone seems to be after these days. They cause you to excessively load the key, and when it buckles, you’ll slam it to the bottom. It’s not inertia, it’s the fact that it increases the difficulty in “pulling your punches” when you’ve applied extra force to overcome the initial bump, and can’t react quickly enough to stop before bottoming keys.
I agree with you for the most part, when it comes to angle, etc, but I don’t think you necessarily need the keyboard to be thin. it should be angled only to put it at the angle that your forearms are at. (generally flat, unless you sit very low, with the keyboard near the edge of the desk (elbows lower than hands), in which case a bit of angle can be good.
A thin palm rest (not wrist rest) can make up the thickness of the keyboard if it’s too tall to be comfortable.
>“as compact as possible” is probably not the greatest if it deviates from the .75″ spacing that we’re all used to.
Note that I added,”the least distance between keys as comfortable”. You quickly get used to any key spacing as long as it’s not entirely too narrow for your fingertips. For what I’ve used to, typing on a regular sized 104 keyboard feels like wrestling with a grand piano.
> I don’t think the switch needs to buckle to give the necessary proprioceptive feedback.
There has to be enough of a difference for the tendons to stretch and release slightly as the key gives in, but not much. The point is that the motion should be felt with the muscle and tendon, not heard or felt by the skin as a high frequency vibration, because that way the nerves controlling the fingers have the shortest possible feedback loop. It’s actually your spinal column that is responsible for the fast reactive actions like compensating for sudden changes in limb position. When your tendons and muscles feel that sudden change, this triggers the trained response to stop pressing the key even before the signal reaches your brain.
>It’s simply that you’ve applied enough force to overcome the tactile bump, and will overshoot to the bottom of the switch
That is describing exactly the same “inertia” as I am.
>since I push them just as far as I do normal mechanical switches.
That’s a bad habit. Lots of people mash the keys unnecessarily hard.
>I think what you want is a linear switch.
Precisely not. Linear keys do not give any indication that the switch has worked, so most people learn to mash them to make sure. Unlearning that can be difficult.
>when it buckles, you’ll slam it to the bottom. It’s not inertia, it’s the fact that it increases the difficulty in “pulling your punches”
You’re not supposed to “pull your punches”. That’s just tiring on the muscles. Once the key buckles, it’s supposed to carry you all the way to the bottom, and then you simply relax the finger and it springs you back. This doesn’t work right when you have a mechanical switch that has 4-5 millimeters of travel. When you have a scissor switch key that has 0.5-0.7 mm of travel between buckling and bottoming, it’s very fast and light on the fingers. You barely touch the keys and they always work – you just have to learn not to mash them needlessly.
The problems come with bad quality domes switches that don’t connect reliably, so you have to apply extra pressure to make sure, and that again creates the bad habit of mashing the keys.
> I don’t think you necessarily need the keyboard to be thin.
It just comes with having short travel keys – there wouldn’t be any advantage in adding tall key caps. Usually when the keyboard is on the table, because people don’t want to have extra keyboard trays under the desk, adding a palm or wrist support lifts your arms slightly higher and then people have the habit of lifting their shoulders up which causes tension in the neck. The lower the tops of the keys, the better it usually is.
So wait…you make this huge claim about the BEST keyboard being one with the least distance between the keys etc. and your perfect keyboard is flawed because it doesn’t include a numpad or arrow keys?
You have essentially described a low profile 40% ortholinear board w/ low profile choc switches and low profile caps. If your goal is to move your fingers and hands the least amount then why would you ever want a numpad or arrow keys? You should be putting them in layers on the 40% board as there would be almost no hand movement at all. You also don’t have to get “clicky clack” switches either.
A lot of people would argue the best for ergonomics would be a dactyl board but I leave that level of debate to the people way more dedicated to those very strange looking boards.
There is something called “too much of a good thing”.
Having the absolute most compact keyboard possible was never the point. Overloading too many keys with modifiers slows you down more than it helps with the ergonomics. When you’re entering numbers and basic arithmetics, it’s faster with a dedicated numpad than the number row, and of course it’s nice to have separate PgUp/Down/Home/End buttons instead of pressing Fn + Arrow keys.
You almost made me get the point of all these efforts :-)
But seriously, if modding your keyboard floats your boat, who am I to judge? At least this was an entertaining read.
If you have been following this series; you’d be aware that Kristina is trying to alleviate pain she experiences with conventional keyboards.
Wasn’t even aware this was part of a series, but I guess somebody making this much effort will have their reasons.
Instead of wasting time searching for that non-existent solution, they could go like RMS and simply hire someone to type for you. After all the whole point is to get work done, not play with keyboard O-rings.
I think you’re on the wrong site.
Oi, read the title of this site!
This isn’t pay a professional to do it for you a day.
That’s why I DIY’ed a split mechanical keyboard and use only trackballs. Injury sucks, but at least we have ways to improve our experiences.
Looks like my new favorite prank! Which four letters should I make very loud and hard to press?….hmmmmm