How To Remove Bounce When Bouncy Objects Encounter Bounciness

We all love a good bit of bounce now and then, with everything from trampolines to bouncy castles and bouncy balls forming the staple of a wholesome childhood for many. That said, most of our bouncy experiences in day to day life concern bouncy objects that meet immovable or rigid objects, including said child having a blast in a bouncy castle. Where the physics get arguably more interesting and less intuitive is when you combine two objects that are both bouncy, with [Steve Mould] recently taking a look at the tuning of said bounciness to even kill the bounce completely.

Understanding how to achieve this tuning means understanding how the kinetic energy is stored in each flexible material, and how to dissipate it in a way that doesn’t result in the aforementioned bounciness. In the simple physical demonstration setup the addition or removal of weights to the lower sprung platform tunes the response to the bouncy ball that is dropped on top of it.

After going through the science behind bounciness and springiness using the practical application of this science in the context of golf balls and clubs, [Steve] introduces the simulation tool that he created. This allows you to tweak the parameters of such a double spring system, which may bring back some high school physics lessons for some.

In a system like that of a golf club and the ball, having undesirable oscillations (bouncing) reduces the final kinetic energy transferred to the ball. Although ‘bouncy’ is perhaps not the first thought that comes to mind when handling a golf ball or a club, ultimately they are just as bouncy as a bouncy ball or an electric switch, just on their own scales, with their own opportunities for optimization and analysis.

Continue reading “How To Remove Bounce When Bouncy Objects Encounter Bounciness”

Rusty bathtub outdoors on equally rusty car springs

Hot Rod Backyard Bath On Steel Spring Legs

In a fusion of scrapyard elegance and Aussie ingenuity, [Mark Makies] has given a piece of old steel a steamy second life with his ‘CastAway Tub’. Call it a bush mechanic’s fever dream turned functional sculpture, starring two vintage LandCruiser leaf springs, and a rust-hugged cast iron tub dug up after 20 years in hiding. And put your welding goggles on, because this one is equal parts brute force and artisan flair.

What makes this hack so bold is, first of all, the reuse of unforgiving spring steel. Leaf springs, notoriously temperamental to weld, are tamed here with oxy-LPG preheating, avoiding thermal shock like a pro. The tub sits proudly atop a custom-welded frame shaped from dismantled spring packs, with each leaf ground, clamped, torched, and welded into a steampunk sled base. The whole thing looks like it might outrun a dune buggy – and possibly bathe you while it’s at it. It’s a masterclass in metalwork with zero CAD, all intuition, and a grinder that’s seen things.

Inspired? For those with a secret love for hot water and hot steel, this build is a blueprint for turning bush junk into backyard art. Read up on the full build at Instructables.

Learn 15 Print-in-Place Mechanisms In 15 Minutes

3D printed in-place mechanisms and flexures, such as living hinges, are really neat when you can get them to print correctly. But how do you actually do that? YouTuber [Slant 3D] is here with a helpful video demonstrating the different kinds of springs and hinges (Video, embedded below) that can be printed reliably, and discusses some common pitfalls and areas to concentrate upon.

Living hinges are everywhere and have been used at least as long as humans have been around. The principle is simple enough; join two sections to move with a thinned section of material that, in small sections, is flexible enough to distort a few times without breaking off. The key section is “a few times”, as all materials will eventually fail due to overworking. However, if this thing is just a cheap plastic case around a low-cost product, that may not be a huge concern. The video shows a few ways to extend flexibility, such as spreading the bending load across multiple flexure elements to reduce the wear of individual parts, but that comes at the cost of compactness.

Continue reading “Learn 15 Print-in-Place Mechanisms In 15 Minutes”

3D Printing On A Spinning Rod

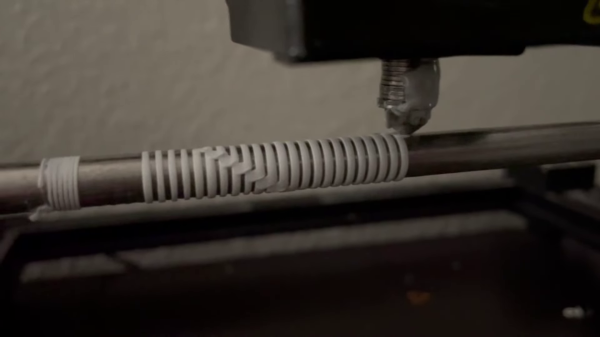
FDM 3D printing traditionally operates on a layer-by-layer basis, using a flat bed to construct parts. However, [Humphrey Wittingtonsworth IV] demonstrates in his video how this process can be significantly enhanced in terms of mechanical strength and print speed by experimenting with printing on a rotating rod instead of the standard flat bed.

[Humphrey] modified a Creality CR-10 3D printer by removing the bed and installing a regular 8mm linear rod under the hotend. The rod is rotated by a stepper motor with a 3:1 belt drive. This lets him use the rod as the printing surface, laying down layers axially along the length of an object. This means parts that can stand up to bending forces much better than their upright-printed counterparts.

Additionally, this rotational action allows for printing functional coil and wave springs – even multi-layer ones – something that’s not exactly feasible with your run-of-the-mill printer. It can also create super smooth and precise threads as the print head follows their path. As an added bonus – it could also speed up your printing process as you’re just spinning a slim rod instead of slinging around an entire bed. So cylindrical parts like tubes and discs could be printed almost as quickly as your hotend can melt filament.

Of course, this approach isn’t without its challenges. It works best for cylindrical components and there’s a limit to how small you can go with inner diameters based on your chosen rod size. Then there’s also the task of freeing your prints from their rod once they’re finished. [Humphrey] addressed this by creating mesh sleeves that snugly fit over his center rod. This limits how much melted plastic can adhere to it, making removal a breeze.

Continue reading “3D Printing On A Spinning Rod”

Feed Your Fasteners In Line, With A Bowl Feeder

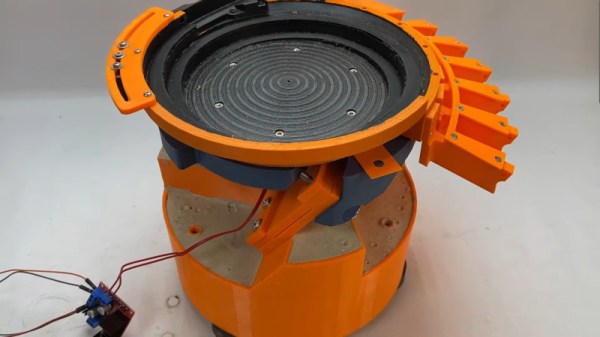
If you spend much time around industrial processes, you may have seen a vibrating bowl feeder at work. It’s a clever but simple machine that takes an unruly pile of screws or nuts and bolts, and delivers them in a line the correct way up. They do this by shaking the pile of fasteners in a specific way — a spiral motion which encourages them to work to the edge of the pile and align themselves on a spiral track which leads to a dispenser. It’s a machine [Fraens] has made from 3D printed parts, and as he explains in the video below the break, there’s more to this than meets the eye.

The basic form of the machine has a weighted base and an upper bowl on three angled springs. Between the two is an electromagnet, which provides the force for the vibration. The electromagnet needed to be driven with a sine wave which he makes with an Arduino and delivers as PWM via an H-bridge, but the meat of this project comes in balancing the force and frequency with the stiffness of the springs. He shows us the enormous pile of test prints made before the final result was achieved, and it’s a testament to the amount of work put into this project. The final sequence of a variety of objects making the march round the spiral is pure theatre, but we can see his evident satisfaction in a job well done.

Oddly this isn’t the first bowl feeder we’ve seen, though it may be one of the most accomplished. We particularly like this tiny example for SMD parts.

Continue reading “Feed Your Fasteners In Line, With A Bowl Feeder”

Filament Cutter Uses Unusual (But Effective) 3D-Printed Spring Design

When one needs a spring, a 3D-printed version is maybe not one’s first choice. It might even be fair to say that printed springs are something one ends up making, rather than something one sets out to use. That might change once you try the spring design in [the_ress]’s 3D-printed filament cutter with printed springs.

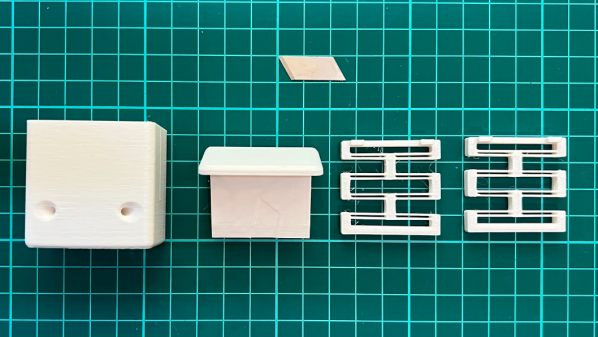
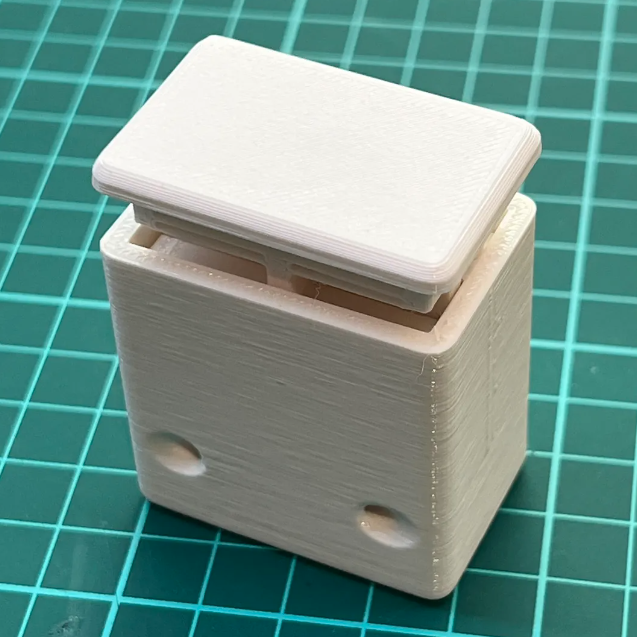
The filament cutter works like this: filament is inserted into the device through one of the pairs of holes at the bottom. To cut the filment, one presses down on the plunger. This pushes a blade down to neatly cut the filament at an angle. The cutter is the device’s only non-printed part; a single segment from an 18 mm utility knife blade.

The springs are of particular interest, and don’t look quite like a typical spring. They take their design from this compliant linear motion mechanism documented on reprap.org, and resemble little parallel 4-bar linkages. These springs have limited travel, but are definitely springy enough for the job they need to do, and that’s the important part.

Want a more traditional coiled spring? Annealing filament wound around a mandrel can yield useful results, and don’t forget the fantastic mechanisms known as flexures; they have clear similarities to the springs [the_ress] used. You can see her design in action in the short video, embedded below.

Continue reading “Filament Cutter Uses Unusual (But Effective) 3D-Printed Spring Design”

When [Carl] Says Jump, PCBs Say “How High?”

We’ve noticed that [Carl Bugeja] likes flexible PCBs. His latest exploit is to make PCB-based springs that combine with some magnets to create little devices that jump. We aren’t sure what practical use these might have, but they are undeniably novel and you can see them — um — jumping around, in the video, below.

[Carl] did many experiments with the spring construction and design. You can see several of the iterations in the video, not all of which worked out well. A PCB coil in the base becomes magnetized when current flows and this repels or attracts the magnets at the other end of the spring. What can you do with a PCB spring? We aren’t sure. Maybe this is how your next microrobot could climb stairs?

Adding stiffeners produced springs too stiff for the electromagnet to attract. We wondered if a different coil design at the base might be more effective. For that matter, you might not have to use a flat PCB coil in that position if you were really wanting to optimize the jumping behavior.

Usually, when we are checking in with [Carl] he is making PCB-based motors. Or, sometimes, he’s making PCB heaters for reflow soldering. We’ve seen jumping robots, before, of course. we will say the magnets seem less intense than using compressed air.

Continue reading “When [Carl] Says Jump, PCBs Say “How High?””