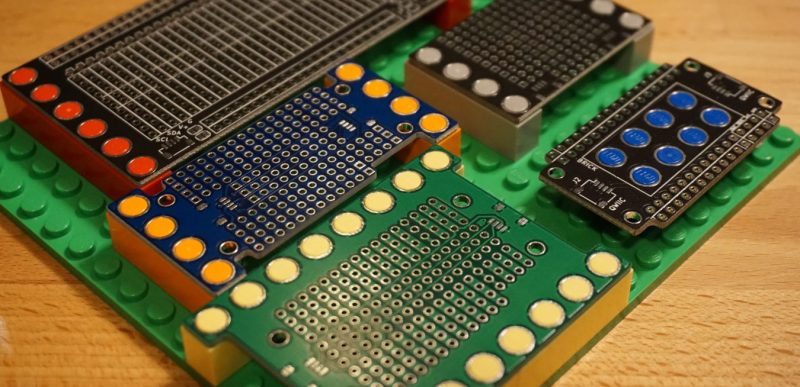
Have a rusty collection of protoboards wired together that would benefit from mechanical support? Working on putting together a robot and need to attach PCBAs without drilling holes, zipping a cable tie, or globing hot glue? Add some stud holes with [James Munns]’ Brick Mount! This isn’t the first time we’ve seen an interface between everyone’s favorite Nordic building system and circuitboards, but this implementation has the elegance we’ve come to expect from [James]’ software work.
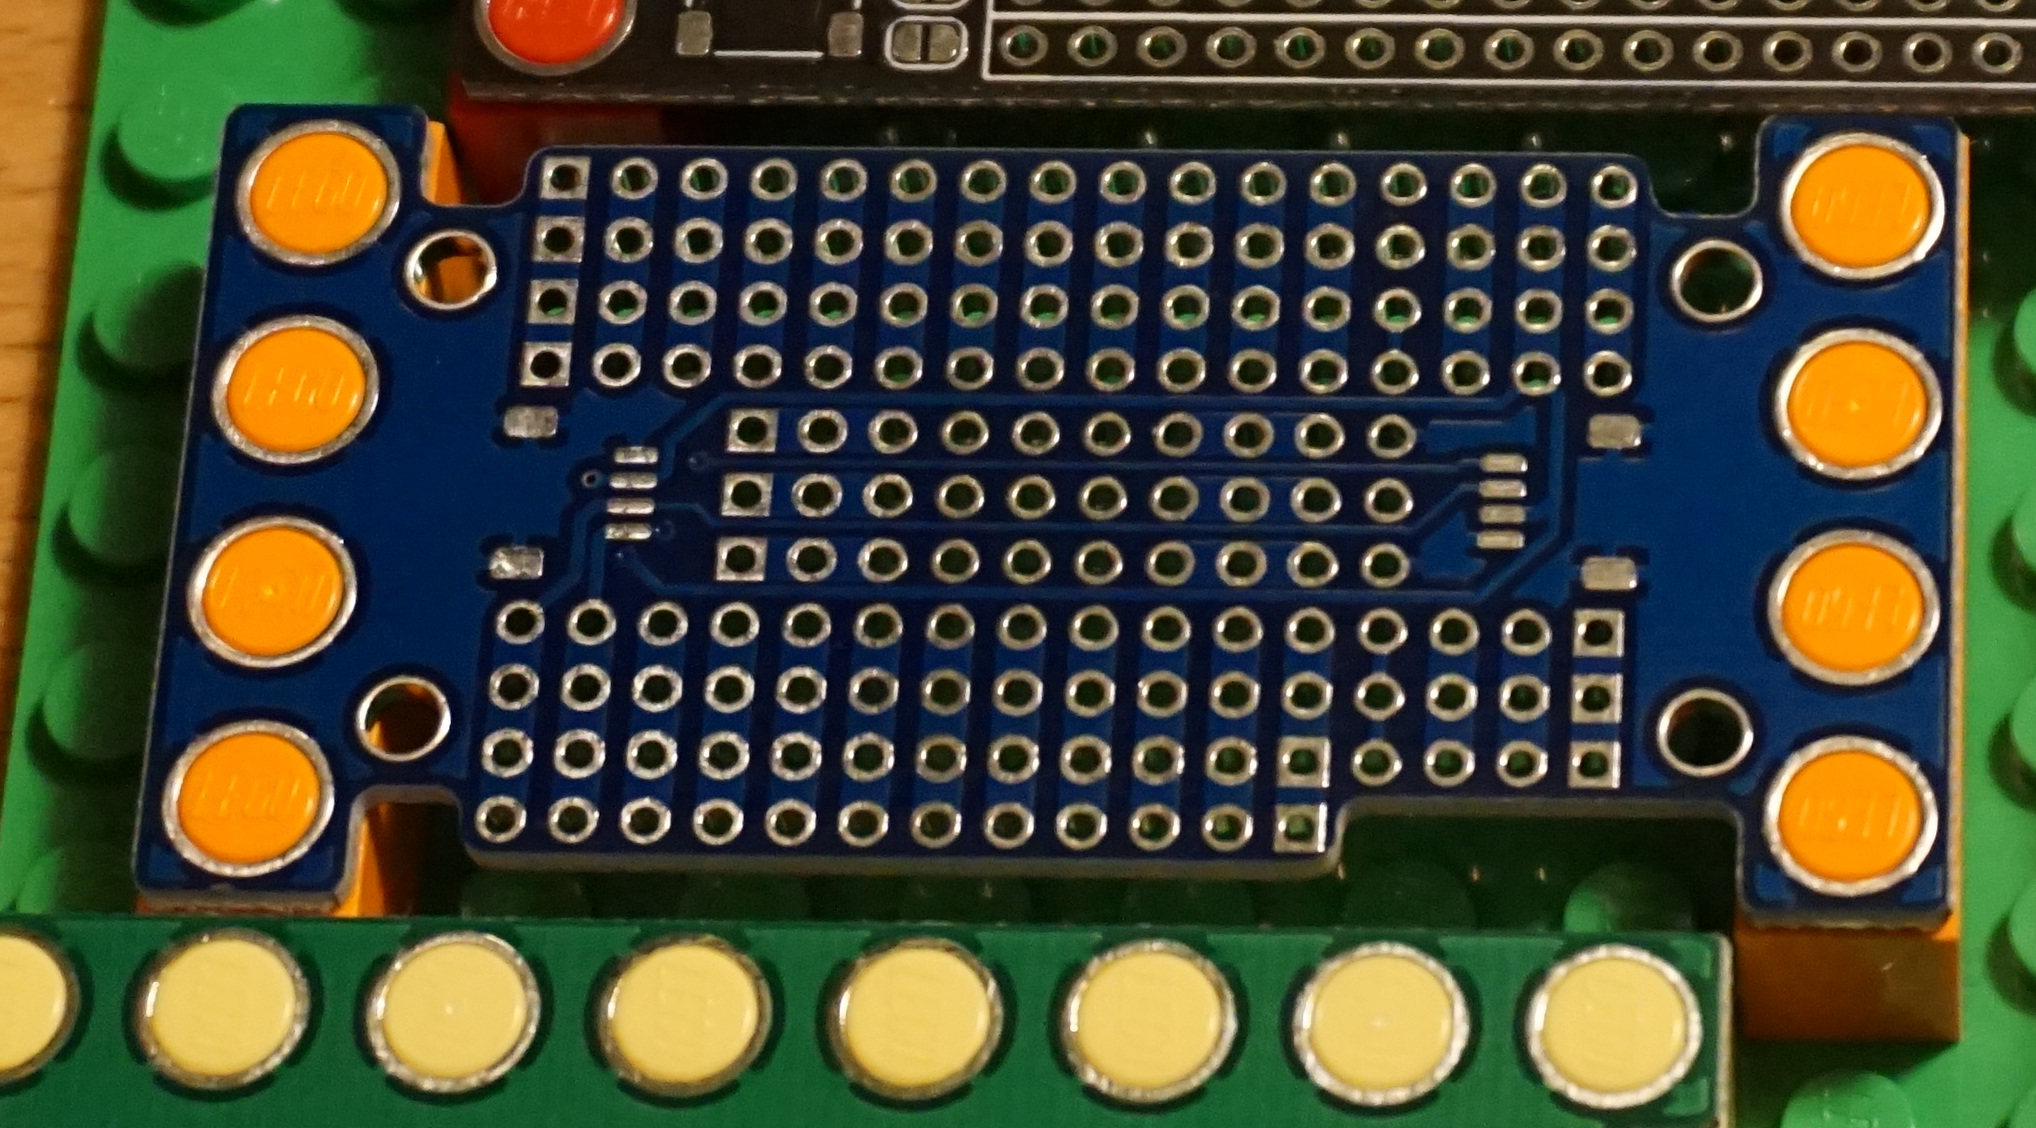
The project repository contains two things: a KiCad library with components for holes in standard patterns and sizes (1×1, 1×2, etc) and a series of protoboards made with those hole components. The protoboards feature a couple common elements; QUIIC connectors for easy chaining between them and holes in the middle or edges for easy mounting on studs. Some are intended to be carriers for Feather-format PCBAs (very convenient!) and others are primarily undifferentiated prototyping space. Of particular note is the “medium” Feather breakout seen to the left, which incorporates clever cutouts to make it easy to wires down under the board so it can be mounted flush against another board.
The thesis here is that getting custom PCBs fabricated is easier and less expensive than ever before. So easy and inexpensive that fabricating customized protoboard to use in one-off projects is cost-efficient enough to be worthwhile. Waste concerns aside this does seem like a great way to level up those temporary projects which find a more permanent home.


Well, it’s about time someone thought of this!
How about extra Meccano pieces made out of copper too, for the bus bars?
This is one of those “why didn’t I think of this?” ideas. Awesome!
He gives credit to Kosmo’s Minis for thinking of it before him.
https://store.lookmumnocomputer.com/collections/kosmo-minis
Check out the Crazy Circuits system at BrownDogGadgets.com. It’s this idea but greatly expanded. We’ve been doing it since 2017 and all our parts are 100% open source. Our GitHub repo has a full step by step guide on designing your own components.
Check out the Crazy Circuits system. We’ve been doing these kinds of designs since 2017, and actually produce products for the educational market. Our parts are 100% open source. You can find the GitHub repo below:
https://github.com/BrownDogGadgets/CrazyCircuits
And heaps of produced parts and guides at:
http://www.browndoggadgets.com
Ok I <3 this!
Brick Mount
Time for a catchy name
Brix ‘n Match?
Leg2bot?
Nordicboards (too many syllables?)
NordBoards?
LegFeather?
FeatherLeg?
MunJim?
Or we could go along with the “clothing/tool” theme that is so popular.
(i.e. capes, hats, Phats, shields, …) codpiece? B^)
Maybe I need a drink to help me think better,,, Caffeine?
Peggo, and the mascot could be Captain Peggy, a butch looking female pirate with a lopsided grin. ;-)
I like it.
Legtro (TM)
One may find that some boards fit between two vertical pieces and slot in between sets of studs facing each other, to make a rack. Whether you jam in the single thickness boards between the baseboard studs or use right angle or hinge blocks to do this is up to you.
If you used the “LEGO electric plate” bricks you could even use the mounting holes for power rails as I see they’re already plated
ive seen that before. see mindsensors. there was an old board that was a motor driver for vintage lego motors (pre power functions). it was meant to connect to the first gen nxt, but it was just an i2c interface and i ended up using it with an arduino instead.
Gota love it. 100% chance my children will be playing with these very soon.
Check out the Crazy Circuits system at BrownDogGadgets.com. It’s literally this idea designed for kids; with heaps of educational resources and activities.
Just to add to the discussion: https://circuit4us.medium.com/electronics-pcb-mount-on-lego-1dbac604e153
Cough cough… the open source Crazy Circuits system has been doing this exact same thing since 2017. We have a whole GitHub repo where we have dozens of parts made up for various components and microcontrollers, as well as a big KiCad write up on how to make your own. We use a 1/8th inch nylon conductive tape to connect components together in the LEGO environment.
We have break out boards of Nanos, Teensy, Feather, Micro:Bit, and even a Pi Zero.
https://github.com/BrownDogGadgets/CrazyCircuits
Or we have boards and full educational kits available at BrownDogGadgets.com and most major STEM websites.
You’re right, these look awesome! The conductive tape is a great way to make them pluggable on standard stubs
That conductive (nylon) tape was new to me too, so I’m adding the link where he sells it.
It may be of interest to others here.
(I am not being paid/bribed to shill for him B^)
https://www.browndoggadgets.com/collections/featured/products/maker-tape-1-4th-inch-20m-roll-nylon-conductive-tape
Hey! I’m the project author here, I hadn’t seen the Crazy Circuits boards or BrownDogGadgets before! As I mentioned on the project page, but I’ll definitely add a link now.
Glad to see you already have something commercial (linked on a couple of the comment threads here already), so I can point folks your way!
Ohhh, this is brilliant.
I was about to ask if the big solder pads would be hard to heat up because of their large size. But that’s no solder pad…
I like this idea!
It’s unfortunate that Lego’s 8mm pitch (assuming that https://upload.wikimedia.org/wikipedia/commons/1/1a/Lego_dimensions.svg is reliable) and the 25mm pitch used by most modern optical breadboards are fundamentally incompatible.