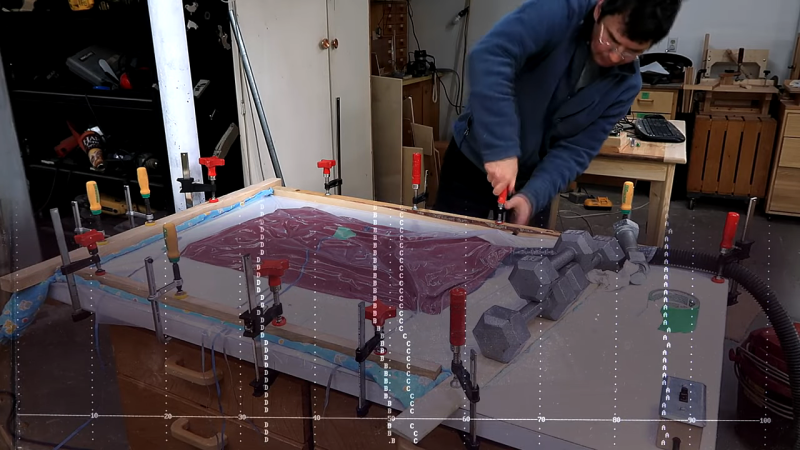
We all know how easy it is to fall down the rabbit hole, something that turns a seemingly simple job into an accidental journey of experimentation and discovery. And perhaps nobody is more prone to rabbit-holing than [Matthias Wandel], at least judging by his recent foray into quantitating different techniques for vacuum clamping in the woodshop. (Video, embedded below.)
To understand where this all came from, you’ll have to dial back to [Matthias]’s first video, where he was just trying to make a simple corkboard. In an effort to get even pressure over the whole surface of the board, he came up with a shop-expedient vacuum clamp, made from a sheet of thick plastic, some scraps of wood and clamps, and a couple of vacuums. With the workpiece sandwiched between a smooth, flat table and the plastic sheet, he was able to suck the air out and apply a tremendous amount of force to the corkboard.
The comments to the first video led to the one linked below, wherein [Matthias] aimed to explore some of the criticisms of his approach. Using a quartet of BMP280 pressure sensor breakout boards and a Raspberry Pi, he was able to nicely chart the pressure inside his clamping jig. He found that not only did the sensors make it easy to find and fix leaks, they also proved that adding a porous layer between the workpiece and the vacuum bag wouldn’t likely improve clamping. He was also able to show which of his collection of vacuums worked best — unsurprisingly, the Miele sucked the hardest, although he found that it wasn’t suitable for continuous clamping duty.
We can see a lot of uses for a jig like this, and we really like it when trips down the rabbit hole yield such interesting results. Especially quantitative results; remember [Matthias]’s exploration of basement humidity?


If the plastic bag is taped down to the table around its edges, sealing it to the table (assuming the table surface is smooth enough to get a good seal), that may work better.
This seems like a solution for some Teflon tape, nicrome wire, and some silicone. Turn that puppy into a giant potato chip bag. I even think the cheap handheld sealers on Amazon would work just as well, if not lengthy to complete given the perimeter.
You can buy plastic channel made for vacuum bagging. Wrap both layers of plastic over a length of plastic filament and push into the channel. Instant bag and it’s reusable. The whole board and items you want to clamp go inside the bag. You don’t seal to the board. Lots and lots of info on the web about vacuum bagging for fiberglass and carbon fiber.
I went down this rabbit hole, it turned out to be such a mess that I ended up just getting a giant purpose built vacuum bag. They are available at vaneer supply stores.
Friends: I really love this Hackaday site since I’d discovered it about a year and a half ago.
This is my first post.
-It’s great to see Matthias Wandel’s efforts pop up here. He is a DIY Maker’s Maker.
– have been following Matthias’ posts for over 10 years, since before I even had the broadband internet to be able watch his videos. Then, I caught every one of his photo-filled step-by-step BLOG posts.
(He STILL posts his projects as both blog posts and videos.)
Matthias has designed and built many devices and machines of all sorts for a long time, the highlights being the many woodworking machines he has built. The structural aspects being mostly designed and engineered to be built out of wood: several Bandsaws, several Gear-calibrated table saw Jigs for joinery, Dust collectors, Wood-joint Mortisers, Router lifts, extraordinary Stationary sanding machines, a DIY Jointer machine, DIY home-built Tablesaws, and much more.
But Matthias’ interests are not limited to woodworking, and he has posted blogs and videos about numerous projects exploring electronics and hobby coding projects, engineering, tinkering, and data gathering related to these. He also has great instructional videos about Sketchup and how he uses it. Perusal of his extensive back catalog of video posts will boggle.
True that!