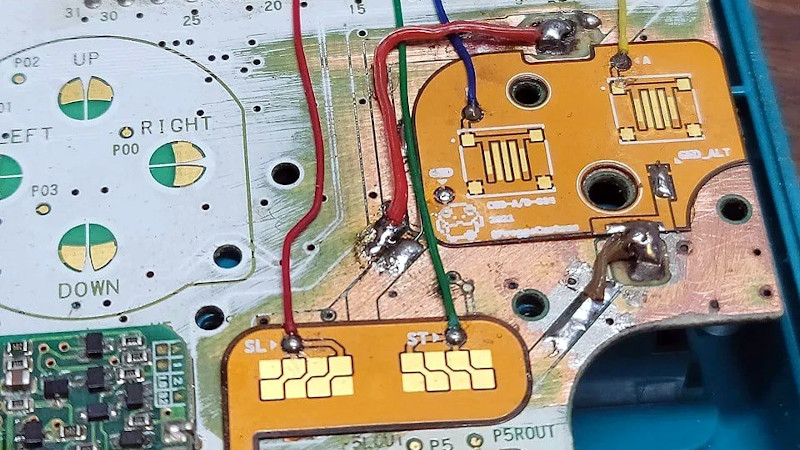
The original Game Boy was the greatest selling handheld video game system of all time, only to be surpassed by one of its successors. It still retains the #2 position by a wide margin, but even so, they’re getting along in years now and finding one in perfect working condition might be harder than you think. What’s more likely is you find one that’s missing components, has a malfunctioning screen, or has had its electronics corroded by the battery acid from a decades-old set of AAs.
That latter situation is where [Taylor] found himself and decided on performing a full restoration on this classic. To get started, he removed all of the components from the damaged area so he could see the paths of the traces. After doing some cleaning of the damage and removing the solder mask, he used 30 gauge wire to bridge the damaged parts of the PCB before repopulating all of the parts back to their rightful locations. A few needed to be replaced, but in the end the Game Boy was restored to its former 90s glory.
This build is an excellent example of what can be done with a finely tipped soldering iron while also being a reminder not to leave AA batteries in any devices for extended periods of time. The AA battery was always a weak point for the original Game Boys, so if you decide you want to get rid of batteries of any kind you can build one that does just that.
f


Amazing work!
It’s not acid but a base.
THANK YOU!
haha i really saw the headline and looked forward to learning how they got acid into a gameboy. is it soda??
at least it’s a good hack!
It’s only a base if alkaline batteries are used.
Zinc-carbon batteries use a mild acid (zinc chloride or ammonium chloride if Wikipedia is correct).
Zinc-carbon batteries, in my experience, are far more likely to leak, and when they do the spill is more damaging when compared to alkaline batteries.
I’ve only ever had Alkaline batteries leak, in fact I’m not even sure that it’s possible to get the pressure build-up that leads to the damaging spills if there’s no hydroxide in your cell.
I was worried that the extra height from the doubled up pcbs would compromise the switch travel but it’s apparently not an issue.
Good thing it’s a flexible printed circuit and not a printed circuit board huh?
I Read the headline: “Acid Damaged Gameboy” and thought they were referring to an old high school friend :}
I used to repair battery damaged test equipment. The only disassembly that was required was for wafer switches and connecting wires. The boards were soaked in household ammonia for 24 hours, then given a good bath/rinse in distilled water and allowed to dry for a week. This removed acid under and around parts. Worked great even in noise sensitive equipment. I suspect that a similar process could be used with a mild acid for alkaline battery leaks.
I’m currently repairing some equipment that was submerged while powered on. Lots of missing traces, pad, IC legs and vias due to electrolysis between power and ground nodes which eats the solder and copper underneath. Solder mask is also raised in areas where the board heated and required removal. After all opens and pads were repaired, and damaged parts replaced, remaining loose mask was removed and all exposed copper covered in UV solder mask. It’s ugly when done, but saves custom boards worth thousands of dollars. I would recommend using the UV mask whenever copper is exposed if you want your repairs to last.
Why did you bury the lead?
Flexible PCB repairs button contacts?
Make your own headline, but why forget to educate? Mention how and why the repair was done even?
Also, could we add /more/ buttons to a classic system using this as a hack?
Nice hack, still confounded as to why the article made no mention of how the cool repair was achieved.