All things considered, modern photography is pretty easy. It’s really just a matter of pointing the camera at the thing you want to take a picture of and letting the camera do the rest. But that doesn’t mean good photographs are easy to make, especially when fine detail is required. And that’s the reason this 3D printed coaxial lighting setup was built — to make quality photographs of small objects a snap.
The objects of [Peter Lin]’s photographic desire are coins, no doubt of the collectible variety. Since the condition of a coin is essential to determining its value, numismatic photographers really need to be meticulous about the quality of their work. The idea here is to keep the incoming light parallel to the optical axis of the camera, for which purpose ring lights around the camera lens are often used. But they can result in lighting artifacts, and can be awkward to use for such smaller subjects.
So for this setup, [Peter] essentially built a beam-splitter. The body is a printed block that’s painted matte black to keep reflections down; a little self-adhesive flocking paper helps with that too. The round aperture on the top is for the camera lens, with the square window on the side admitting light. The secret is a slot oriented at 45 degrees to both of those openings, into which the glass element from a cheap UV filter is inserted. The filter acts like a beam splitter which reflects light down onto the coin on the bottom of the block and lets it pass up into the camera lens directly above the coin, parallel to the optical axis. Genius!
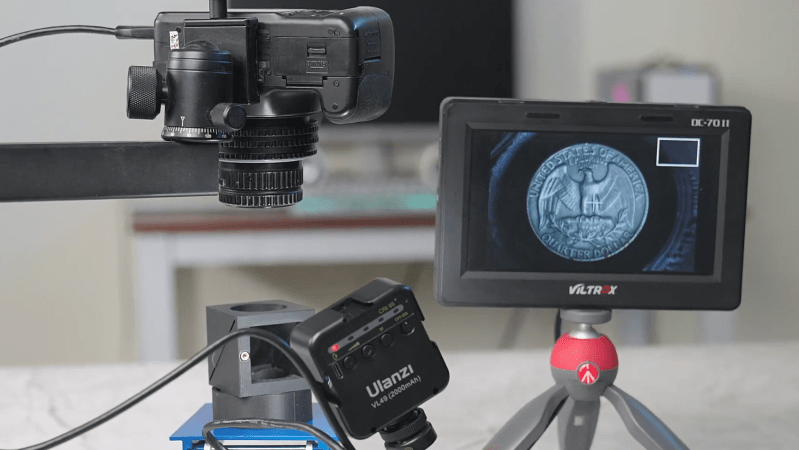
The video below shows it in use with both DSLR and smartphone cameras, and the image quality is amazing. While most of us probably aren’t photographing coins, we do enough high-resolution photography of small objects that this seems applicable. In a way, it reminds us of [Big Clive]’s “TupperCam” method of high-res PCB photography (final item).


Check out “dark field illumination” and make composites in your favorite image editing software.
That is an excellent set of magic word as an entry point to also find other sorts of illumination.
This also reminds me of an article about tin whiskers I once read. Apparently they are nearly impossible to see when uniform lighting is used, and they used spot lights and changed their orientation to optimize the visibility of the tin whiskers.
“Epi illumination” is the term used in microscopy. It can be dark (occulted) or bright field.
Nice work. Some things of note: Actual 50T/50R beam splitters can be had for cheap on AliExpress. Also matte black filament is pretty awesome for this stuff. I’m using PolyTerra PLA Charcoal Black with good success.
Interestingly, it matters zero what the beamsplitter reflectivity is. What it giveth in object illumination it taketh away in transmission to the camera…
What matters much more is the ratio in reflectivity between the front surface and the back surface. If they are equal (like a plain sheet of clear glass), then you get ghost images slightly offset. Antireflection coating on one (only) surface is required.
> Interestingly, it matters zero what the beamsplitter reflectivity is. What it giveth in object illumination it taketh away in transmission to the camera…
I don’t think that’s true… for a lossless beam splitter, T(ransmission)+R(eflection)=1. If the albedo of the object is A, the light the camera receives would be R*A*T. This quantity depends on the values of T and R and is maximized when T=R=1/2.
Ah, heck. Yeah, you’re right. My brain fart. Serves me right for posting on the run.
I should have known better — I have some epi scopes right here, and some of them use the splitter approach (though most use a coaxial path).
Awesome work, were the stl files posted somewhere?
The way to do products and detail photos of metal objects used to be “high key” lighting. You use a funnel shaped piece of frosted plastic or glass, like a “spindled” sheet. You lens at the narrow end and the big end against the surface that holds the subject. Use two or more lights outside aimed roughly at the subject. I did it with a sheet of frosted drafting Mylar-like drafting stuff a few times.
The method here looks less than ideal
Is this basically using the peppers ghost illusion for illumination? (Or something fairly similar)
That’s brilliant.
Coaxial illumination is a big deal for coins that are TONED.
When a coin tarnishes lightly, the thin film that forms on the coin’s surface produces interference effects that can lead to brilliant colors. Colorfully toned coins can fetch ridiculous prices.
The catch is that this color is most pronounced when the illumination and viewing angles are perpendicular to the coin’s surface. With off-axis illumination, the colors are more dull and muted.
If you’re trying to photograph toned coins for sale, a good coaxial setup can pay for itself pretty quickly, from what I’ve seen.