A Cycle-Accurate Intel 8088 Core For All Your Retro PC Needs

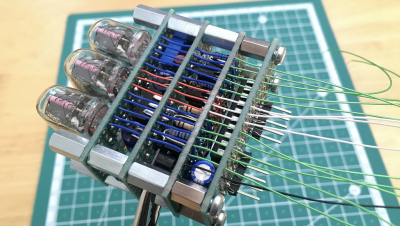
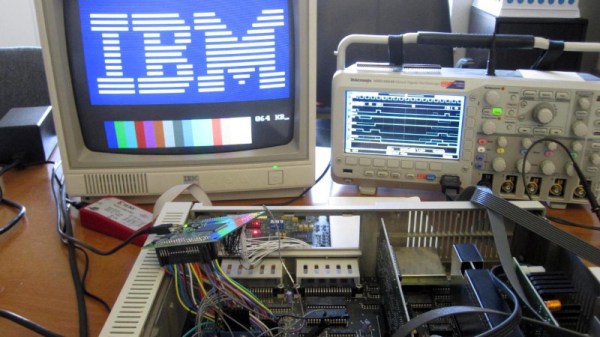
A problem faced increasingly by retrocomputer enthusiasts everywhere is the supply of chips. Once a piece of silicon goes out of production its demand can be supplied for a time by old stock and second hand parts, but as they become rare so the cost of what can be dubious parts accelerates out of reach. Happily for CPUs at least, there’s a ray of hope in the form of FPGA-based cores which can replace the real thing, and for early PC owners there’s a new one from [Ted Fried]. MCL86 is a cycle accurate Intel 8088 FPGA Core that can be used within an FPGA design or as a standalone in-circuit replacement for a real 8088. It even has a full-speed mode that sacrifices cycle accuracy and can accelerate those 8088 instructions by 400%.

Reading the posts on his blog, it’s clear that this is a capable design, and it’s even been extended with a mode that adds cache RAM to mirror the system memory at the processor’s speed. You can find all the code in a GitHub repository should you be curious enough to investigate for yourself. We’ve pondered in the past where the x86 single board computers are, perhaps it could be projects like this that provide some of them.

Better Coding Through Sketching

Back in the late 1970s and early 1980s, engineering students would take a few semesters of drafting and there would usually be a week or two of “computer-aided drafting.” In those days, that meant punching cards that said RECTANGLE 20,30 or something like that and getting the results on a plotter. Then we moved on to graphical  CAD packages, but lately, some have gone back to describing rather than drawing complex designs. Cornell University researchers are trying to provide the same options for coding. They’ve built a Juypter notebook extension called Notate that allows you to sketch and handwrite parts of programs that interact with traditional computer code. You can see a video about the work below.

The example shows quantum computing, but the idea could be applied to anything. The example has sketches that generate quantum circuits. Naturally, there is machine learning involved.

Continue reading “Better Coding Through Sketching”

Build Your Own Mini Fogging Cauldron

The best cauldrons are full of bubbling, steamy potions of great magical potential. We don’t have many of those in the real world, though, so sometimes we have to make do with a simulacra. [wannabemadsci] has built just that, with this fogging cauldron prop that uses no fog fluid or dry ice, running solely with water instead.

The heart of the build is a piezo element that vibrates at ultrasonic frequencies to atomize water. They’re available from websites like AliExpress complete with a driver circuit to energize the piezo element. The water is delivered from a wetted fiber wick, and quickly becomes a fog when the piezo is energized.

The disk was installed in a custom PVC water cup with the wetted wick, along with the electronics. The assembly was then lowered into an off-the-shelf plastic cauldron party favor to complete the look. The trick is to mount the piezo element sideways to get a nice-looking distribution of fog. A green LED was installed to light the cauldron from within.

The resulting effect is a sinister-looking glowing cauldron with a steady stream of fog emanating from the top. It’s a great piece of Halloween decor, and as a bonus, it doesn’t require any fancy chemicals to make it work. If you’re thirsty for more, be sure to check out the winners of last year’s Halloween Hackfest. Video after the break.

Continue reading “Build Your Own Mini Fogging Cauldron”

Magnetic jack version of the bit-bang ethernet peripheral for Raspberry Pi Pico

Bit-Banging Bidirectional Ethernet On A Pi Pico

These days, even really cheap microcontroller boards have options that will give you Ethernet or WiFi access. But what if you have a Raspberry Pi Pico board and you really want to MacGyver yourself a network connection? You could do worse than check out this project by [holysnippet] that gives you a bit-banged bidirectional Ethernet port using only scrap passive components and software.

This project is similar to one we shared back in August by [kingyo], but differs in that what [holysnippet] has achieved is a fully-functional (albeit only around 7 Mbps) Ethernet port, rather than a simple UDP transmit device. The Ethernet connection itself is handled by the lwip stack. Connection to the RJ45 socket can be made from any of the Pi Pico pins, provided TX_NEG is followed directly by TX_POS, but the really hacky part is in the hardware.

schematic of Pi Pico bit-banged ethernet peripheral
Schematic showing the empirically-determined passive component values required.

Rather than developing hardware that would protect the Pico, this design admits that it “shamefully relies on the Pico’s input protection devices” to limit the Ethernet voltages to 3.3 V.

You’ll need an isolation transformer from some old Ethernet-enabled gear (either standalone or as part of a magnetic jack), but then it’s only resistors and capacitors from there. There are warnings not to connect this to PoE networks for obvious reasons, and the component layout needs to keep in mind the ~20 MHz frequencies involved, but to get this working at all feels like quite a feat.

Normally, there’d be no reason to go to these lengths, but it’s always educational to see if it can be done and, with the current component shortages, this is another trick to keep up your sleeve for emergencies!

Putting ports where they shouldn’t belong is not a new idea, of course.  Back in the day we even shared an inadvisable ATTINY implementation of bit-banged Ethernet with no protection at all.

Thanks to [biemster] for the tip-off

Nixie Display Module Is Addressable Via SPI

There are plenty of SPI interface screens on the market, but few of them have the charm of the good old Nixie tube. [Tony] decided to whip up a simple three-Nixie module that could be addressed via SPI. 

The stacked construction keeps things compact.

The module relies on a PIC16F15344 microcontroller to run the show, using its built-in SPI interface. It’s built with four stacked-up PCBs for ease of assembly and testing. It uses an internal buck converter to create the 170 volts required for the Nixie tubes from a 6 to 12 volt input. The high-voltage lines are routed towards the inside of the stack to minimize any nasty shocks when handling, though caution would still be advisable.

Driving the display is as simple as sending 16-bit words over the SPI interface, with the device operating in SPI client mode 1. If you’re looking for a simple way to have projects write output to a nice Nixie display, this module could be just what you’re looking for. Alternatively, if you can’t lay your hands on the tubes, there are other pretty solutions out there, too. Video after the break.

Continue reading “Nixie Display Module Is Addressable Via SPI”

Cargo Culting And Buried Treasure

I have no idea how true the stories are, but legend has it that when supplies were dropped on some Melanesian islands during WWII, some locals took to replicating runway signs in order to further please the “gods” that were dropping them. They reportedly thought that making landing strips caused laden airplanes to visit. Richard Feynman later turned this into a metaphor about scientific theory – that if you don’t understand what you’re doing deeply, you may be fooling yourself.

I’d like to be a little bit more forgiving of adherents of technological cargo cults. Because the world around us is very complicated, we often just take things as they are rather than understanding them deeply, because there’s simply only so deep you can go into so many fields.

Is someone who doesn’t know the i386 machine language cargo-culting their way through a job as a web backend developer? Probably not. But from the perspective of an assembly-language programmer, any of us who write in compiled or interpreted programming languages are cargo-culting coding. You don’t need to understand a cell phone to dial home, but can you really say that you understand everything about how one works?  Or are you just going through the motions?

So while some reliance on metaphor and “well, it worked last time” is perfectly normal, I think noticing when you cargo-cult is also healthy. It should also be a warning sign, or at least a flag to remind yourself that there may be dragons here. Or maybe just a buried learning opportunity, the X that marks the spot where digging deeper might be productive.

Bring Out The Fine Detail In Small Objects With This Coaxial Lighting Rig

All things considered, modern photography is pretty easy. It’s really just a matter of pointing the camera at the thing you want to take a picture of and letting the camera do the rest. But that doesn’t mean good photographs are easy to make, especially when fine detail is required. And that’s the reason this 3D printed coaxial lighting setup was built — to make quality photographs of small objects a snap.

The objects of [Peter Lin]’s photographic desire are coins, no doubt of the collectible variety. Since the condition of a coin is essential to determining its value, numismatic photographers really need to be meticulous about the quality of their work. The idea here is to keep the incoming light parallel to the optical axis of the camera, for which purpose ring lights around the camera lens are often used. But they can result in lighting artifacts, and can be awkward to use for such smaller subjects.

So for this setup, [Peter] essentially built a beam-splitter. The body is a printed block that’s painted matte black to keep reflections down; a little self-adhesive flocking paper helps with that too. The round aperture on the top is for the camera lens, with the square window on the side admitting light. The secret is a slot oriented at 45 degrees to both of those openings, into which the glass element from a cheap UV filter is inserted. The filter acts like a beam splitter which reflects light down onto the coin on the bottom of the block and lets it pass up into the camera lens directly above the coin, parallel to the optical axis. Genius!

The video below shows it in use with both DSLR and smartphone cameras, and the image quality is amazing. While most of us probably aren’t photographing coins, we do enough high-resolution photography of small objects that this seems applicable. In a way, it reminds us of [Big Clive]’s “TupperCam” method of high-res PCB photography (final item).

Continue reading “Bring Out The Fine Detail In Small Objects With This Coaxial Lighting Rig”