Why press many button when few button do trick? That was the thinking of [Bike Cook Robots] when it came time to revamp his desk. To that end, he whipped up a tidy macropad to make daily computing tasks easier.
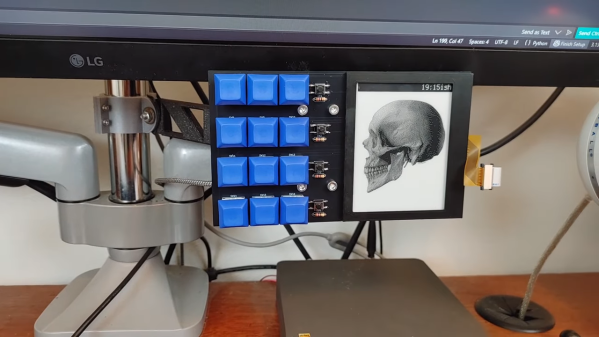
The build is based around an Adafruit RP2040 Feather ThinkInk devboard, chosen because it plugs straight into a readily-available 4.2 inch e-ink. The display is tasked with showing icons that correspond to the macro assignments for the 3 x 4 array of mechanical keyboard switches. Everything is wrapped up in a 3D printed frame, with an bracket to mount it to the monitor arms on the desk. The macropad is set up to talk to a custom Python app that runs on the host machine, which handles triggering actions and can also talk back to the pad itself.
The combination of e-ink display and button pad is a great way to display the function of each key without excess complexity. We’ve seen some other great builds in this space before, too.
Continue reading “An E-Ink Macropad For Improved Productivity”