A finished 3D print, especially plastic deposition types, often have imperfections in them from the process of laying down each layer of material and from the printer itself. For small batches or one-off parts, we might reach for a few pieces of sandpaper to smooth out these rough edges. While that might work for a small number of parts, it’s not always the best or lowest-effort option for refining these prints. There are a few alternative methods to try out if your fingers are getting sore, though.
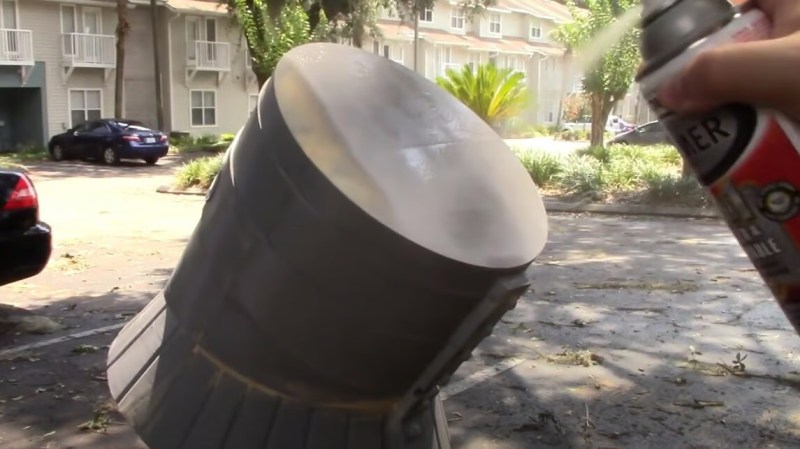
Rather than removing material as sandpaper does, most of these methods involve adding material to the print in order to fill in the rough edges of the print. There is a 3D-print-specific product listed called 3D Gloop! which is generally used as a glue to hold plastic parts together, but can also act as a fill in a pinch. Two other similar methods, one using spray paint and polyurethane and the other using epoxy, are more general-purpose ways of finishing the prints with a more natural texture than the printer will produce on its own. They’re not all additive, though; the final (and perhaps, most toxic) method here to achieve a smooth surface on a print uses solvent to remove some of the material instead.
While sandpaper does have its time and place, certain prints may lend themselves more to being finished by one of these other methods especially if they are overly complex, fragile, or an unusual size. Take note of the safety gear you’ll want to have on hand for most of these methods, though, as gloves and a respirator are highly encouraged and possibly helpful even if using only sandpaper. These aren’t the only ways of finishing 3D prints, either. Some of our other favorites are using glazing putty or silver for the finish.


Readed the gloop safty papers and it explain why i got headache. But the technical description is really helpfull. Next time i better used it outside and than i should be fine.
Had the same problems after looking for lego bricks glue. According to a forum, lego used MEK (pure solvent) but changed to the other stuff that is used here in europe as grafitti remover (and illegal use as liquid extasy, or K.O. drops) that is cancerous but less cancerous than MEK.
This is what got on my nerves with 3d printing, something is always dangerous. Ok, if you read the safety papers you should be on the save site.
Why are there no safe products maybe raw hide glue and wooddust? I know, hide glue is hard to apply in thin coats but there must be something less harmfull, this is not rocket science or music theory. :-)
Why not using a tumbler like in the previous 3d print metal coating article?
I try it actually with a tupperbox in a tupperbox in a short not heated washing mashine programm.
The first try to fixed on the washing mashine did not worked well (it felt down), could not fixed it long enought on the top.
Im experimenting with dilluted shoe glue, this rubbery stuff that only sticks to itself and in my case different dusts (still looking for a working one).
Did somebody try this spray clay like coating base for cars? It looks like it fills the gaps, for the spraypaint.
Titebond III wood glue is an amazing filler. I’m told it doesn’t make a proper chemical bond with the PLA, but that doesn’t seem to matter, it holds up to being on fashion accessories and escape room props just fine. I’ve been using it for years now.
I just smear it on with rubber gloves but I think a better way might be to dilute it and paint it on (Being very careful to clean brushes, the stuff is water resistant when dry)
It’s nontoxic, water based, accepts acrylic paint well, fairly cheap, weather resistant. You just have to be careful not to get any lint or hairs or bubbles, that can be hard to fix.
Also, UV resin glue if you need full clarity. It’s really horrible and nasty but works!
Thank you so much! Next on my shopping list: Tidebond III.
Is UV resin delutable? Would be interesting with repeated dipping and than hardening, until the wanted thickness is reached.
And what about sanding/grinding of the Titebond?
My experience with wood glues is, that it’s pretty hard to grind them, because they are still slightly rubber…
That is part of what makes it hard to fix bubbles. You can lightly sand it, it’s fairly hard, but too much sanding can make it catch on the sandpaper and peel up.
Somebody should hack up a 3D print sandblaster.
Auto body filler (Bondo) works for me. It’s cheap and available at auto shops or Amazon. I use latex gloves, smear a thin coat on, and let it dry. A light bit of wet sanding gives me a nice smooth surface to primer/paint.
I’ve tried sanding PLA directly, coating with UV resin, car body filler + sanding, brushing with DMSO “plastic weld”, spraying with PU lacquer, and various other stuff. My conclusion is that none of these methods is really worth it. Body filler (Bondo, or U-Pol in Europe) does work well for sanding, but it’s a lot of work to get a flawless surface, and like all these methods it can be difficult with fine details / small parts. If you don’t care about layer lines, a light coat of hairspray makes prints easy to paint.
But BY FAR the best finishing technique is if you can design the part to look good straight from the printer.
Bobtato: ‘But BY FAR the best finishing technique is if you can design the part to look good straight from the printer.’. – I would say this our next interesting article.
I like to use filler primer. It’s a primer that swells when it dries. Usually a few coats and some sanding in between gets rid of those lines.
I was having layering problems with my 3d printer using PLA. So, I swapped it for wood and the layering problem disappeared immediately. But the extruder didn’t work, just charred the wood. So, I replaced it with a drill instead.
Best 3D-prints I’ve ever made. (Checkout YT video ” Trigger’s Broom ” for the full story)
I’ve heard that sanding PETG is easier than sanding PLA, though I can’t remember if I noticed that myself (terrible memory).
And personal experience: PETG prints exactly as easily as PLA. Not sure if environment makes a difference (typically 18 to 28 degree C, 45% humidity, Creality printers).
PETG has higher temp, so when sanding it’s slightly harder to melt it.
I wouldn’t say that PETG prints exactly as PLA. PETG is more susceptible to string at least, and also from my feeling it’s more susceptible to humidity.
Anyway I now use sanding + Motip putty spray. The Motip putty is much better then standard filler sprays, because it’s denser. Most of the fillers in spray are very liquid, so it doesn’t cover the layers well…
PETG supposedly absorbs a lot less water than PLA but the issue is that, unlike PLA, wet PETG hydrolyses when heated and turns into a brittle mess.
PETG is easier to send because it’s slightly harder to melt it. You don’t want it to melt, you want to sand it. I’ll try to find motip putty spray, thank you for that tip.
> the final (and perhaps, most toxic) method here to achieve a smooth surface on a print uses solvent to remove some of the material instead.
1) The idea is to keep the solvent inside the container. Heat it so it boils, but condenses on the object and outside of the container. If your stove has a fine adjustment you can try the experiment with non-toxic water. You can let it simmer at a level where you get small “boiling” bubbles, but no steam comes out.
2) it does not remove material. It softens the outside and lets it become “one plastic object”, it fuses the different layers into one, thereby losing some detail and hopefully the layer lines….
This chemical did a great job of smoothing PLA in Japan.
https://www.sankyo-chem.com/products/industrial-detergent-release-agent/concerning-to-paints-and-painting/finesolve-series/finesolve-e/?lang=en
I haven’t found an exporter.
https://youtu.be/CkE4p_wUlcU?si=u2gBp5OTmYIkArFF
Video is a comparison of using it vs not. Msds looks pretty safe too.