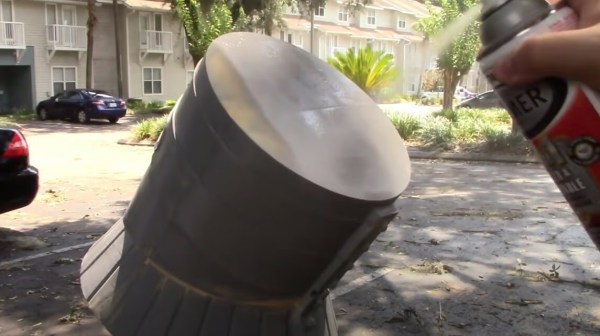
Anti-Curl Sandpaper Storage Is Impressive

Maybe it’s the humidity, maybe it’s the cold weather. Something is making [Laura Kampf]’s nice fabric-backed sandpaper curl up into scrolls the second it comes out of the package. So you can understand why she urgently wanted to make a storage system that would be easy to flip through like a record bin, but also provide enough pressure to keep the papers flat.

Although [Laura] didn’t know what exactly the end result would be, she got started on it anyway — that’s a great way to get more projects off the drawing board and past the finish line. It worked out, because she got a great idea while building the box and using nice cam clamps to hold the finger joints together as the glue dried. Since she already had a bunch of these cam clamps in different lengths lying around, why not use a couple of them for this?

[Laura] has two major classifications of sandpaper — paper-backed and fabric-backed — and built them separate boxen using two clamps for each box. She joined the pins with a DIY handle in order to move the cams in unison, so all she has to do is pull out to flip through the papers, and push the handle back and down to re-pressurize the stack for storage. Be sure to check out the build and demo video after the break.

While DIY clamps are often wood and metal affairs, it’s good to have 3D printing in your corner.

Continue reading “Anti-Curl Sandpaper Storage Is Impressive”

Reverse Engineering With Sandpaper

Every once in a while, and more so now than before, you’ll find a really neat chip with zero documentation. In [David]’s case, it’s a really cool USB 3.0 eMMC/ SD MMC controller. Use this chip, attach a USB port on one end, and some memory on the other, and you have a complete bridge. There are drivers, too. There are products shipping with this chip. The problem is, there is no data sheet. Wanting to use this chip, [David] turned to sandpaper to figure out the pinout of this chip.

The best example of a product that came with this chip is a simple board from the hardkernel store that happily came with fairly high resolution product photos. While waiting for these boards to be delivered, [David] traced the top layer of copper. This was enough to get an idea of what was going on, but the real work started when the boards arrived. These were placed in a flatbed scanner and carefully photographed.

The next step was to desolder all the parts, taking care to measure and catalog each component. Then, it’s off to sanding with 200 and 600 grit wet sandpaper. Slowly, the soldermask is removed and the top copper layer appears. After that, it’s just a matter of sanding and scanning, stacking all the layers together with your image processing software of choice.

There are a few caveats to hand-sanding a PCB to reverse-engineer the copper layers. First, it makes a mess. This is wet/dry sandpaper, though, and you can and should sand with water. Secondly, even pressure should be applied. We’re not sure if [David] was holding the sandpaper or not, but the best technique is to actually hold the board itself.

Despite a few problems, [David] did get the pictures of each copper layer. After assembling these images, he could make an Eagle part for an eMMC reader for his Nintendo Switch.

Mechanisms: Abrasives

In our “Mechanisms” series, we’ve featured the fascinating bits and pieces that go into making our mechanical world work. From simple machines such as screws and levers, from springs to couplings, and even more complex mechanisms like zippers and solenoids, we’ve covered the gamut. But we haven’t talked about one of the very earliest mechanisms, captured from nature by our clever ancestors to do useful work like grinding grain and shaping materials into tools: grit, sand, abrasives.

Continue reading “Mechanisms: Abrasives”

Hackaday Links Column Banner

Hackaday Links: November 26, 2017

Hey, it’s sometime between Black Friday and Cyber Monday. We’re blowing out everything in the Hackaday Store. There’s some great deals in there. Tindie, our lovable robot dog is also heading up hundreds of Tindie deals for Cyber Monday. If you want some electronic stuff direct from the people who make it, this is the sale to check out.

Looking for some other Black Friday/Cyber Monday sales? Adafruit has compiled a list of retailers so I don’t have to. Thanks, Phil. There are deals from Lulzbot to Makerbot, LittleBits to Sparkfun.

The engineer responsible for Dieselgate has been sentenced to 40 months in prison. There are two takeaways from this: 1) The Nuremberg Defense doesn’t work. 2) Don’t build a business plan around breaking the law, despite what the libertarian hellscape of Hacker News tells you.

The theme for next year’s DEF CON has been announced. It’s, “1983”. What does that mean? Brutalist architecture, first of all. They’re also going for a ‘year before 1984’ thing, where everyone installs always-on, far-field microphones in their house and connects them to the Internet. In other news, Alexas and Google Homes are on sale this Black Friday. Big props for the official DEF CON style guide with typefaces and colors, though.

Over on Hackaday.io, [Frank] has created a very interesting and very cool game for the Vectrex. It’s called Bloxorz, and you can think of it as a cross between Marble Madness and Q*Bert. It’s a puzzle game, and now it’s a project on Kickstarter. Want to check out what this game looks like? Take a look at the video. It’s big into the tradition of early-90s puzzle games (a genre we wish would come back), and if I had a Vectrex, I’d buy one.

I told you SparkleCon tickets are on sale, right?

Here’s an argument you can settle. What is the grit designation of sandpaper? Sandpaper comes in various grits, from 60 (very coarse) to 1500, 2000, and 6000 (for polishing, basically). Here’s a question: how are these numbers derived? I have a vague memory from my youth where someone who probably didn’t know what they were talking about said grit sizes are the number of abrasive particles per some unit of area. A 60-grit sandpaper would have sixty particles of aluminum oxide per square quarter inch, for example. This sounds too stupid to be correct, doesn’t fit with the mesh sizes of different grades of sandpaper, and a cursory Googling does not tell me how sandpaper grit sizes are derived. What say you, Hackaday peanut gallery? Where do the numbers on the back of a sheet of sandpaper actually come from?

How To Sharpen Your Woodworking Tools On A Budget

Wood may seem like a soft, weak material if you’re used to working with steel, but to do good work, you’ll quickly learn you need your tools sharp. Buying and maintaining a good set of tools can be expensive for the home gamer, so [shopbuilt] put together an Instructable on how to sharpen your woodworking tools on a budget.

The trick is to use sandpaper. It’s a good quality abrasive material and is readily available. You’ll want a selection of different grits – low grits to get started, higher grits when finishing. The reason this is cheaper is that you can get a selection of 5-10 different sandpapers for under $20. Getting even a couple of decent sharpening stones wouldn’t be possible at that price. In the long run, they’ll last longer but this is a budget option we’re talking about.

Obviously you can’t just sharpen something with sandpaper – [shopbuilt] suggests mounting the paper to the flattest surface you can find. The use of a tempered glass panel from a fridge shelf is, in our mind, an inspired choice here. 3D printer enthusiasts have been using similar techniques for heated beds for the best part of a decade now.

We love woodworking here at Hackaday, so get your feet wet with these woodworking basics for the hardware hacker.