Sandpaper Alternatives For 3D Prints

A finished 3D print, especially plastic deposition types, often have imperfections in them from the process of laying down each layer of material and from the printer itself. For small batches or one-off parts, we might reach for a few pieces of sandpaper to smooth out these rough edges. While that might work for a small number of parts, it’s not always the best or lowest-effort option for refining these prints. There are a few alternative methods to try out if your fingers are getting sore, though.

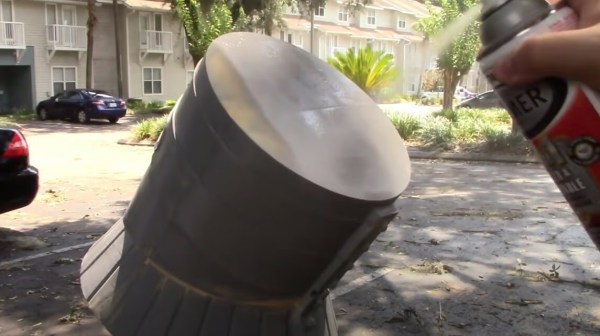
Rather than removing material as sandpaper does, most of these methods involve adding material to the print in order to fill in the rough edges of the print. There is a 3D-print-specific product listed called 3D Gloop! which is generally used as a glue to hold plastic parts together, but can also act as a fill in a pinch. Two other similar methods, one using spray paint and polyurethane and the other using epoxy, are more general-purpose ways of finishing the prints with a more natural texture than the printer will produce on its own. They’re not all additive, though; the final (and perhaps, most toxic) method here to achieve a smooth surface on a print uses solvent to remove some of the material instead.

While sandpaper does have its time and place, certain prints may lend themselves more to being finished by one of these other methods especially if they are overly complex, fragile, or an unusual size. Take note of the safety gear you’ll want to have on hand for most of these methods, though, as gloves and a respirator are highly encouraged and possibly helpful even if using only sandpaper. These aren’t the only ways of finishing 3D prints, either. Some of our other favorites are using glazing putty or silver for the finish.

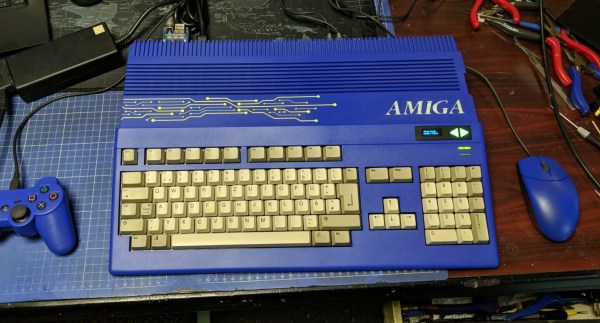
An Amiga 500 with a blue case and blue accessories

Restored Amiga 500 Is Blue – And Glows In The Dark

Few things are as satisfying to watch as a good retrocomputer restoration project – we’re always happy to see someone bring a rusty old Commodore, Apple or Atari back to life. The goal is typically to get the machine as close to its original state as possible, except for perhaps a few non-intrusive mods like memory upgrades. [Drygol] however, had already done this so many times that he thought it was time to take a different route for once, and apply some creativity to an old Amiga 500 case. Originalists may shudder, but we quite like his funky blue-and-yellow A500 mod.

An Amiga 500 with a poor blue-and-yellow paint job
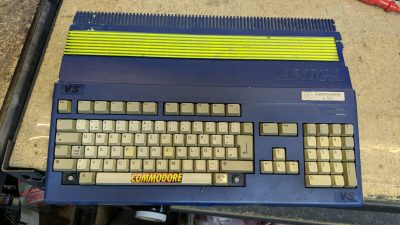
Missing keys, random stickers and an ugly paint job: the A500 wasn’t looking great at the beginning

To be fair, [Drygol] wasn’t the first one to modify this specific Amiga’s case: one of its previous owners had already applied a rather shoddy blue paint job and defaced it with some stickers. [Drygol] decided to stick with the basic idea, but do it right this time. First he removed the old paint using concentrated lye, then gave it a fresh coat of blue. He also applied glow-in-the-dark paint to the Amiga logo embossed in the case and added a fluorescent yellow laser-cut circuit board ornament. It took a bit of experimenting to get all these elements just right, but the end result definitely looks the part.

The insides of the Amiga also needed some TLC: [Drygol] competely cleaned and lubricated the floppy drive, gave the motherboard a good ultrasonic scrub, and replaced dodgy capacitors all over. He expanded the RAM from 512 kB to 1 MB and added a Gotek floppy emulator, which can work in parallel with the original disk drive. To make the Gotek easy to operate, [Drygol] placed its OLED screen and a pair of touch-sensitive buttons in a cutout on the front of the case.

A matching blue mouse and gamepad, both connected through the MouSTer adapter, complete the setup. The result is a good-looking A500 with some modern conveniences that’s perfect for exploring the Amiga’s extensive software library. If custom colors aren’t your thing, you’ll be happy to know that the original shade of grey or beige might be available for your retro console, too.

Continue reading “Restored Amiga 500 Is Blue – And Glows In The Dark”

Dot-Painting Graffiti Machine Is Wonderfully Simple

Traditionally, when many of us think of graffiti, we think of artists spraying away with simple paint cans. However, there’s often a lot of tech and art that goes into the field these days. [Vitaly Tesh] built himself a impressive dot-painting spray rig that’s really rather nifty.

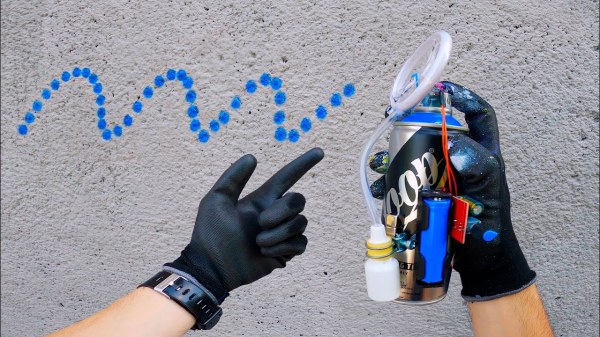
The dot maker performed ably in this piece by [Vitaly].
The build starts with [Vitaly] using a heated Stanley knife to cut away a propeller assembly from a small toy drone. He then fits a small plastic disc to the motor in place of the prop.  The disc has a cutout so that as it spins, it only allows paint to pass at certain times. The whole package bolts onto a regular spray can, so it can be used with any paint color or brand that’s desired.

The spray can paints individual dots on the wall at varying distances apart, thanks to the spinning disc. Varying the speed of the motor or the rate at which the can is moved relative to the wall changes the pitch of the dots. Importantly, [Vitaly] included a drip capture system so that paint that doesn’t pass out of the dot aperture doesn’t leak all over his hands or the wall, ruining the piece.

We’ve seen robots put to work painting murals on walls, too. Video after the break.

Continue reading “Dot-Painting Graffiti Machine Is Wonderfully Simple”

Retrocomputing Spray Paints: Amiga Beige, Commodore, And ATARI Grey

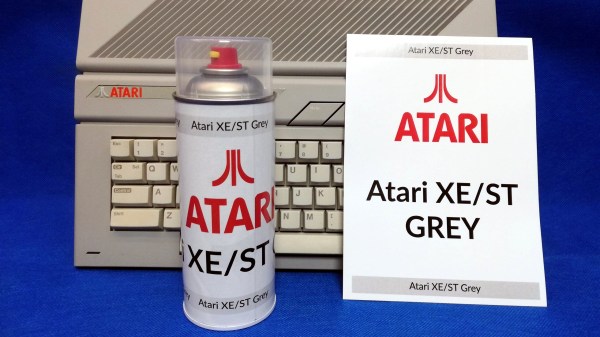
[retrohax] has provided vintage computer guidance for years, and part of that guidance is this: sometimes using paint as part of restoration is simply unavoidable. But the days of tediously color-matching to vintage hardware are gone, thanks to [retrohax] offering custom-mixed spray paints in Amiga 500 Beige, C-64 Beige, and ATARI ST/SE Grey. (At the moment only delivery within Poland is available due to shipping restrictions, but [retrohax] is working on a better solution.)

As a companion to making these vintage colors available, there is also a short how-to guide on how to properly prep and spray paint a computer case for best results that talks a little about the challenges in color matching to vintage hardware, and how getting custom paints mixed makes life much easier. Hackers may value making do with whatever is available, but we can also appreciate the value of having exactly the right material or tool for the job.

It’s not every day we see someone mixing custom spray paint colors, but off the shelf options don’t always cut it. Another example of getting specialty materials made from the ground up is custom plywood specifically designed for laser-cutting puzzles, something done because the troubles that came with off-the-shelf options were just not worth the hassle.

Beat The Streets With This Text Spraying Robot

In the midst of striking for climate change awareness, you may need some extra hands. That’s what [Anred Zynch] thought when they built Strettexter, the text-spraying writing robot that sprays onto streets.

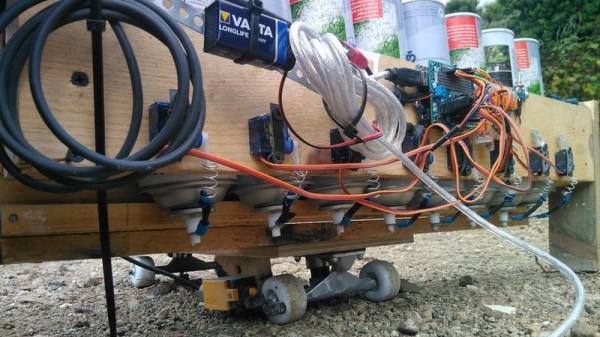
The machine is loaded with 8 spray cans placed into a wooden box (a stop line with a wooden ledge to prevent the cans from falling out) and is fixed on top of a skateboard. It uses a PWN/Servo shield soldered onto an Arduino Uno connected to 8 servo motors (TowerPro SG90s) to control each of the spray bottles. A table converts every character into 5×8 bit fonts to fit the size of the spraying module. The device also includes a safety switch, as well as an encoder for measuring the horizontal distance traveled.

The Strettexter is activated by pulling on the skateboard once it’s been set up and connected to power (for portability, it uses a 8000mAh power bank). In its current configuration, the words stretch out pretty long, but some additional testing will probably lead to better results depending on the constraints of your canvas. The shorter the words, the more difficult it is for the white text to be legible, since there is significant spacing between printed bits.

We don’t condone public vandalism, so use this hack at your own discretion.

Continue reading “Beat The Streets With This Text Spraying Robot”

Professional Results From Cheap Air Compressors

The portable air compressors sold at big box hardware stores like Lowe’s and Home Depot are perfectly suited for the jobs they’re advertised for: namely throwing some nails into the wall or filling tires. But if you try to respray your car with that $50 Black Friday pancake air compressor, you’re going to have a bad day. The relatively small amount of air they hold is almost guaranteed to be contaminated with oil and moisture, making it unsuitable for painting or even just blowing the dust out of electronics.

But all is not lost. [Stephen Saville] has done an excellent job documenting his work to turn these low cost homeowner-grade air compressors into something suitable for spraying auto body panels. But even if you aren’t looking to put a sick pearlescent finish on the family minivan, these tips are worth checking out. From increasing the usable volume of air in the system to separating out contaminants, these modifications can unlock a whole new world of pneumatic projects.

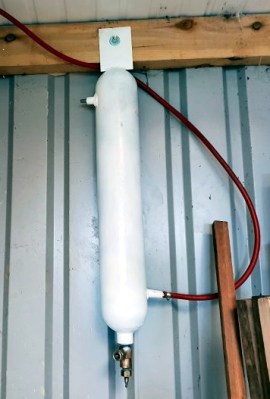
The big one (literally and figuratively) is the swirl tube [Stephen] builds out of an old CO2 cylinder. The idea is that this will centrifugally clean the air, not unlike a cyclonic dust separator. As the air enters the top of the cylinder and spins around, contact with the cold metal will cause any moisture to condense out and collect down at the bottom. Oil and other particles in the air should also get spun out, leaving a central column of cleaner air. The collected water and contaminants at the bottom can be occasionally purged out by way of the cylinder’s original valve.

With a source of clean and dry air sorted, [Stephen] next wanted a way to get it around his shop. Using scrap metal pipes he puts together a system that not only gives him air where he needs it, but also increases the volume of compressed air he has available. By using large smooth metal pipes rather than something like flexible rubber hose, the plumbing puts very little resistance on air flow. The pipes therefore can be considered something of an extension of the compressor’s primary tank.

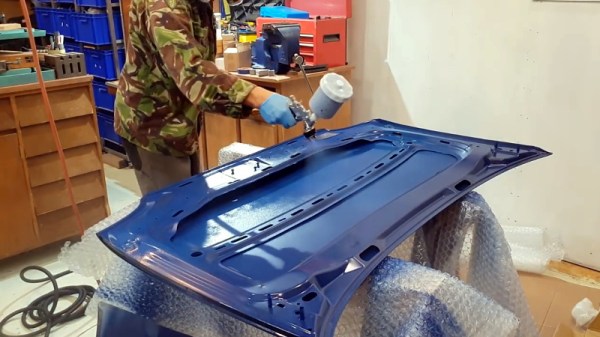
In the video after the break, [Stephen] shows off his new air system by laying down a very nice looking coat of paint on a car hood, but he also goes through the whole build process if you want to see the nuts and bolts of his system. He gives some great tips on welding and working with dissimilar metals which are worth the price of admission alone.

Outfitting the workshop with an integrated compressed air system sounds like the perfect second project to tackle once you’ve got the built-in dust collection system up and running.

Continue reading “Professional Results From Cheap Air Compressors”

Spray Paint Goes DIY Virtual With A Vive Tracker

Here is a virtual spray painting project with a new and DIY twist to it. [Adam Amaral]’s project is an experiment in using the Vive Tracker, which was released earlier this year. [Adam] demonstrates how to interface some simple hardware and 3D printed parts to the Tracker’s GPIO pins, using it as a custom peripheral that is fully tracked and interactive in the Vive’s VR environment. He details not only the custom spray can controller, but also how to handle the device on the software side in the Unreal engine. The 3D printed “spray can controller” even rattles when shaken!

There’s one more trick. Since the Vive Tracker is wireless and completely self-contained, the completed rattlecan operates independently from the VR headset. This means it’s possible to ditch the goggles and hook up a projector, then use the 3D printed spray can to paint a nearby wall with virtual paint; you can see that part in action in the video embedded below.

Continue reading “Spray Paint Goes DIY Virtual With A Vive Tracker”