With multi-segment displays, what you see available online is pretty much what you get. LEDs, LCDs, VFDs; if you want to keep your BOM at a reasonable price, you’ve pretty much got to settle for whatever some designer thinks looks good. And if the manufacturer’s aesthetic doesn’t match yours, it’s tough luck for you.
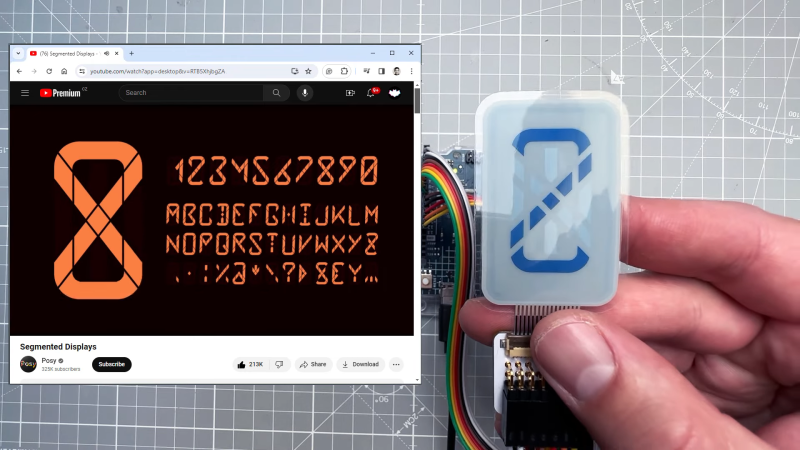
Maybe not though. [upir] has a thing for custom displays, leading him to explore custom-made e-ink displays. The displays are made by a company called Ynvisible, and while they’re not exactly giving away the unique-looking flexible displays, they seem pretty reasonably priced. Since the displays are made with a screen printing process, most of the video below concerns getting [upir]’s preferred design into files suitable for printing. He uses Adobe Illustrator for that job, turning multi-segment design ideas by YouTuber [Posy] into chunky displays. There are some design restrictions, of course, chief of which is spacing between segments. [upir] shows off some Illustrator-fu that helps automate that process, as well as a host of general vector graphics design tips and tricks.
After sending off the design files to Ynvisible and getting the flexible displays back, [upir] walks us through the details of driving them. It’s not as simple as you’d think, at least in the Arduino world; the segments need +1.5 volts with reference to the common connection to turn on, and -1.5 volts to turn off. His clever solution is to use an Arduino Uno R4 and take advantage of the onboard DAC. To turn on a segment, he connects a segment to a GPIO pin set high while sending 3.5 volts out of the DAC output into the display’s common connection. The difference between the two pins is 1.5 volts, turning the segment on. To turn it off, he drops the DAC output to 1.5 volts and drives the common GPIO pin low. Pretty clever, and no extra circuitry is required.
This isn’t the first time we’ve seen [upir] trying to jazz things up in the display department. He’s played with masking LED matrix displays with SMD stencils before, and figured out how to send custom fonts to 16×2 displays too.


I actually met a VP of Ynvisible at a trade show, and he is a hacker type. They have a DIY kit: https://www.ynvisible.com/products/electrochromic-inks if you’re into it.
If you want to really DIY, I think their ink is some kind of stabilized Prussian Blue, and it doesn’t look tricky at all. “Electrochromic” is your keyword. I’d love to see some art projects with this stuff covering large surfaces…
The Ynvisible displays are printed out on a big roll printer, which makes them cheap as chips in bulk. They use very little power to hold state, making them like a low-cost e-ink, but they’re also super thin and flexible.
It’s a cool tech, and it doesn’t look hard to hack around with either, certainly not compared to how hard it would be to make your own e-ink screen.
Ouch that ink is a bit out of reach for the hobbiest, but reasonable for small companies.
Wonder if there are cheaper alternatives available.
hobbyist
Guess I’m not only a hobbyist, but amateur too…
It’s fine, it just makes you come of as a Dutch person, Sjakie ;)
That ink is very expensive indeed. A bit much to just play with. The display in the video looks amazing though. I wish we could get car and motorcycle dashboards that had a similar design.
It’s Prussian Blue + secret sauce.
Why would a company located in downtown Vancouver sell stuff priced in Euro?
The one thing I’d love to see them try is vacuum forming. That way, we might be able to get 3D shapes covered in displays, like key caps. One may need to find a substitute for the ITO coating, but since they’re laminating the foils anyway, it shouldn’t be too far of a stretch to give it a new shape.
Very interesting, I checked their site. They mention that the displays are electrochromic and not electrophoretic. It seems like the image retention of their electrochromic displays is max 5 minutes, so these displays need to be refreshed every so often?
(sorry, I’m at work and couldn’t watch the video, maybe it’s mentioned in the video)
Maybe Mirasol or Liquavista would be better? Or maybe Rdot or Memory-in pixel?
https://rdotdisplays.com/articles/the-most-energy-efficient-display
https://www.iottechtrends.com/e-ink-display-alternatives/
Yeah, they do. They fade over time if left unpowered, unlike e-ink. But the power required is tiny.
Wow, that’s very cool. If the printing process is similar to screen-printing then I wonder how hard it would be to adapt this for printing directly onto a PCB. I’m imagining a small voltmeter with an on-board display rather than LEDs, or a temperature/humidity/pressure sensor with one side of the board for parts and the other for the printed-on display.
It also might make a very nice keycap display if it is so thin.
wanted to say, good idea!
Needs to be durable. I’ve already worn out WASD.
For other display technologies, “what’s available is what you get” is certainly true for one-off or very small projects, but it can be surprisingly inexpensive to get custom displays for even smaller-volume projects.
Somewhere in a box of dead-end projects I have a few samples of a custom (monochrome / segment) LCD for a project that got cancelled — It was probably 10 years ago but I remember it being less than $1000 for the tooling and 5 samples, and the display would have been a couple dollars max in couple-hundred-unit quantities. It was small-ish, and iirc had a few 7-seg characters, several custom icons, and maybe a small dot-matrix area?
For color TFT panels, overall panel size and resolution is more limited to what the handful of manufacturers is producing, but there’s a bunch of “LCD companies” that are actually just buying the glass and building the panels, and they’re generally happy to do some customization. Depending on the manufacturer, things like brighter backlight, different touchscreen, custom glass bezel, longer / different pinout cables, better color gamut (via better backlight), etc. are all “reasonable” if you’re manufacturing even a few hundred of something.
It looks nice but the pricing is… hobbyist unfriendly.
Yeah, I think this is a large-volume thing.
Ynvisible displays are way too expensive, both in prototyping and in volume. Custom LCD in China is only a fraction of the price. Their sample prices are also a joke, you can get an OLED display module for the same price as one of their 7-segment digits. I thought you can mass-manufacture them in a screen printing process? Why not 100 single-digit displays for €10?
Do you have more information on this? Some links would be handy.
I have bought their kit (which seems not in stock anymore) some months ago.
If someone wants, maybe I can share /split some material, if it is not against any rules here, you can contact me
Its not eink, its electrochromic printed epaper. :)