Adjustable Lights Help Peer Inside Chips With IR

If you’re used to working through a microscope, you’ve probably noticed that the angle of the light greatly affects how your workpiece looks. Most of us prefer the relatively flat lighting provided by a ring light, but variable angle side lighting can be useful too, especially when you’re peering inside ICs to make sure the silicon is what it’s supposed to be.

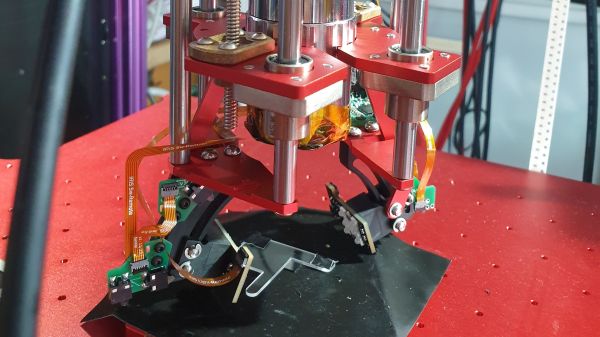
That’s what [Bunnie] is working on these days with his Project IRIS, short for “Infrared in situ,” a non-destructive method for looking inside chip packages. The technique relies on the fact that silicon is transparent to certain wavelengths of light, and that some modern IC packages expose the underside of the silicon die directly to the outside world. Initial tests indicated that the angle of the incident IR light was important to visualizing features on the metal interconnects layered onto the silicon, so [Bunnie] designed a two-axis light source for his microscope. The rig uses curved metal tracks to guide a pair of IR light sources through an arc centered on the focal point of the microscope stage. The angle of each light source relative to the stage can be controlled independently, while the whole thing can swivel around the optical axis of the microscope to control the radial angle of the lighting.

The mechanism [Bunnie] designed to accomplish all this is pretty complex. Zenith angle is controlled by a lead screw driving a connecting rod to the lights on their guide tracks, while the azimuth of the lights is controlled by a separate motor and pulley driving a custom-built coaxial bearing. The whole optical assembly is mounted on a Jubilee motion platform for XYZ control. The brief videos below show the lights being put through their paces, along with how changing the angle of the light affects the view inside a chip.

Continue reading “Adjustable Lights Help Peer Inside Chips With IR”

Bye Bye Green Screen, Hello Monochromatic Screen

It’s not uncommon in 2024 to have some form of green background cloth for easy background effects when in a Zoom call or similar. This is a technology TV and film studios have used for decades, and it’s responsible for many of the visual effects we see every day on our screens. But it’s not perfect — its use precludes wearing anything green, and it’s very bad at anything transparent.

The 1960s Disney film makers seemingly had no problem with this as anyone who has seen Mary Poppins will tell you, so how did they manage to overlay actors with diaphanous accessories over animation? The answer lies in an innovative process which has largely faded from view, and [Corridor Crew] have rebuilt it.

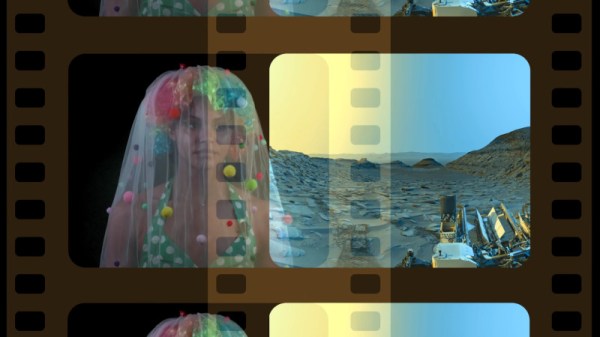
Green screens, or chroma key, to give the effect its real name, relies on the background using a colour not present in the main subject of the shot. This can then be detected electronically or in software, and a switch made between shot and inserted background. It’s good at picking out clean edges between green background and subject, but poor at transparency such as a veil or a bottle of water. The Disney effect instead used a background illuminated with monochromatic sodium light behind the subject illuminated with white light, allowing both a background and foreground image to be filmed using two cameras and a dichroic beam splitter. The background image with its black silhouette of the subject could then be used as a photographic stencil when overlaying a background image.

Sadly even Disney found it very difficult to make more than a few of the dichroic prisms, so the much cheaper green screen won the day. But in the video below the break they manage to replicate it with a standard beam splitter and a pair of filters, successfully filming a colourful clown wearing a veil, and one of them waving their hair around while drinking a bottle of water. It may not find its way back into blockbuster films just yet, but it’s definitely impressive to see in action.

Continue reading “Bye Bye Green Screen, Hello Monochromatic Screen”