We make no claims to be an expert on anything, but we do know that rule number one of working with big, expensive, mission-critical equipment is: Don’t break the big, expensive, mission-critical equipment. Unfortunately, though, that’s just what happened to the Deep Space Network’s 70-meter dish antenna at Goldstone, California. NASA announced the outage this week, but the accident that damaged the dish occurred much earlier, in mid-September. DSS-14, as the antenna is known, is a vital part of the Deep Space Network, which uses huge antennas at three sites (Goldstone, Madrid, and Canberra) to stay in touch with satellites and probes from the Moon to the edge of the solar system. The three sites are located roughly 120 degrees apart on the globe, which gives the network full coverage of the sky regardless of the local time.
azimuth12 Articles
Adjustable Lights Help Peer Inside Chips With IR
If you’re used to working through a microscope, you’ve probably noticed that the angle of the light greatly affects how your workpiece looks. Most of us prefer the relatively flat lighting provided by a ring light, but variable angle side lighting can be useful too, especially when you’re peering inside ICs to make sure the silicon is what it’s supposed to be.
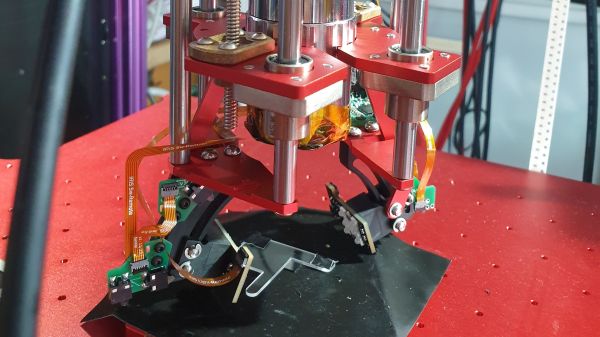
That’s what [Bunnie] is working on these days with his Project IRIS, short for “Infrared in situ,” a non-destructive method for looking inside chip packages. The technique relies on the fact that silicon is transparent to certain wavelengths of light, and that some modern IC packages expose the underside of the silicon die directly to the outside world. Initial tests indicated that the angle of the incident IR light was important to visualizing features on the metal interconnects layered onto the silicon, so [Bunnie] designed a two-axis light source for his microscope. The rig uses curved metal tracks to guide a pair of IR light sources through an arc centered on the focal point of the microscope stage. The angle of each light source relative to the stage can be controlled independently, while the whole thing can swivel around the optical axis of the microscope to control the radial angle of the lighting.
The mechanism [Bunnie] designed to accomplish all this is pretty complex. Zenith angle is controlled by a lead screw driving a connecting rod to the lights on their guide tracks, while the azimuth of the lights is controlled by a separate motor and pulley driving a custom-built coaxial bearing. The whole optical assembly is mounted on a Jubilee motion platform for XYZ control. The brief videos below show the lights being put through their paces, along with how changing the angle of the light affects the view inside a chip.
Continue reading “Adjustable Lights Help Peer Inside Chips With IR”
Automatic Planet Finder Is Out Of This World
When the world is on your shoulders, it can be relaxing to remember that we’re just hairless monkeys hurtling through space on a big rock alongside a lot of other rocks. If you find yourself wondering where exactly the other major rocks are instead of worrying, we think that’s a good sign.
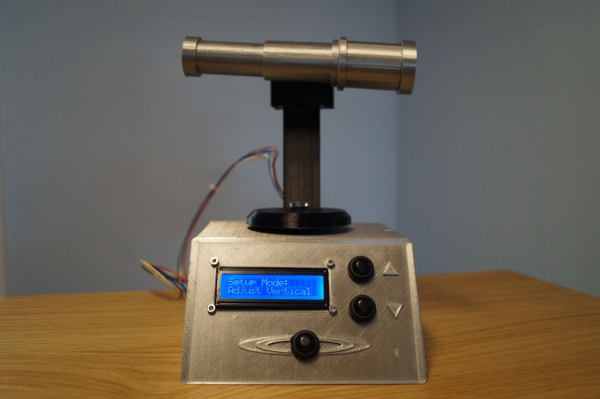
Wherever [snowbiscuit] lives, there’s a large planet finder in a public square somewhere that stopped locating rocks a long time ago. Hungry to watch such a thing in action, [snowbiscuit] built a great-looking tabletop version that uses the Horizontal Coordinate System to locate planets. Inside is a Raspberry Pi 3, which queries NASA for azimuth and altitude data and combines that data with a predetermined north reading to point out whatever planet was selected by spinning the printed telescope on top. The telescope itself is non-working, and returns to north after a few seconds to wait for input.
This project is wide open for remixing if you want to make your own. As lovely as it is now, designing around a slip ring would eliminate all those long wires and make it more sleek. Take a peek after the break.
Don’t stop your desktop space toy collection there — build an ISS-tracking lamp to go with it.
Continue reading “Automatic Planet Finder Is Out Of This World”
SatNOGS Update Hack Chat
Join us on Wednesday, October 30 at noon Pacific for the SatNOGS Update Hack Chat with Pierros Papadeas and the SatNOGS team!
Ever since the early days of the Space Race, people have been fascinated with satellites. And rightly so; the artificial moons we’ve sent into orbit are engineering marvels, built to do a difficult job while withstanding an incredibly harsh environment. But while most people are content to just know that satellites are up there providing weather forecasts and digital television, some of us want a little more.
Enter SatNOGS. Since winning the very first Hackaday Prize in 2014, SatNOGS has grown into exactly what Pierros Papadeas and the rest of the team envisioned: a globe-spanning network of open-source satellite ground stations, feeding continuous observations into an open, accessible database. With extensive documentation and an active community, SatNOGS has helped hundreds of users build ground stations with steerable antennas and get them connected. The network tracks hundreds of Low-Earth Orbit (LEO) satellites each day, including increasingly popular low-cost Cubesats.
Join us as the SatNOGS crew stops by the Hack Chat to give us an update on their efforts over the last few years. We’ll discuss how winning the Hackaday Prize changed SatNOGS, how the constellation of satellites has changed and how SatNOGS is dealing with it, and what it takes to build a global network and the community that makes it work.
 Our Hack Chats are live community events in the Hackaday.io Hack Chat group messaging. This week we’ll be sitting down on Wednesday, October 30 at 12:00 PM Pacific time. If time zones have got you down, we have a handy time zone converter.
Click that speech bubble to the right, and you’ll be taken directly to the Hack Chat group on Hackaday.io. You don’t have to wait until Wednesday; join whenever you want and you can see what the community is talking about.
Pi Zero Gives Amateur Astronomer Affordable Control Of Telescope
Like many other hobbies, astronomy can be pursued on many levels, with equipment costs ranging from the affordable to the – well, astronomical. Thankfully, there are lots of entry-level telescopes on the market, some that even come with mounts that automatically find and track heavenly bodies. Finding a feature is as easy as aligning to a few known stars and looking up the object in the database embedded in the remote.
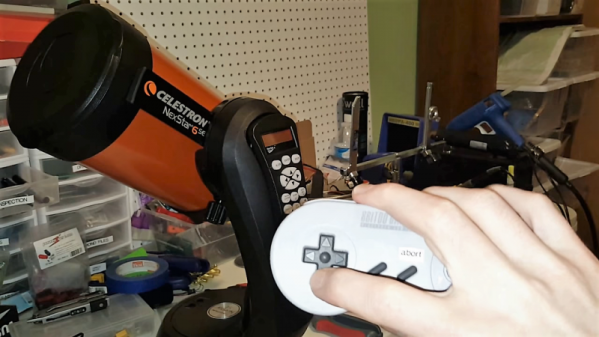
Few of the affordable mounts are WiFi-accessible, though, which is a gap [Dane Gardner]’s Raspberry Pi interface for Celestron telescopes aims to fill. For the price of a $10 Pi Zero W and a little know-how, [Dane] was able to gain full control over his ‘scope. His instrument is a Celestron NexStar, a Schmidt-Cassegrain reflector with a 150-mm aperture, has a motorized altitude-azimuth mount. The handheld remote had enough room for him to add the Zero, powering it from the mount’s battery pack. The handset has an RS-232 serial port built-in, but with the level differences [Dane] just connected the Pi directly to the handset before the UART. Running INDI, a cross-platform astronomical instrument control library, he now has total control of the scope, and he can use open source astronomy software rather than the limited database within the handset. As a neat side trick, the telescope can now be controlled with a Bluetooth gamepad.
Astronomy and electronics go hand in hand, whether in the optical or radio part of the spectrum. We like the way [Dane] was able to gain control of his telescope, and we’d like to hear about what he sees with his new tool. Assuming the Seattle weather ever cooperates.
Continue reading “Pi Zero Gives Amateur Astronomer Affordable Control Of Telescope”
Desktop Radio Telescope Images The WiFi Universe
It’s been a project filled with fits and starts, and it very nearly ended up as a “Fail of the Week” feature, but we’re happy to report that the [Thought Emporium]’s desktop WiFi radio telescope finally works. And it’s pretty darn cool.
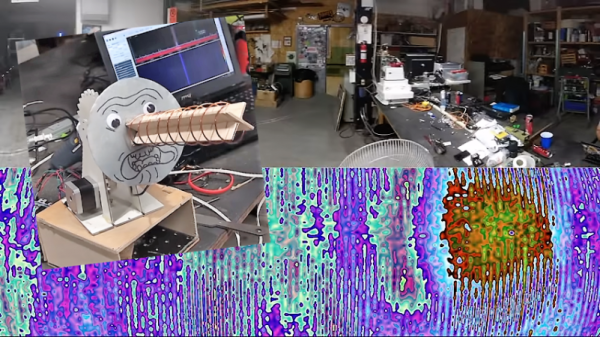
If you’ve been following along with the build like we have, you’ll know that this stems from a previous, much larger radio telescope that [Justin] used to visualize the constellation of geosynchronous digital TV satellites. This time, he set his sights closer to home and built a system to visualize the 2.4-GHz WiFi band. A simple helical antenna rides on the stepper-driven azimuth-elevation scanner. A HackRF SDR and GNU Radio form the receiver, which just captures the received signal strength indicator (RSSI) value for each point as the antenna scans. The data is then massaged into colors representing the intensity of WiFi signals received and laid over an optical image of the scanned area. The first image clearly showed a couple of hotspots, including a previously unknown router. An outdoor scan revealed routers galore, although that took a little more wizardry to pull off.
The videos below recount the whole tale in detail; skip to part three for the payoff if you must, but at the cost of missing some valuable lessons and a few cool tips, like using flattened pieces of Schedule 40 pipe as a construction material. We hope to see more from the project soon, and wonder if this FPV racing drone tracker might offer some helpful hints for expansion.
Continue reading “Desktop Radio Telescope Images The WiFi Universe”
Start Tracking Satellites With This Low-Cost Azimuth-Elevation Positioner
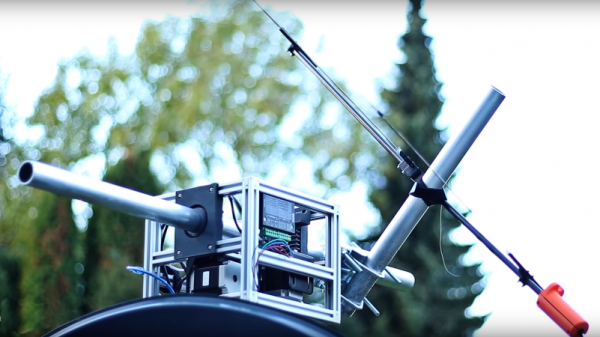
Tracking satellites and the ISS is pretty easy. All you really need is an SDR dongle or a handheld transceiver, a simple homebrew antenna, and a clear view of the sky. Point the antenna at the passing satellite and you’re ready to listen, or if you’re a licensed amateur, talk. But the tedious bit is the pointing. Standing in a field or on top of a tall building waving an antenna around gets tiring, and unless you’re looking for a good arm workout, limits the size of your antenna. Which is where this two-axis antenna positioner could come in handy.
While not quite up to the job it was originally intended for — positioning a 1.2-meter dish antenna — [Manuel] did manage to create a pretty capable azimuth-elevation positioner for lightweight antennas. What’s more, he did it on the cheap — only about €150. His design seemed like it was going in the right direction, with a sturdy aluminum extrusion frame and NEMA23 steppers. But the 3D-printed parts turned out to be the Achille’s heel. At the 1:40 mark in the video below (in German with English subtitles), the hefty dish antenna is putting way too much torque on the bearings, delaminating the bearing mount. But with a slender carbon-fiber Yagi, the positioner shines. The Arduino running the motion control talks GS232, so it can get tracking data directly from the web to control the antenna in real time.
Here’s hoping [Manuel] solves some of the mechanical issues with his build. Maybe he can check out this hefty dish positioner for weather satellite tracking for inspiration.
Continue reading “Start Tracking Satellites With This Low-Cost Azimuth-Elevation Positioner”


