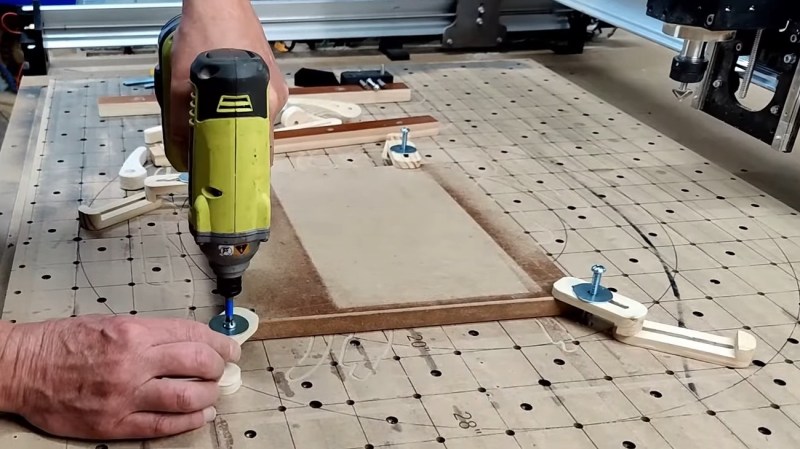
Designing a file to cut on a CNC is only part of the process. You also have to keep it in place while the machine does its work. [Garrett Fromme] walks us through five different work holding techniques.
Since every project is different and stock material can vary from thin veneer to much larger pieces, there’s no one right work holding method for every project, and not all methods are applicable to all materials. A vise is great for small projects that need to be held very securely and won’t be damaged, vacuum tables can make switching pieces quick in a production environment, fasteners will hold a piece securely at the expense of your spoil board, clamps are fairly versatile but fiddly to setup, and tape and CA glue are quick but require more consumables.
[Fromme] does a quick demonstration of setups with these different methods and their limitations, which is a great place to start for the beginner CNC operator. Just like 3D printers, CNCs are a far cry from the replicators in Star Trek that can automagically create what you ask it to, but proper workholding lets you waste less material and operate the machine more safely.
Our own [Elliot Williams] had a look at how CNCs aren’t as automated as you think. If you do need some CNC clamps, you might try these printable parametric clamps, or if you want something more beautiful, give these metal toe clamps a go.


If you need cutting from multiple sides of an object, cutting a jig in some scrap piece is very helpful. You can mill exactly the shape and size of the first side and the XYZ origin will be accurately in place for cutting the opposite side.
I was impressed by Brian Oltrogge’s method for two sided parts. No additional parts needed.
Skip to 5:30 to see it in action.
https://youtu.be/BLD4dFoXC7o?si=nAJqNL9es9mGCzya
That’s clever!
I like machinist vices for my CNC. My Z travel is more than 200mm so plenty of room there. It’s the quickest and most secure way to clamp if the workpiece fits into it (mine is 125mm max but plan on getting a 300mm one). Get a parallel set so you can adjust the depth of the stock in the vise so the stock can stick out a bit on the top if you need access with the cutter to the whole surface. Also great for machining metal.
As for clamping, I have an 20mm thick aluminium bed with M5 threaded holes machined in it in a grid of 50mm apart. I drilled and tapped it with the CNC itself.
I use top clamps with strips of 100x20x5mm aluminium flat stock with a slot machined in them and two holes drilled, one at each end and threaded with M5. One bolt in the slot goes into the bed, the threaded holes have bolts from the opposite side in them to clamp against the stock with adjustable height and the other to support the back of the strip. Most 6mm cutters won’t get damaged when running into an aluminium strip.
I use laminate flooring boards cut to size as waste boards, it’s cheap, reasonably consistent in thickness and easy to make to size.
The 50x50mm grid allows you to screw in all sorts of fences, vices, clamps etc.
As for pre flight check, I usually scoot around with the cutter far above the workpiece with the CNC with the gcode loaded and check the cuts on screen vs on the CNC itself and see if it might hit clamps, screws, or other things it shouldn’t hit. Or to check if I have a scrap piece if the CNC program fits within the scrap piece with enough stock around it.
In our lab when needing to machine pieces on five sides I’ll use some Crystalbond 821 and a sacrificial piece of Al or steel scrap. Plane the scrap in a vice with parallels, throw it on a hotplate set to 280C and then wait for the crystal bond to melt down, then attach the piece of stock. Doesn’t need much and it stands up to machining forces and coolant fairly well. YMMV of course.
After 5 years of CNC’ing wood, aluminium, brass and acrylic using blue tape and CA glue, I wouldn’t suggest anything else. My suggestions are meaningless of course, but it’s a contribution to the pool.