Super-Blue CNC Part Fixturing

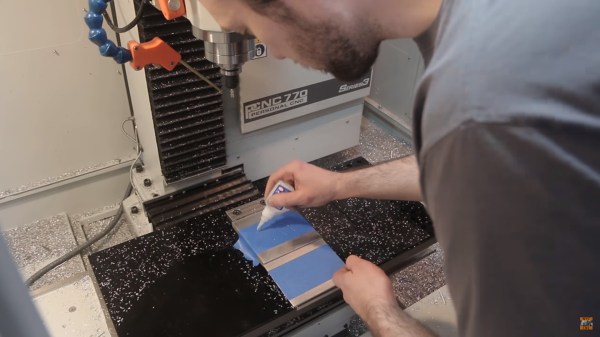
Simple clamps are great if you need to keep the pressure on two parallel surfaces, but if you have an irregular plane, or you need to cut through it, clamps are not the correct tool. The folks at [NYC CNC] feature a video with a clever hack borrowing from other disciplines. Painters tape is applied to the top of a level mounting surface in the machine and then burnished. The same is done to the bottom of the workpiece. Superglue is drizzled between the tape layers and pressed together so now the stock is held firmly below the toolhead.

Some parts are machined in the video, which can be seen below, and the adhesion holds without any trouble. One of the examples they cut would be difficult to hold without damage or stopping the machine. The accepted wisdom is that superglue holds well to a slightly porous surface like tape, but it doesn’t like do as well with smooth surfaces like metal. Removing residue-free tape at the end of a cut is also cleaner and faster than glue any day.

If you have yet to cut your teeth, you can watch our very own Elliot Williams getting introduced to CNC machines or a portable machine even a child can use.

Continue reading “Super-Blue CNC Part Fixturing”

The Fine Art Of Acid Etching Brass

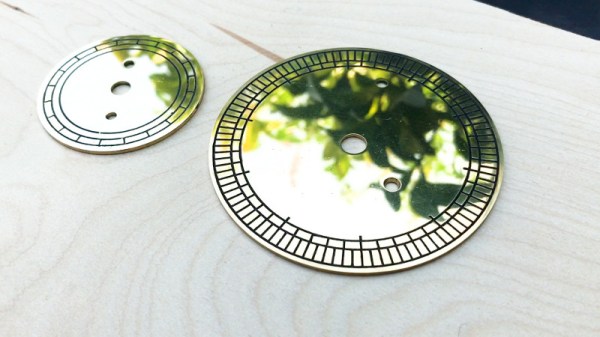
If you were building a recreation of the James Watt micrometer, where would you start? If you’re [rasp], the answer would be: “Spend a year trying to find the best way to make etched brass discs.” Luckily for us, he’s ready to share that information with the rest of the world. While it’s rather unlikely anyone else is working on this specific project, the methods he details for getting museum-quality results on brass are absolutely fascinating.

The process starts with sanding down the bare brass and applying a layer of clear packing tape to the metal. [rasp] then covers the piece with LaserTape, which is a special tape designed to make laser-cut masks for sandblasting. But the masking principle works just as well for painting or chemical etching.

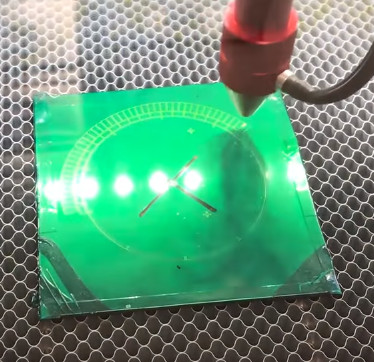
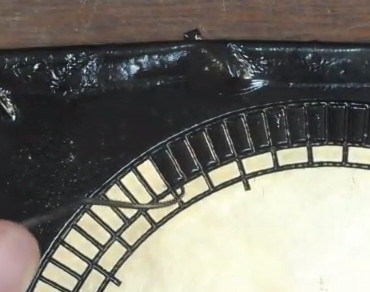
With the LaserTape in place, the piece is then put into the laser and the mask is cut out. Once cut, there’s the tedious task of peeling off all the cut pieces of tape, which [rasp] does with a dental pick. Once the pieces are pulled off, the brass is ready for its acid bath.

Anyone who’s etched their own PCB with ferric chloride will recognize these next steps. The piece is put into the acid bath and agitated every 10 minutes or so. It’s interesting to note that [rasp] places the piece in the bath upside-down, using little 3D printed “feet” to suspend the brass sheet off the bottom of the container. This allows the debris from the etching process to fall down and away from the piece. After about an hour out in the sun, the piece is pulled out of the bath and carefully washed off.

Once clean off, the piece is sprayed with black spray paint to darken up the etched areas. The moment of truth comes when the paint has dried and the layers of tape are carefully peeled back to reveal the etching. [rasp] then wet sands the piece with 1000 and 2000 grit paper, and a final pass with polishing compound brighten up the surface to a mirror-like shine. It’s quite a bit of manual labor, but the end result really is spectacular.

In the video after the break, [rasp] breaks down the entire process, including the additional machine work required to turn these brass plates into functional components of the final machine. As an added bonus, he even includes a lot of his failed attempts in an effort to keep others from making the same mistakes. Something we love to see here at Hackaday.

The process used here is similar to the snazzy brass name plates we showed earlier in the year, and has even been done without a laser using photoresist.

[via /r/DIY]

Continue reading “The Fine Art Of Acid Etching Brass”

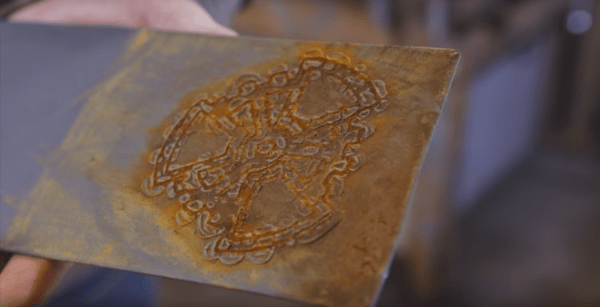
Fail Of The Week: Cutting Steel With Baking Soda

[NightHawkInLight] wants what may be the impossible – a dirt cheap replacement for a laser cutter or a water jet. He’s got this crazy idea about using electrolysis to etch sheet steel parts, but he just can’t get the process to work. Sounds like a job for the Hackaday community.

In theory, electrolytic cutting of metal  is pretty simple to understand. Anyone who lives in the northeast of the USA knows all about how road salt can cut holes in steel given enough time – say, one winter into payments on that new car. Adding a few electrons to the mix can accelerate the process of removing metal, but doing so in a controlled manner seems to be the crux of [NightHawkInLight]’s problem.

In his research into the method, he found a 2010 video by [InterestingProducts] of etching reed valves for DIY pulse jet engines from spring steel that makes it look easy. [NightHawkInLight] deviated from the reed valve process by substituting baking soda for salt to avoid the production of chlorine gas and changed up the masking technique by using different coatings. We applaud the empirical approach and hope he achieves his goal, but we tend to agree with frequent-Hackaday-tipline-project notable [AvE]’s assessment in the YouTube comments – the steel is just too darn thick. Once the etching starts, a third dimension is created at 90° to the surface and is then available to electrolyze, causing the corrosion to extend under the masking.

What does the Hackaday hive mind think? Is there any way to fix this process for thicker steel stock? Narrower traces, perhaps? Somehow modulating the current in the tank? Perhaps using the Hackaday logo would have helped? Chime in down below in the comments, and maybe we can all throw out our laser cutters.

Continue reading “Fail Of The Week: Cutting Steel With Baking Soda”