It’s been a while since the last installment in our Know Audio series, in which we investigated distortion as it applies to Hi-Fi audio. Now it’s time to return with part two of our look at distortion, and attempt some real-world distortion measurements on the bench.
Last time, we examined distortion from a theoretical perspective, as the introduction of unwanted harmonics as a result of non-linearities in the signal path. Sometimes that’s a desired result, as with a guitar pedal, but in a Hi-Fi system where the intention is to reproduce as faithfully as possible a piece of music from a recording, the aim is to make any signal path components as linear as possible. When we measure the distortion, usually expressed as THD, for Total Harmonic Distortion, of a piece of equipment we are measuring the ratio of those unwanted harmonics in the output to the frequencies we want, and the resulting figure is commonly expressed in dB, or as a percentage.
The Cheapest Of Audio Kits, Analysed
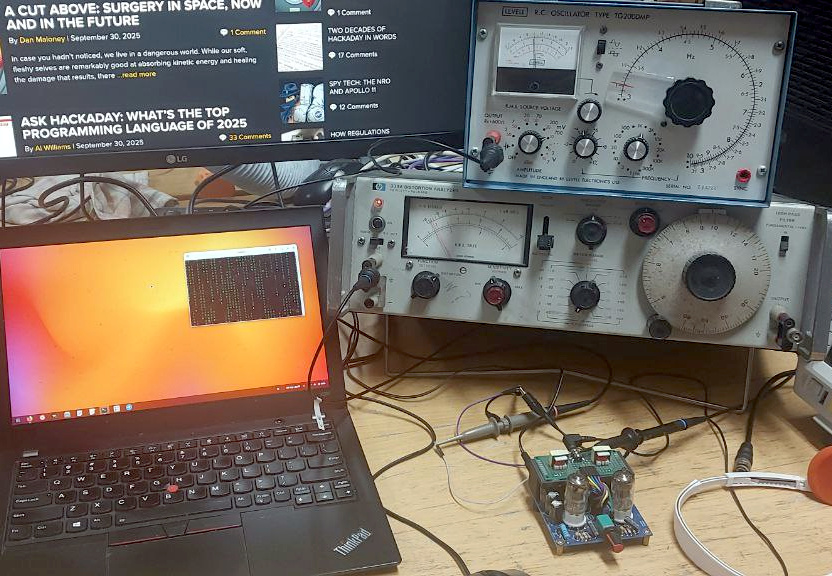
Having explained what we are trying to do, it’s on to the device in question and the instruments required. On the bench in front of me I have my tube headphone amplifier project, a Chinese 6J1 preamp kit modified with transformers on its output for impedance matching. I’ve investigated the unmodified version of this kit here in the past, and measured a THD of 0.03% when it’s not driven into distortion, quite an acceptable figure.
To measure the distortion I’m using my audio signal generator, a Levell TG200DMP that I was lucky enough to obtain through a friend. It’s not the youngest of devices, but it’s generally reckoned to be a pretty low distortion oscillator. It’s set to 1 KHz and a 1 V peak-to-peak line level audio output, which feeds the headphone amplifier input. The output from the amplifier is feeding a set of headphones, and my trusty HP334A distortion analyser is monitoring the result.
How Does A Distortion Analyser Work Then?
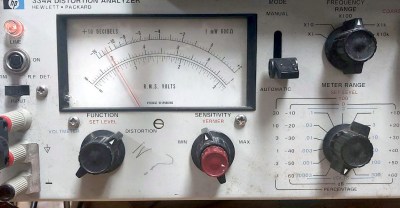
A distortion analyser is two instruments in one, a sensitive audio level meter, and an extremely high quality notch filter. In an instrument as old as this one everything is analogue, while in a modern audio analyser everything including the signal source is computer controlled.
The idea is that the analyser is first calibrated against the incoming audio using the voltmeter, and then the filter is switched into the circuit. The filter is then adjusted to reject the fundamental frequency, in this case 1 kHz, leaving behind only the harmonic distortion. The audio level meter can then be used to read the distortion. If you’re interested in how these work in greater detail I made one a few years ago in GNU Radio for an April Fool post about gold cables.
Using the HP offers an experience that’s all too rare in 2025, that of tuning an analogue circuit. It settles down over time, so when you first tune it for minimum 1kHz level it will retune to a lower level after a while. So mine has been running but idle for the last few hours, in order to reach maximum stability. I’m measuring 0.2% THD for the headphone amplifier, which is entirely expected given that the transformers it uses are not of high quality at all.
An Instrument Too Expensive For A Hackaday Expense Claim
It’s important to state that I’ve measured the THD at only one frequency, namely 1 kHz. This is the frequency at which most THD figures are measured, so it’s an easy comparison, but a high-end audio lab will demand measurements across a range of frequencies. That’s entirely possible with the Levell and the HP, but it becomes a tedious manual process of repetitive calibration and measurement.
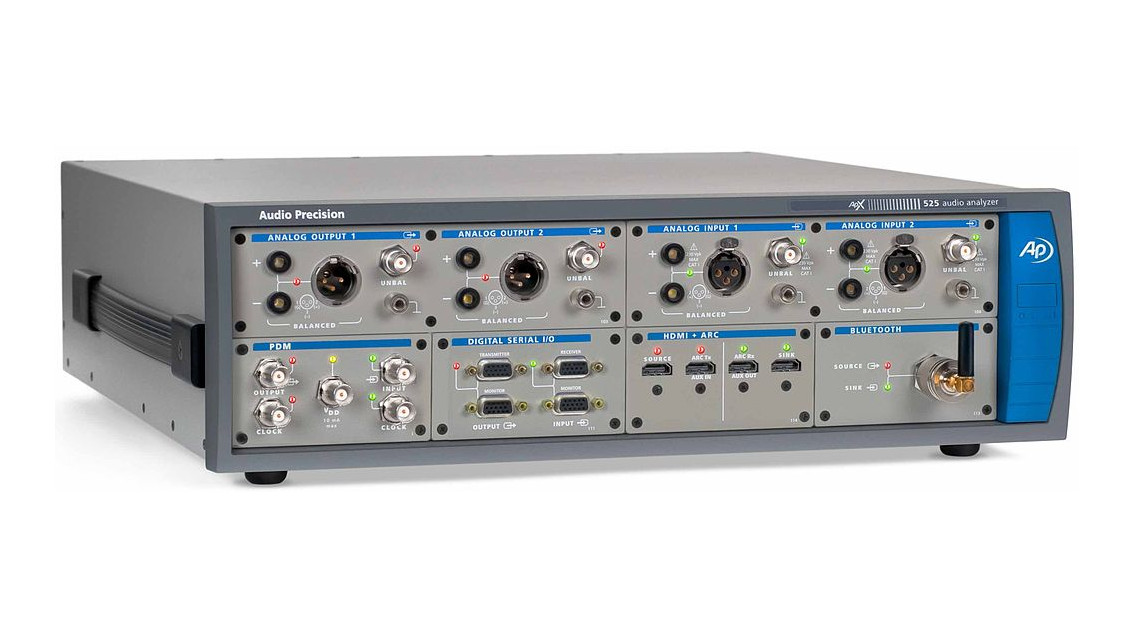
As you might expect, a modern audio analyser has all these steps computerised, having in place of the oscillator and meter a super-high-quality DAC and ADC, and instead of the 334A’s filter tuning dial, a computer controlled switched filter array. Unsurprisingly these instruments can be eye-wateringly expensive.
So there in a nutshell is a basic set-up to measure audio distortion. It’s extremely out of date, but in its simplicity I hope you find an understanding of the topic. Keep an eye out for a 334A and snap it up if you see one for not a lot. I did, and it’s by far the most beautifully-made piece of test equipment I own.


For work, I procured a QuantAsylum QA403 audio analyzer. 0.001% THD at 1kHz for $600 does everything I need instead of that $25k AP.
Note: I have no financial ties to QA.
Thank you :) I always thought Audio Precision were all alone on that kind of measurements !!!
Any good quality sound card can be used as a distortion analyzer. But you do need a good quality one, because else it would just be measuring it’s own distortion. If your gadget had different signal levels, you may need an extra amplifier and/or attenuator to get the signal into the range of the sound card.
I sense another rabbit hole for me to explore is inevitable, thanks to this.
The HP 8903B is also a good audio analyzer that can be had for a reasonable price if one is patient.
It is computer controllable via GPIB, and there are apps available online for it that allow you to run sweeps etc in a mostly automated fashion. (Do a search for Pete Millett’s website).
I have both the 334A and 8903B and they both work well. I mostly use the 334A for tuning up function generators and the 8903B for audio work.
FWIW, when it comes to audio THD is a very flawed metric. It treats all unwanted harmonics – low-order, high-order, even-order, and odd-order – as equally objectionable, by giving them the same weight in the calcs. For more background I recommend just about anything on Lynn Olson’s website. Here’s a good place to start: http://www.nutshellhifi.com/triode4.html
This is in spite of the fact that odd-order and higher-order harmonics have been known to be more audible and more objectionable for more than 60 years. Noted BBC engineer D.E.L Shorter, and noted amplifier designer Norman Crowhurst, both advocated for weighting harmonics by the square, or even the CUBE, of the harmonic order when calculating THD.
Interestingly, harmonic spectrum is one reason that (some) tube amps sound better than solid state ones. In particular, (good) single-ended triode designs may have fairly high second harmonic content, and lower but still high third harmonic content. Their THD figure may be ten or more times that of a solid-state amp, but they may sound better. And I don’t mean just “warmer” or “tubier” – I mean more natural, more relaxing, and more true-to-life.
At least as far as lower-level amps go, some of the newest and best solid-state op-amps have such vanishingly low THD specs that they’re probably at least as good as a quality single-ended discrete-component preamp. Beyond that, if you’re looking for the very best sound, don’t blindly assume that you can get it via semiconductors alone. The relationship among THD, IM, and TIM distortions is incredibly complex. And that’s even before you take a close look at the interactions between amp and transducer, and between transducer and room.
Great post. Thanks.
Note that harmonic distortion of any kind will also result in intermodulation distortion, producing frequencies that were not in the original program material, and which do not go nicely with it. Harmonic distortion on a single frequency will give products that musically make sense; but when two or more notes go into it, now there will be distortion products that do not fit into the chords and scales pleasantly.
A major audio manufacturer made an audio amplifier many years ago that had exceptional specifications, essentially flat across the spectrum.
It was introduced to the market with terrible reviews. It sounded like crap.
How could this be, the manufacturer wondered. Some research into the matter yielded a simple result.
Linear amplifiers don’t match the dynamics of the ear. The lousy tube amplifiers that sounded so good had terrible specs, rolling off significantly over a few thousand hertz.
That’s a bit of a myth.And yes, I have taken the measurements on very high end kit to back that statement up.
Some people accustomed to poor quality sound equipment find the sensation of accurate high frequency response irritating. Violins in particular can seem scratchy to someone unfamiliar with good equipment or live performances.
It’s not just violins.
Accordions, bagpipes and EDM can also sound ‘off’ to people not used to musical torture.
There are some who just don’t like the sound of a war pipe ensemble in a small room.
No accounting for taste.
Every speaker ever made will have an order of magnitude more distortion than any other component in the signal path.
Non-electrostatic speakers will have multiple orders of magnitude more distortion.
Then you should consider the space.
Chasing decimals on amplifiers first is misspent energy and money.
Especially as THD is widely bullshitted.
THD at what volume level?
There was a brand (who’s name I won’t mention so as not to enrage a vintage gear enthusiast) that measured THD at -40Db below rated power.
The ‘replaced all the caps’ people still cite that BS and will pay lots of money for one, despite it being a bog standard IC amp of the day.
Start w reasonable cost components.
Spend first on speakers, then adjust room and walls as much as possible.
If your doing the vintage amp thing, judge old amps by weight, but don’t.
Dolby Pro surround is a bigger improvement than any audiophile stereo amp.
Avoid Matsushita brands, all crap.
Look funny at the twits arguing about Akai vs Pioneer tape decks…
Like Audi vs VW vs Porsche…Same crap under skin…Just different price for same part.
There are design mistakes and aging related to capacitors in hifi equipment that can be fixed by replacing capacitors. High-k ceramic capacitors in the signal path can cause measurable and audible distortion, and should be replaced with plastic dielectric caps. Electrolytic capacitors in the signal path can also be a problem, but replacing them with new electrolytics or other types of capacitors can lead to many complications. (For instance, many electrolytics have high ESR, and replacing them with plastic capacitors in a loudspeaker crossover can boost high frequency response by about 1 dB.)
Although speakers are generally the high distortion element in a system, that’s not always the case in use. Quality speakers designed to accept 200 W are not going to produce much distortion when fed 1 W. Most speaker distortion usually occurs in trying to produce deep bass, due to cheaping out on the construction of woofers; good design or not playing music with low notes results in lower distortion. Some class D amplifiers are not clean at low power levels or high frequencies.
Matsushita (Panasonic) includes Technics. I don’t know what they’re doing today, but 40 years ago they were building very good stuff.
Surround sound is a gimmick. Sometimes it produces impressive results, but not always.
As bad a metric as THD is, good speakers report THD in the 1-2% range.
Electrostatics are much better, but cost as much as a house, are huge and won’t fix the room.
It’s not just clipping, speakers will distort most at low volumes too.
Everything is complicated, crossovers, enclosures, ports.
You need a good microphone to measure a speaker, but it’s not theory.
Have fun with Technics…waste of effort IMHO.
Same as all Matsushita brands, just different labels, same factory.
Harmon Kardon made good amps at not too insane prices.
Surround sound is about the production quality, but even in 5 channel stereo mode the room will sound better.
Stereo is also a ‘gimmick’.
This is the third time I’m trying to post this, after the first two times apparently going into the bit bucket. I wonder what’s going on. Fortunately I kept a copy, so I don’t have to re-type it.
Thank you for pointing that out. I was at a Brüel & Kjaer seminar years ago where the presenter demonstrated all kinds of things that skewered the sacred cows of the “golden ears” people. One thing he demonstrated was two speakers that both had 5% distortion, but one had a coil rub and the other was in good condition, and one speaker sounded good and the other one sounded absolutely horrible, both at 5%. In the days of tape recorders, the level a type of tape could handle, expressed in nanowebbers, was, IIRC, the level where the distortion was 3% when you adjust the bias by finding where the output peaked, and then continue increasing the bias until the output dropped by 3dB. (I worked constantly with tape recorders at TEAC, and have time in professional recording studios too, but that was over 40 years ago, so I might need a little review.) Anyway, yes, “Chasing decimals on amplifiers first is misspent energy and money” is true, and I remember thinking the same thing when I’d see ads in the magazines for amplifiers with .005% distortion or less.