
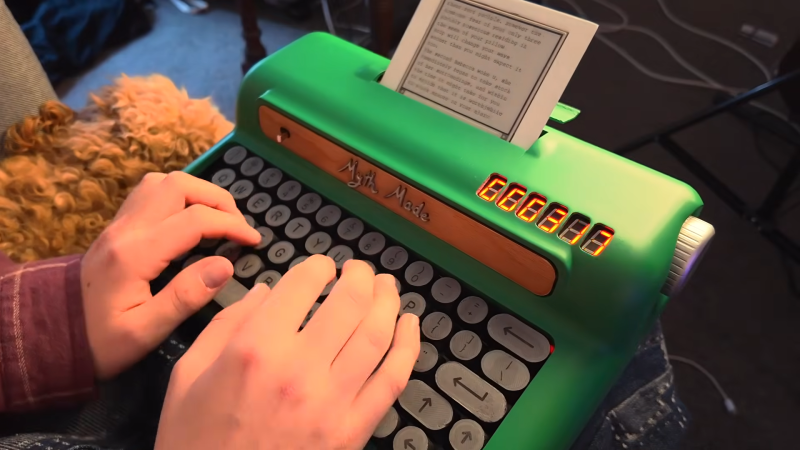
[Myth Made] has a goal to get into writing. However, she likes to do things the aesthetic way, rather than the easy way. Thus, she has eschewed simple word processing on a conventional computer, instead choosing to build a remarkably attractive writing deck styled after a classic typewriter.
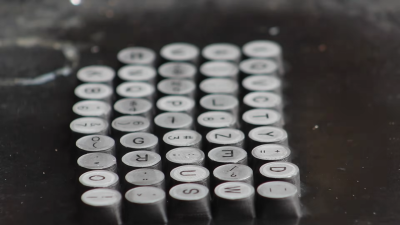
The build began with a mechanical keyboard with a compact layout. The square keycaps were swapped out for custom 3D printed versions that were rounded to suit the desired look. [Myth Made] used a neat technique where the caps were colored in with a paint marker and then ran through a laser engraver to bond the paint to the surface to make all the key markings.
With the input side sorted, the rest of the build could progress. The typewriter shell was printed in multiple parts, and then welded together with acetone. This was then covered with an ABS-acetone solution that helped remove some of the surface artifacts, before priming and paint. As for the electronics side, a Raspberry Pi Zero runs the show, hooked up to a Waveshare e-ink display which can be cranked up and down like a piece of paper coming out of a typewriter. There’s also a lovely 7-segment display which displays the current word count.
It’s a fun build that looks utterly joyous to use. Sometimes leaning into the aesthetic side of a project is what makes it so magical.












Distraction free? I would be typing in various words with hyphens, apostrophes and dots after abbreviations to see if I could fool the word count!
Then maybe, just maybe, you’re not a writer.
One of my (admittedly lame) excuses has always been “Nobody makes the keycaps I want”.
Now, I will have to blame my lack of a 3D printer.
Or my desire for multi-color keycap legends.
With relatively affordable 3d printers now the multi-colour is pretty trivial (though usually rather wasteful on filament for the cheap ones). So that excuse isn’t much of an enchantment to your admittedly lame excuses…
Though I think for doing keycap legends I’d be wanting to use a resin printer and printing the legends as a void – fill each one with dyed UV resin or Epoxy after the bulk colour print – FDM printers do look pretty good and smooth if you want them to, and can be post processed for an even better finish, but resin prints are so so much smoother and effectively higher resolution.
If you know what you want these days owning the printer is pretty much entirely optional too – just send it out to a printing service. So might I suggest your lame excuse should be “But I haven’t done the 3d modelling in CAD yet” (hopefully with additional riders of because you don’t know how to use CAD, or can’t afford your own licence of the one you do know).
Great project, hacking a keyboard into a retro looking configuration like that.
Clever! That’s really cool!
Kolchak 2.0