
In previous installments of this series we looked at how creating a DIY router using an e-waste-level PC has changed over the years, before attempting to boot OpenWrt for x86 on it. After an initial SD card booting failure on one system, another system with a newer mainboard – an Intel Board D2500CC – was used which happily booted OpenWrt from an SD card inserted into a USB card reader.
Unfortunately, OpenWrt didn’t see any usable Ethernet interfaces despite having no less than four Intel Ethernet controllers and two hooked up to active networks. After recently getting back to the project, I found out why both onboard Intel 82574L Ethernet controllers didn’t show up in OpenWrt: the drivers for the Intel 82574L controllers are in the e1000e driver package, while only the e1000 package is present in the provided x86 image. This issue persists in the ‘generic’ image profile to this day.
Yet rather than diving head-first into building my own image that includes the kmod-e1000e package, I decided to give OPNsense a shake first.
All The Features
Suffice it to say that OPNsense is a whole different galaxy compared to the cheerful-and-light OpenWrt. Rather than targeting just being a basic router, you instead get access to a feature list where it’s probably faster to start asking what it doesn’t do. This FreeBSD-based software specifically takes aim at commercial products offering firewall, network traffic analysis and routing as well as network security features, with plugins adding features that probably has the average network admin salivating.
Although only the tiniest bit of overkill when you merely want to set up a consumer-grade network router, not to mention possess just enough network administration skills to not injure yourself while running the setup wizard of a router and plugging in Ethernet cables, it’s still a nice fuzzy warm feeling to know that you have all this power at your fingertips should you ever need it.
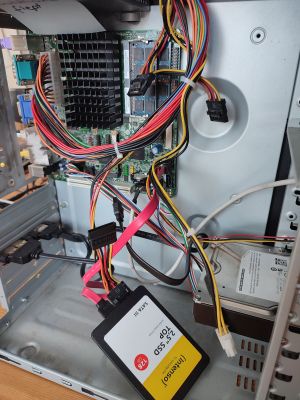
The Get Started page for OPNsense is also rather reassuring, promising that the lowly 2012-era Intel Atom D2500CC board with its dual 1.8 GHz cores will do just fine. Although only 2 GB of DDR3 is installed, DDR3 SODIMM sticks are still plentiful and relatively affordable, so it’s easy to hoard have a strategic reserve of them for upgrading older systems to 4 GB and beyond if they support it. Surreptitiously closes drawer with RAM hoard
Storage-wise a 4 GB SD or CF card is considered the minimum, with a 120 GB SSD recommended. Considering that I’ll be living large with OPNsense I decided to splurge on a whole 128 GB SATA SSD here in the midst of a supply crisis no less. This way it should be possible to install OPNsense from a USB stick and be up and running without the limitations of running a ‘nano’ image off an SD card or similar.
The exciting aspect here is that while the D2500 Atom CPU is technically a 64-bit CPU and should run 64-bit Linux quite all right if the mainboard also supports it, the x86_64-only focus of OPNsense makes this a make-or-break aspect. Will I need to break out Yet Another E-Waste PC to make this work? Stay tuned.
Deployment Time
The instructions on the OPNsense ‘Get Started’ page are a bit vague on which image to use exactly, with the DVD ISO, VGA, Serial and Nano images all having apparently specific goals and purposes that aren’t easy to decipher once you try to figure out what exactly is different between the ‘DVD’ and ‘VGA’ image. Some searching with DuckDuckGo later and the found suggestions – including deeper in the full documentation – pointed me to the ‘VGA’ image. This .img file needs to be extracted from the .bz2 archive before it can be written with Rufus or similar to a USB stick.
Fortunately this half-guess at the right image turned out to be the correct one, as the system booted right into the live image, also putting to rest initial fears of the system rejecting the modernity of 64-bit. Amusingly, the installer works by logging into the live session’s login as installer rather than root with the same opnsense as the password, which is only mildly awkward when you find yourself staring at a login prompt for installing an OS.
A mere eleven minutes and forty-five seconds of OPNsense live session uptime later, the installation was finished and I was asked to remove the USB stick and reboot to admire the glory that is OPNsense. Meaning mostly to do first-time setup things and make sure that everything that should work also does so. Would the system even boot?
First Boot
With some level of trepidation, I pushed the power button on the front of the case, only to see it cycle through all the typical happy FreeBSD things, albeit it all distorted since the portable monitor I used hates 640×480 as resolution for some reason. I had opted for the typical ZFS filesystem option during installation, along with basically all the other defaults. The only thing that I was uncertain about was whether it would pick the right Ethernet port as the WAN port by default or that I’d have to reassign it.
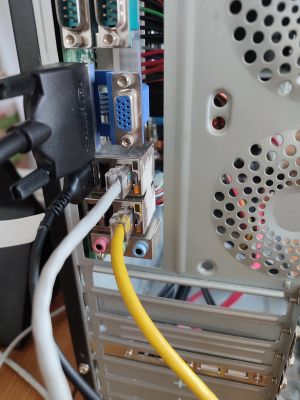
This fear turned out to be unfounded, with what turned out to be the second interface (em1) – which I had plugged into an active LAN connection – being assigned the WAN role, leaving the second interface (em0) as the brand new LAN’s interface. By default OPNsense assigns clients on this LAN interface /24 style addresses with the router and DHCP server found on 192.168.1.1. Clients are assigned addresses in the range of 192.168.1.100-200.
As an aside, I really appreciate how OPNsense announces major state changes like finishing booting and going down for a reboot/shutdown result in the running of a beep script which creates a fanfare that even a half-deaf network admin working at the other side of a busy server room would be hard-pressed to miss. This isn’t a joke, I really appreciate clear signaling for anything that warrants those in the room to be 100% aware of this fact.
With a happy UP message on the em1 WAN interface, and happily blinking LEDs on the WAN interface, it was time to plug a client into the new LAN port to see whether I now had a real internet router.
Speed Testing
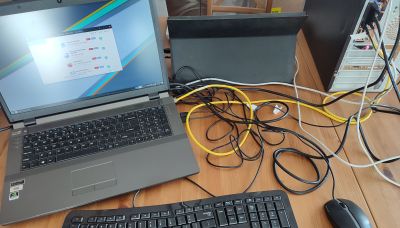
Rather than drag out a newer PC or laptop, I used my 2013-era gaming laptop running Manjaro. This makes it about the same age as the Intel board in the new OPNsense router, though both are clearly useful in a different way. Fortunately both systems were more than happy to see each other, with plugging in a new Ethernet cable between the two immediately popping up a confirmation pop-up in Manjaro about an Ethernet connection.
It being Arch-based, the first thing to test was updating Manjaro with what turned out to be nearly a gigabyte of updates. A few minutes later this was all downloaded and the laptop’s fan was kicking in as if to tell everyone to slow it down somewhat. Clearly it was time to run some comparative benchmarks with other systems not trapped behind this new OPNsense router.
Here I got some slightly funny results, which might be more due to how unreliable browser-based internet speed tests are. First using fast.com in Firefox I got a piddly 61 Mbps up and 23 down, which had me somewhat worried, yet when I ran over to my regular PC to run the same test in the Firefox ESR-based Waterfox, I got a very similar score at 55/36.
As a sanity check I benchmarked then with speedtest.net, which gave the Manjaro laptop a big thumbs up with 184/187 Mbps, which is closer to what my ISP claims is a ~300/150 Mbps connection. On my PC with Waterfox I got lower again the first time, but the second time it was much higher and closer to the result on the Manjaro laptop. It’s all relative, I guess.
I also checked the speedtest.net app on my Android phone using the regular Wi-Fi access point and got a happy 163/142 Mbps, so whatever is going on, it’s probably due to JavaScript or browser compatibility or similar shenanigans as are about 90% of all network issues these days.
Happy Routing
Either way, the connection on the Manjaro laptop in Firefox via the OPNsense router was stable over the course of an hour, with the speedtest claiming a 16 ms ping and so far no issues detected. I’ll definitely have to figure out a better way to benchmark the connection, and also to remember to check the system load on this newly minted OPNsense system, but so far it’s been an astoundingly and happily boring experience.
There are also a lot more features in OPNsense that are begging to be explored further, for which I’ll gladly take requests since me and professional networking equipment are at most on a neighbor-level of acquaintance. For some reason diving into OPNsense does feel like at some point you absolutely have to get that 19″ rack to fit in with the club.












Noice I enjoyed this write up – only thing for me missing is isp provider details for me it was the trickiest of all the initial get up and go settings but this is very dependent on whom you use, I bought an Intel 4590t and an equally old motherboard, the only thing I couldn’t find myself scrimping on was the case, if anything my router has to look nice no matter how large it is, a repurposed node 202 in my case. I’ve had very little issues running opnsense on old hardware and enjoyed the whole experience – was a little more complex running inside proxmox so I could also do other stuff but away to repurpose and migrate opnsense to a mini Lenovo thinkcentre m720q. Felt more connected to my network, less reliant on isp provided gear. My request would be a write up on comparisons of different ways opnsense allows for you to connect to home network from remote with maybe a why you would choose one over the other. I personally utilise netbird now it has opnsense integration. Anyway cheers 🍻
Quite a big box. I prefer dirt-cheap “thin clients” for that purpose, as many have already 4GB or 8GB RAM, 64 or 128GB SSD, a low-end dual or even quad-core x86, and two Gbit Ethernet interfaces. They are super compact, consume little power, and are fanless.
The Atom boards were used in a device category called “nettops”.
By the 2010s that was a type of low-end desktop PCs (mini PCs) usually running Windows XP or 7.
They mainly ran the 32-Bit editions, because the UEFI was 32-Bit (with CSM)
and because the integrated hardware (laptop hardware) was so old it had no 64-Bit drivers.
Unlike thin clients of that era, they usually had lacked traditional ports (IDE, RS232, LPT) and standard hardware.
The matching mini laptops were called “netbooks”, by the way.
https://en.wikipedia.org/wiki/nettop
https://en.wikipedia.org/wiki/Netbook
I recently rescued an Engenius ESG620 – cloudy managed router.
Ships with a vendor neutered Opnsense that does nothing until registered with their cloud.
Intel C2558 Quad-core (Denverton)
8GB DDR4
16GB eMMC
2x X550 SFP+ ports
8x I226-V 2.5G copper ports (4x support PoE+ / 802.3at)
1x USB 3.0 port
1x RJ45 Serial port
Sadly everything soldered on-board, other than unpopulated pads for an M.2 slot, no expansion.
But critically, no secure boot.
BIOS is crippled with no forms enabled to change anything, including boot order – but some reverse engineering later, the only gate was uEFI looks for a particular vendor named file on any USB stick before it considers it a boot candidate.
Now happily booting VyOS, compiled denverton pinctrl module for GPIO to manage LEDs; fan control via the LM96163 (lm63 module needed fixes backporting from later kernel) and PoE just via I2C pokes from the fully documented datasheet floating around.
I love rescuing enterprise stuff that’s either EoL or locked into vendor cloudy rubbish.
s/C2558/C3558/
Nice accomplishment! Will you be publishing your how-to guide for the benefit of, say, other HaD readers who’ve read this article & your comment and realized that their current router is dumber than a bag of rocks?
And yes, vendor cloud-locking can DIAF.
+1, would be glad to know how to replicate that but even more how did you manage to discover that!
I really should start a blog or even just some github repos.
I reverse engineer all sorts from routers/firewalls to car radios – whatever piques my interest / intrigue at the time but rarely publish anything.
(My favourite was rooting an IP cam via a QR setup code – I did bother to publish that one, aQRootG3)
For this device, was something like:
1. Unpack firmware update (simple 8 byte XOR)
2. Find the crippled shell assigned to the “admin” user
3. Find a bug in said shell to gain root
5. Backup whole eMMC to USB (there are some per-device certs on 1 partition)
4. Dump bios (was mapped to /dev/mem)
5. Prod various uEFI vars before realising the Insyde bios is crippled
6. Manually set USB as boot device via efibootmgr to prove it boots
7. Dig into eUEFI modules from dump for “BootOrder”
8. Find a check for “/EFI/BOOT/sngwusbbootvalidation” that promotes USB over eMMC
9. Remove manually added efibootmgr vars and try with sngwusbbootvalidation
10. Great success.
(“sngwusbbootvalidation” < OEM of the device is Senao so assume sngw = Senao Gateway?)
Then go back to the unpacked firmware to find how/where LEDs/Fans are setup (thankfully just a series of bash scripts) and see how that compares to mainline linux.
The LM96163 needs programming at every cold boot (there’s no eeprom) – so there’s no thermal management until set.
There is a flag you can actually set to put the box into “developer mode” once you’ve got root on the stock firmware that does re-enable the stock opnsense UI – for many that’s probably enough to make the boxes useful again.
As you age, the will to document things or even apply for the CVE for your discoveries diminishess verses the will to deal with all of the bs associated with it and the total lack of benefit to one’s self.
I have increasingly found that to be the case. Although I do wish my documentation was better – looking back on old projects, at the time I remember it making perfect sense; now, sans context, not so much. And certainly the case with some CVE-worthy bugs where having them patched would be detrimental to my needs so I keep them to myself (sorry Garmin).
My first e-waste router was a 486sx running IPcop and a pair on NE2000 cards. This was 2003 so our cable was a whopping 3mbps — but it handled torrents great!
IPcop ftw.
Win98. Cable modems.
Dropping a text file on someone’s desktop explaining what a firewall was to someone whose pc kept trying to hack you.
Why not but a MikroTik and flash it with OpenWRT instead? It would be cheaper, better suited for the job and more energy efficient.
I started looking at opnsense because their update story looks a lot more coherant than openwrt’s.
For sake of history: Advanced users or gamers in late 2000s DID install SSDs in their PCs.
It wasn’t mainstream yet, but it happened.
The SSDs were early models, with a just a few GBs (below 16GB), sure, but they were in ordinary 2,5″ format.
There were small metal adapter plates to mount 2,5″ devices in 3,5″ drive bays, for example.
Some users simply used double-sided tape, simply, I assume.
Or let’s take those dummy SATA HDDs that looked like 3,5″ HDDs from outside but had a 2,5″ mounting inside.
They were useful for computers like Mac Pro 2006 and similar, which had HDD mounting plates designed for SATA HDDs.
Or… instead of physical hardware… OPNSense works just fine in a Proxmox VM. I just stuck an additional 2-port ethernet card in mine and dedicated the whole card to Proxmox via PCI-passthrough.
I was skeptical at first but it works great! At any given time there are probably three people in the house streaming video plus me doing whatever I am doing. No slowdowns.
Advantage… only one PC using your electricity, producing heat and wearing itself out instead of a rack full of servers.
OPNsense most definitely doesn’t run just fine in a proxmox vm – google why, it’s to do with the poorly supported NETBSD roots.
Not sure where you got that idea. I’ve been running OPNsense in a Proxmox VM for years, no problems. OPNsense isn’t based on NetBSD either; it’s built on FreeBSD. In the past it was using “HardenedBSD” but they went back to standard FBSD a while ago.
Hey, actually I’ve done thatas well, but I observe CPU spikes and performance drop down on a gigabyte link. This is a single board of, a Zotac something. I’ve 2 motherboards NICs, vlans on each ports (10 vlans) , and each network is exposed on Linux bridges. The 2 NICs are LACP bonded. Then opensense main and secondary (with net virtio) attach to those bridges . Also I use libvirt/qemi instead of proxmox.
My question: do you observe performance issues on speed test ? I use iperf3 on each testing hosts. What I see, is VM CPU spike, and then if stress is too long, complete loss of connectivity. For me, I have a bottleneck on virtualized vlan/routing + 30 fw rules. But I’m open on any feedbacks :)
Same here, OPNSense running under Proxmox on a HP Elitedesk 800 G4. 4 ports intel cards PCI passthrough. Runs great with a bunch of other VM’s….
I’ve run OpenWrt as a wired router on x86 without a problem – the issue comes with wifi!
Why are so many of you guys using powerful x86 computer own routers? Do you all have gigabit fibre internet connections? Or is it just to access NAS/other devices locally?
Hi, my guess is it might have to do with this:
https://hackaday.com/2026/03/24/us-fcc-prohibits-approval-of-new-foreign-made-consumer-routers/
Besides that, homebrew DIY routers were common in late 90s and early 2000s.
I remember that Fli4l was popular where I live, for example.
https://en.wikipedia.org/wiki/Fli4l
Commercial routers of the 90s not seldomly used 486 variants, such as 486SXL2.
So both low power consumption and processing power were good.
Yes, I do…
And they are also useful as you can use it as a nas, VPN, etc etc…