A Z80 Retro Microcomputer For The Papilio Pro FPGA Board

z80

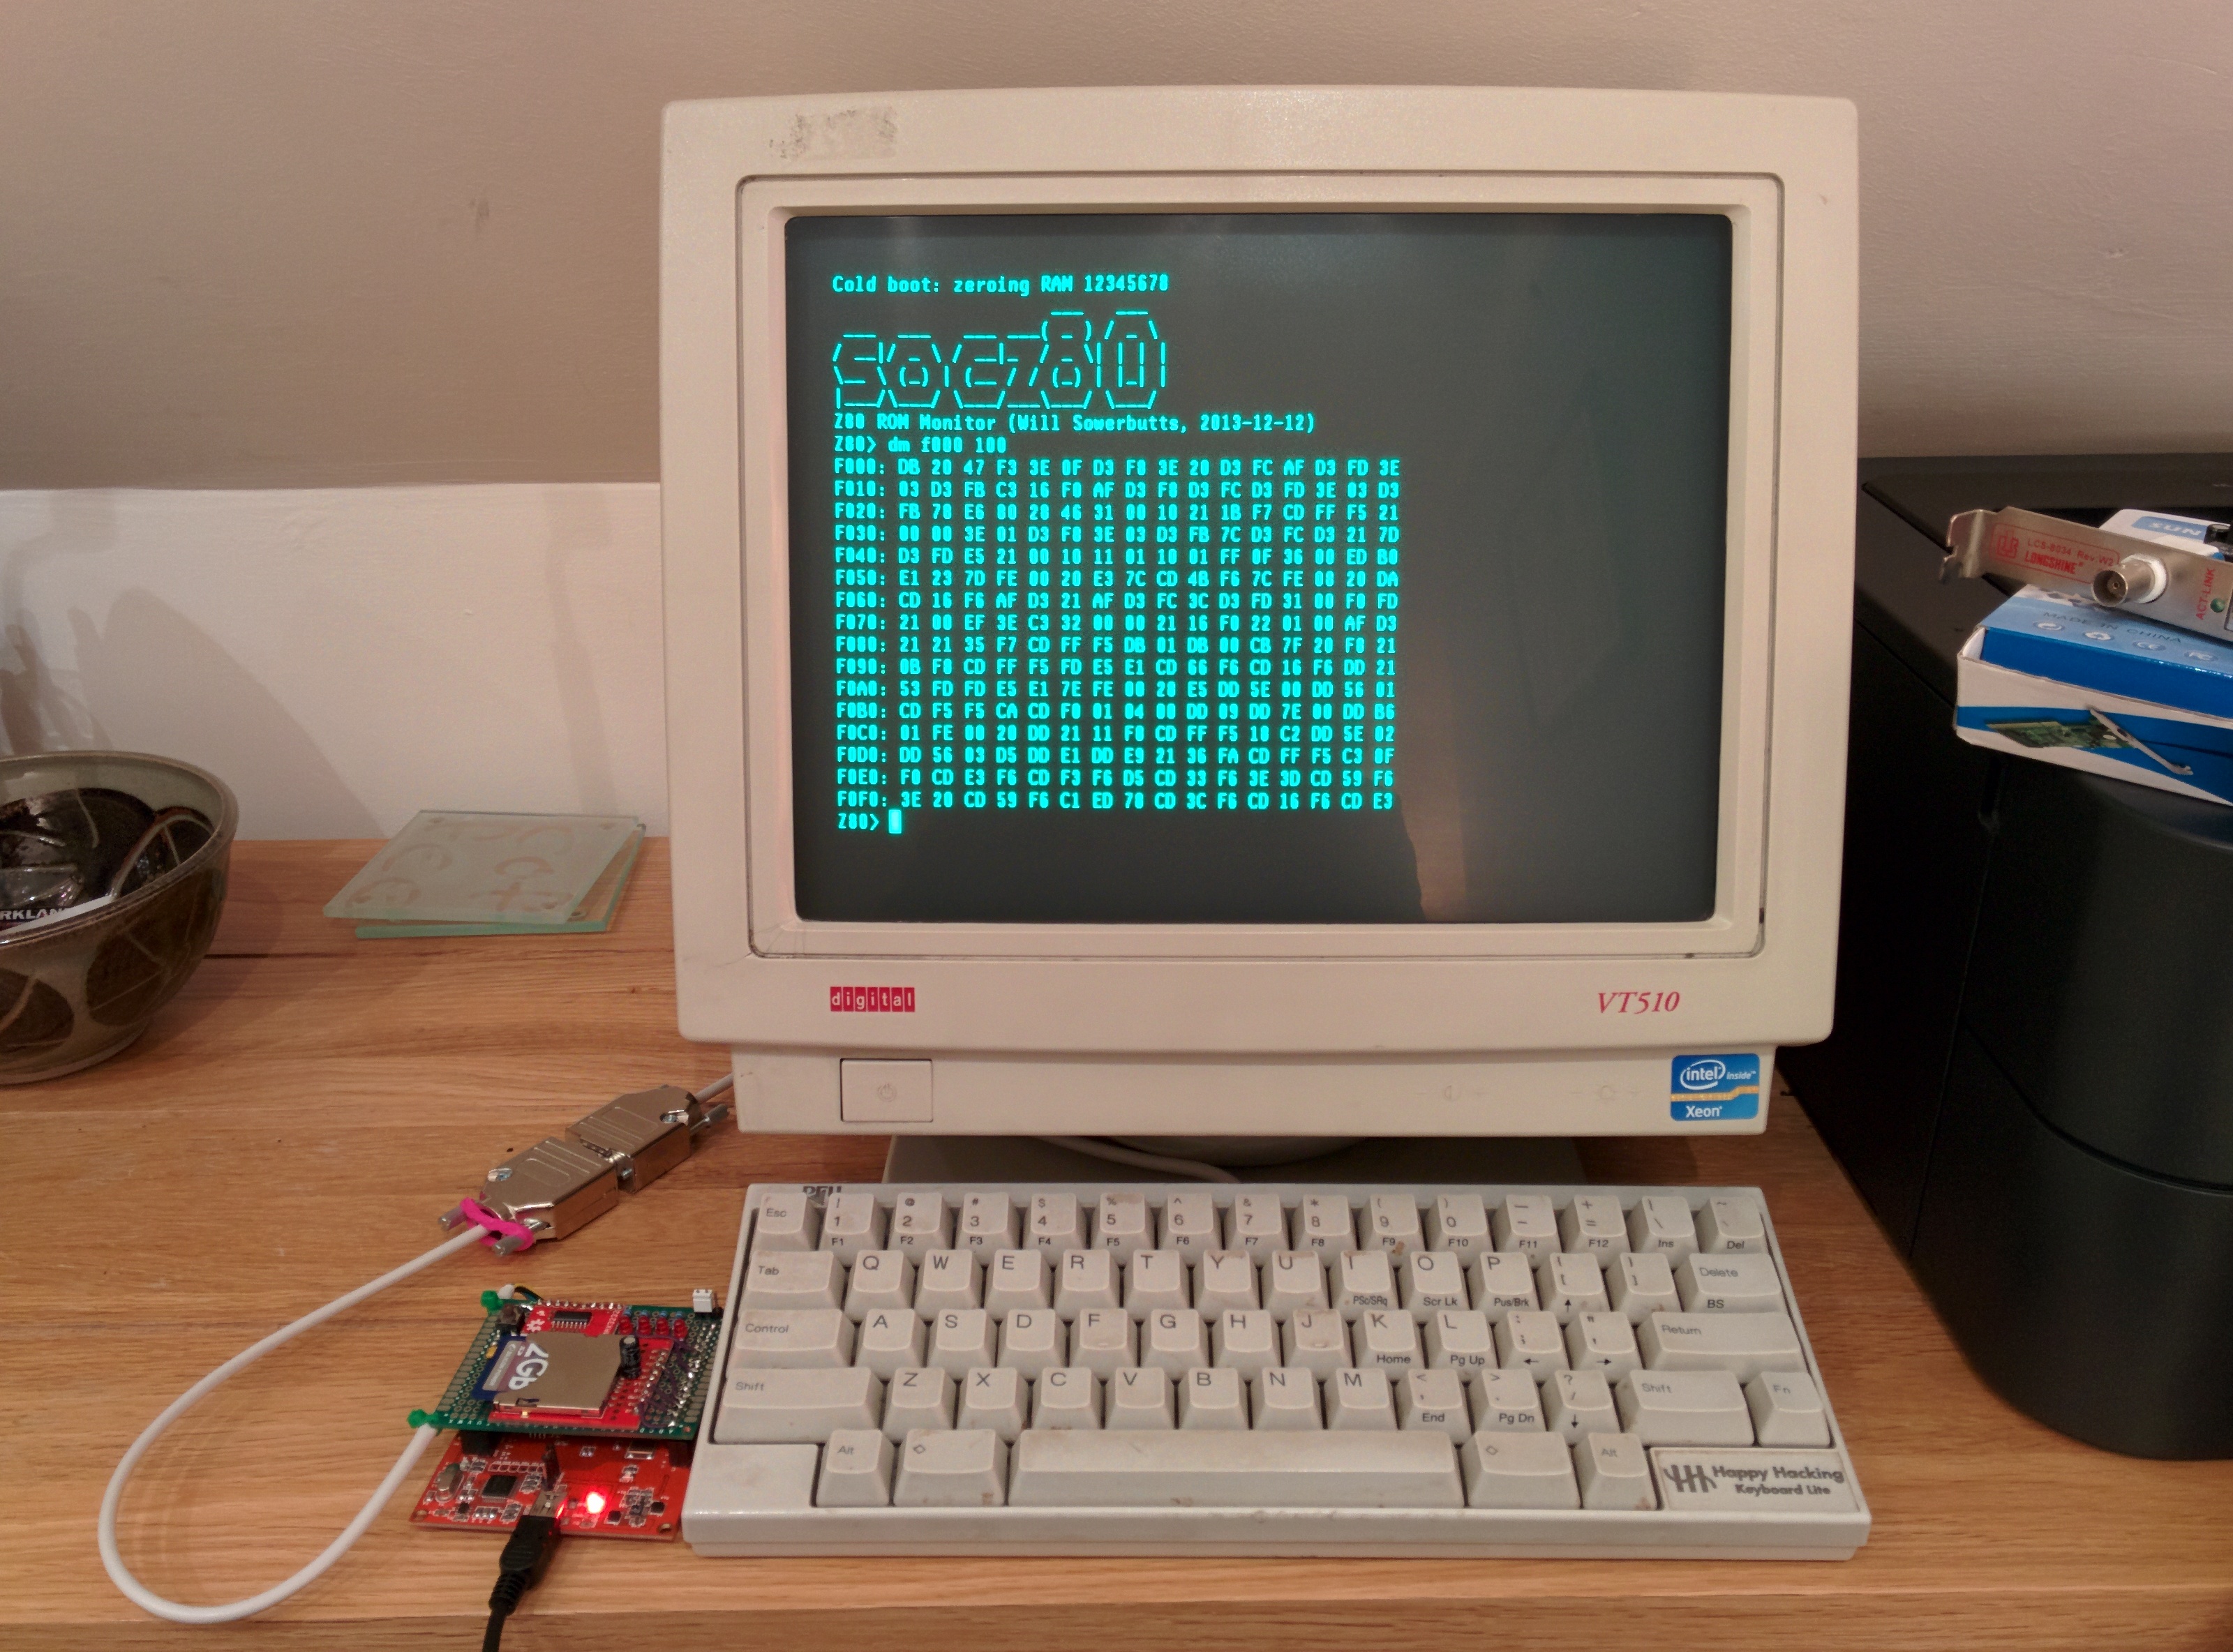
[Will] wrote a 128MHz Z80-based retro microcomputer which runs on a Papilio Pro board. For those who don’t know, the latter is built around a Spartan-6 LX9 FPGA so you may imagine that much work was required to implement all the computer features in VHDL. The T80 CPU core was taken from opencores, the SDRAM controller was imported from Mike Field’s work but [Will] implemented several additional functions on his own:

– a 4KB paged Memory Management Unit to translate the 16-bit (64KB) logical address space into a 26-bit (64MB) physical address space.

– a 16KB direct mapped cache to hide the SDRAM latency, using the FPGA internal block RAM

– a UART interface for external communications

He also ported CP/M-2.2, MP/M-II and UZI (a UNIX system) to the computer. His project is completely open-source and all the source code can be downloaded at the end of [Will]’s write up.

Thanks [hamster] for the tip.

UMotio: An Arduino Compatible 3D Gesture Controller

uMotio

The Mooltipass project USB code contributor [Tom] and his friend [Ignatius] recently launched their Indiegogo campaign: meet the 3D gesture controller uMotio (Indiegogo link). As [Tom] has been spending much of his personal time helping the Mooltipass community, we figured that a nice way to thank him would be to try making their great open project one step closer to a disseminated product.

As you can see in the video embedded after the break, the uMotio is a plug and play system (detected as a USB HID joystick & keyboard with a CDC port) that can be used in many different scenarios: gaming, computer control, domotics, music, etc… The platform is based around an ATMega32u4 and the much discussed MGC3130 3D tracking and gesture controller. This allows a 0 to 15cm detection range with a resolution of up to 150dpi. uMotio is Arduino compatible so adapting it to your particular project can be done in no time especially using its dedicated expansion header and libraries. The uMotio blue even integrates an internal Li-ion battery and a Bluetooth Low Energy module.

Continue reading “UMotio: An Arduino Compatible 3D Gesture Controller”

A High-Speed Logic Gate Board For The Easy-Phi Project

A (long) while ago I presented you the Easy-phi project, which aims at building a simple, cheap but intelligent rack-based open hardware/software platform for hobbyists. With this project, you simply have a rack to which you add cards (like the one shown above) that perform the functions you want.

During these last months my team has been finishing the design and production of several different boards so I’ll start showing them off during these next weeks. Today I present you the High Speed Logic Gate Board, a quantum-physicist requested easy-phi module that can perform logic AND/OR functions at <2GHz speeds. This quite technical write-up is mainly about the constraints that high-speed signals pose for schematics design but is also about the techniques that are used for HS signals termination and monitoring. I hope, however, it’ll give our readers a nice overview of what the insides of a high-speed system may look like. All the files used for this board may be found on the official GitHub repository.

Developed On Hackaday: Vote For Your Favorite Card Art

A few weeks ago we asked our dear readers if they were interested in coming up with some card art for the Mooltipass project. We received more than a dozen of them and a few days ago the HaD project Mooltipass followers/Mooltipas Google group recipients voted for their favorite ones.

Today we’ll present you the three popular ones and ask you to pick your favorite, so please follow us after the break…

Continue reading “Developed On Hackaday: Vote For Your Favorite Card Art”

A LIN Bus Signal Injector

LIN bus signal injector

[Zapta] tipped us about his latest project: a LIN bus signal injector. For our unfamiliar readers, the LIN bus is a popular automotive bus that is used to interface with buttons, lights, etc. As [Zapta] was tired of having to press the Sport Mode button of his car each time he turned the ignition on, he thought it’d build the platform shown above to automatically simulate the button press.

The project is based around an ATMega328 and is therefore Arduino IDE compatible (recognized as an Arduino Mini Pro), making firmware customization easy. In the car, it is physically setup as a proxy between the LIN master and the slave (which explains the two 3-wires groups shown in the picture). It is interesting to note that the injection feature can be toggled by using a particular car buttons press sequence. The project is fully open source and a video of the system in action is embedded after the break.

Continue reading “A LIN Bus Signal Injector”

Measuring Frequency Response With An RTL-SDR Dongle And A Diode

[Hans] wanted to see the frequency response of a bandpass filter but didn’t have a lot of test equipment. Using an RTL-SDR dongle, some software and a quickly made noise generator, he still managed to get a rough idea of the filter’s characteristics.

How did he do it? He ‘simply’ measured his noise generator frequency characteristics with and without the bandpass filter connected to its output and then subtracted one curve with the other. As you can see in the diagram above, the noise generator is based around a zener diode operating at the reverse breakdown voltage. DC blocking is then done with a simple capacitor.

Given that a standard RTL-SDR dongle can only sample a 2-3MHz wide spectrum gap at a time, [Hans] used rtlsdr-scanner to sweep his region of interest. In his write-up, he also did a great job at describing the limitations of such an approach: for example, the dynamic range of the ADC is only 48dB.

Building A Mesh Networked Conference Badge

[Andrew] just finished his write-up describing electronic conference badges that he built for a free South African security conference (part1, part2). The end platform shown above is based on an ATMega328, a Nokia 5110 LCD, a 433MHz AM/OOK TX/RX module, a few LEDs and buttons.

The badges form a mesh network to send messages. This allows conversations between different attendees to be tracked. Final cost was the main constraint during this adventure, which is why these particular components were chosen and bought from eBay & Alibaba.

The first PCB prototypes were CNC milled. Once the PCB milling was complete there was a whole lot of soldering to be done. Luckily enough [Andrew]’s friends joined in to solder the 77 final boards. He also did a great job at documenting the protocol he setup, which was verified using the open source tool Maltego. Click past the break to see two videos of the system in action.

Continue reading “Building A Mesh Networked Conference Badge”