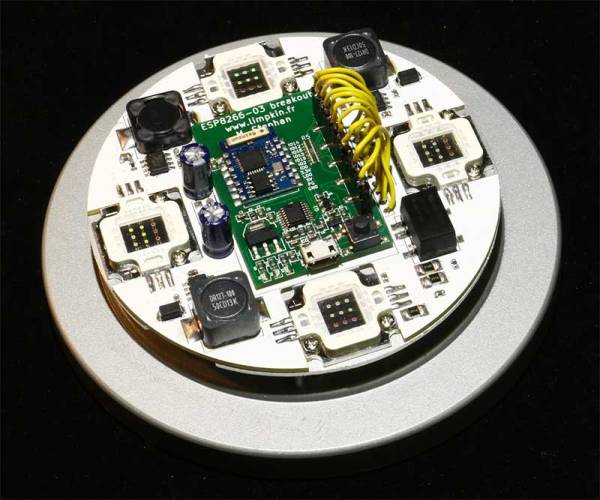
[Limpkin], aka Hackaday alum [Mathieu Stephan], is at it again, converting an IKEA lamp into a visual wake-up light. He wants to build an alarm that can be remotely triggered, He’s basing this project around a combination of an ESP8266 that handles the communication and timing, and a pile of 10-watt RGB LEDs. However, he is having a problem: every time he initializes the PWM (pulse width modulation) signalling that will control the level of the LEDs, his ESP8266 dev board reboots. So, he’s offering an interesting bounty for the person who finds the issue: figure it out and he will send you the lamp. Well, the PCB and components, anyway: you’ll have to add your own IKEA lamp. It’s an interesting approach to debugging a hardware problem, so feel free to take a look. The full hardware and software details are on his GitHub repository.
limpkin19 Articles
A Breakout Board For The ESP8266-03
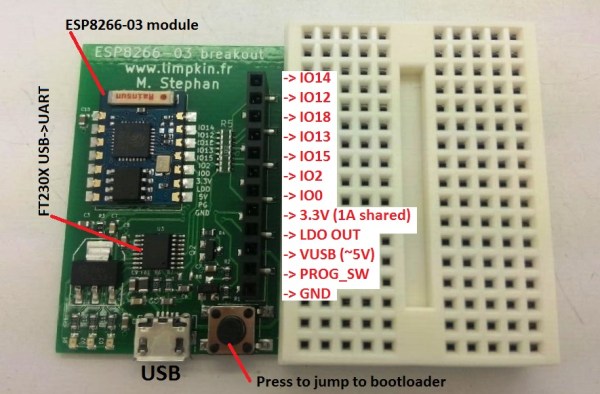
In the last few weeks we have been seeing a lot of ESP8266 based projects. Given this WiFi module is only $3 on Ebay it surely makes sense using it as an Internet of Things (IoT) platform. To facilitate their prototyping stage I designed a breakout board for it.
The board shown above includes a 3.3V 1A LDO, a genuine FT230x USB to UART adapter, a button to make the ESP8266 jump into its bootloader mode and a header where you can find all the soldered-on-board module IOs. One resistor can be removed to allow 3.3V current measurement, another can be populated to let the FT230X start the bootloader jumping procedure. All the IOs have 1k current limiting resistors to prevent possible short-circuit mistakes. Finally, the board deliberately doesn’t use any through hole components so you may put double-sided tape on its back to attach it anywhere you want. As usual, all the source files can be download from my website.
Developed On Hackaday: Crowd- Funding Campaign Start!
For a little less than a year open source enthusiasts from all over the globe got together to work on an open source offline password keeper. We narrated our progress here on Hackaday and always asked our readers’ opinion when critical decisions were to be made.
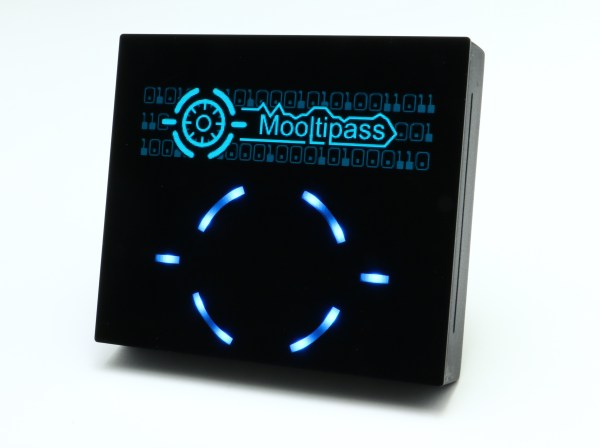
Today, the wait is finally over: the Mooltipass crowdfunding campaign finally arrived.
In some of our Developed on Hackaday series posts we noticed that it was tricky for us to convey the benefits of the device we were developing. The first 3 minutes of our video therefore explain good security practices and how the Mooltipass can help users with their credentials security. For our readers that may not have followed our adventure since its beginning, the campaign’s text will provide them with a simple (yet detailed) explanation of what the Mooltipass can do. Finally, our geeky readers will find at the end of our write-up a few links supporting our claims. We would have liked offering cheaper pledges but we unfortunately need to hire professional javascript developers to finish our app & extension.
Our Mooltipass Developed on Hackaday series therefore come to an end. We would like to thank you for your support and hope that you enjoyed seeing an idea materialize into a crowdfunding-ready product!
Developed On Hackaday: The Answer Is Below
In one month the Mooltipass offline password keeper project will be one year old.
We hope that our twice a month Developed on Hackaday series posts allowed our dear readers to see what are the steps involved in a device’s life, going from idea to prototype to crowdfunding-ready product. The Mooltipass is the fruit of a unique world-wide collaboration around open source, developed by and for security minded people who (for most of them) never saw each other. Relating our progress here enabled us to benefit from our readers’ feedback and make sure that we didn’t miss important wanted features. Contrary to other campaigns that we often debunk on Hackaday, we preferred to wait until we had a beta-tester approved device to move to the crowdfunding stage. Our geekiest readers will therefore find the launch date embedded in this post, other may want to subscribe to our official Google group to stay updated.
Mooltipass Installation Process Is Now Dead Simple
In a few weeks the Hackaday community offline password keeper will reach a crowdfunding platform. This is a necessary step as only a high production volume will allow our $80 early bird perk target. We’ll therefore need you to spread the word.
Thanks to the Chromium development team, a few days ago the Mooltipass installation process became as simple as installing our app & extension. As you may remember, our device is enumerated as composite HID proprietary / HID standard keyboard. This makes it completely driverless for all operating systems and enables standalone operation as the Mooltipass can type logins and passwords selected through its user interface. Management communications are therefore done through the Mooltipass HID proprietary interface, which Chrome 38 now natively supports through its chrome.hid API. The simpler our installation process is, the more likely the final users will appreciate the fruit of our hard labor.
As our last post mentioned there’s still plenty of space for future contributors to implement new functionalities. Our future crowdfunding campaign will allow us to find javascript developers for the remaining app & extensions tasks and also implement other browsers support. Want to stay tuned of the Mooltipass launch date? Subscribe to our official Google Group!
Using A Standard Coil For NFC Tag Implant Reading
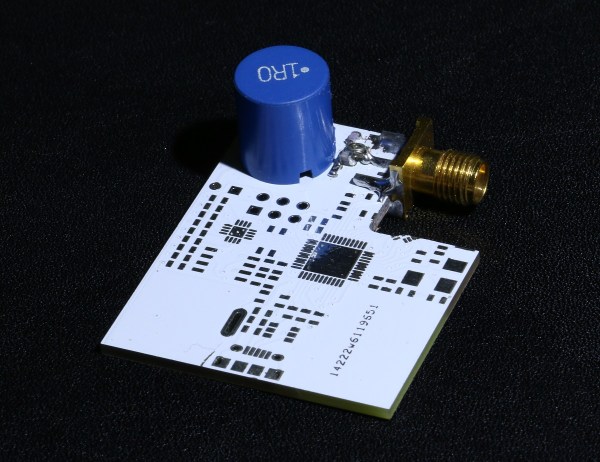
A few months ago Hackaday covered the xNT crowdfunding campaign which aimed at making an NTAG216 based NFC implant for different purposes. I actually backed it, found that standard NFC readers don’t perform well and therefore decided to try using a standard coil as an antenna for better reading performances.
Most NFC readers typically only have a small sweet spot where implant reading is possible. This is due to what we call coupling factor which depends on the reading distance and reader & NFC tag antenna geometries. Having a smaller antenna diameter increases the coupling factor and makes implant positioning easier.
In my detailed write-up you’ll find a good introduction to impedance matching, a process where a few passive components are added in series/parallel with an antenna to bring its complex impedance close to a RF signal transmitter’s. This usually requires expensive tools but allows optimal power transmission at a given frequency.
You may find our xNT coverage here.
Developed On Hackaday: Sometimes, All You Need Is A Few Flags
The development of the Hackaday community offline password keeper has been going on for a little less than a year now. Since July our beta testers have been hard at work giving us constant suggestions about features they’d like to see implemented and improvements the development team could make. This led up to more than 1100 GitHub commits and ten thousand lines of code. As you can guess, our little 8bit microcontroller’s flash memory was starting to get filled pretty quickly.
One of our contributors, [Miguel], recently discovered one compilation and one linker flags that made us save around 3KB of Flash storage on our 26KB firmware with little added processing overhead. Hold on to your hats, this write-up is going to get technical…
Many coders from all around the globe work at the same time on the Mooltipass firmware. Depending on the functionality they want to implement, a dedicated folder is assigned for them to work in. Logically, the code they produce is split into many C functions depending on the required task. This adds up to many function calls that the GCC compiler usually makes using the CALL assembler instruction.
This particular 8-bit instruction uses a 22-bit long value containing the absolute address of the function to call. Hence, a total of 4 flash bytes are used per function call (without argument passing). However, the AVR instruction set also contains another way to call functions by using relative addressing. This instruction is RCALL and uses an 11-bit long value containing the offset between the current program counter and the function to call. This reduces a function call to 2 bytes and takes one less clock cycle. The -mrelax flag therefore made us save 1KB by having the linker switch CALL with RCALL instructions whenever possible.
Finally, the -mcall-prologues compiler flag freed 2KB of Flash storage. It creates master prologue/epilogue routines that are called at the start and end of program routines. To put things simply, it prepares the AVR stack and registers in a same manner before any function is executed. This will therefore waste a little execution time while saving a lot of code space.
More space saving techniques can be found by clicking this link. Want to stay tuned of the Mooltipass launch date? Subscribe to our official Google Group!


