DIY 3D Projector From An LCD

We’ve shared many home made projectors in the past, but we think this might just be the first home made 3D projector!

[Nicholas] has created a wonderful write up on this project on his blog, and in an Instructable, and even more details are available on the original forum post (in French though).

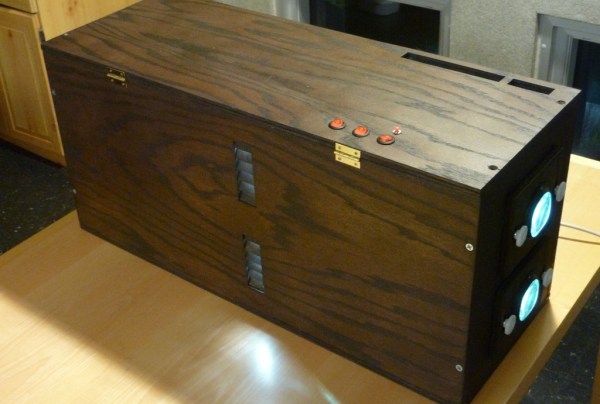
To sum it up though, he’s using an old LCD from a broken laptop, split into two halves. By using a Fresnel lens and two separate optical lenses that are adjustable he can combine the two images (top and bottom of the LCD) on the wall. Then by adding a polarization filter to each lens, he can reuse the cheap 3D goggles from the cinema for his own setup to see in 3D! This style of passive 3D does require a special projector screen to keep the polarization intact — he’s using a Da-Lite Silverlight screen, whose metallic surface ensures the polarization is kept the same.

It’s a great project and is definitely worth checking out. If you’re in the mood for a smaller form factor projector, it’d be worth checking out this one we covered quite a few years ago!

16×8 Pixel Laser Projector

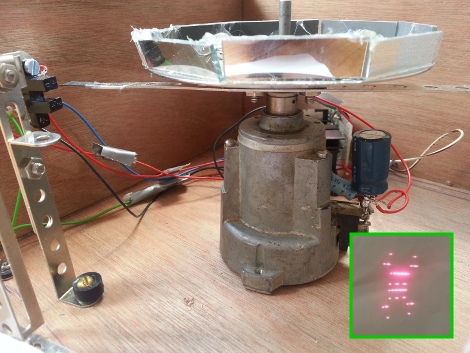
[Michiel] gave us a little shout-out by drawing the Hackaday logo with his recently completed 16×8 pixel laser projector. It uses a spinning set of mirrors mounted at slightly different angles to redirect the path of the red laser diode.

The projector is driven by an Arduino. To give it more than just a hard-coded existence [Michiel] included an Xbee module. This lets him connect to it with a computer in order to stream messages. One of the demo videos linked in his project log shows the web interface he coded which will push a message typed in the submission form out to the projector where it is scrolled like a marquee.

This type of spinning display is one of a few common methods for making laser projectors. In the image above you can see the optical sensor which is used to sync the diode with the spinning mirrors, each of which is responsible for a different row of pixels. He lists off several things that he learned when working on the project. We think the most important is the timing issues which go into something like this.

3D Printer With Insane Accuracy Uses A DLP Projector

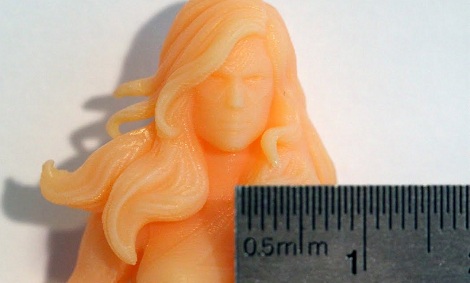
After years of work, [Junior Veloso] is finally getting his 3D printer project out to the public. Unlike the Makerbots and repraps we usually see, [Junior]’s printer uses light-curing resin and a DLP projector to build objects with incredibly fine detail.

One highlight of [Junior]’s project is the development of low-cost resins. Normally, light curing resins are extremely expensive, but [Junior] is actively trying to get the price of resin down to $150 USD per kilogram. A quick back-of-the-wolfram calculation tells us you should be able to print about 7-800 cubic centimeters with a kilogram of resin. It’s much more expensive than plastic filament used in other 3D printers, but that’s the price you pay for quality.

There’s a very popular Indiegogo campaign that is trying to raise money to mass produce the resin and some components of this kit. We’re not impressed with the rewards for this campaign – $59 for a .PDF description of the printer without any dimensions, $159 for a BOM, dimensions and the formula to make your own resin, and $400 for the closed-source software [Junior] devleoped – but hopefully this Indiegogo gets cheap resin out onto the market. There’s a short FAQ about this printer, so we’ll leave our readers to tactfully discuss the merits of this printer in the comments below.

You can check out the process of printing a remarkably detailed alien skull in the video after the break.

Continue reading “3D Printer With Insane Accuracy Uses A DLP Projector”

Baby’s First Star Light Projector And A Foil Slip Ring

For a newborn, everything is magical; a lack of object permanence means everything is new, wonderful, and novel. What then, could be better than a projected star field circling an infant’s room, gently sending them to sleep?

[Pete] was inspired by this earlier starlight projector that projects a rotating star field onto the walls and ceiling of a nursery. Instead of a rather loud servo, [Pete] used a quiet 12 Volt gear motor that spins the star field at 5 RPM. Like the previous build, a LED was used but [Pete] found a color-changing RGB LED that automatically shifts colors.

The shaft of [Pete]’s gear motor is tiny, and unlike the servo, there’s constant rotation. This meant a slip ring was needed to pass electricity into the spinning sphere. A piece of copper foil and a pair of improvised brushes served just fine. While [Pete]’s project, like its predecessor, doesn’t seem to have any recognized constellations drilled into the sphere, the foil slip ring opens up the possibility for a small microcontroller being fitted inside the globe with blinking lights.

Check out the video of [Pete]’s build in action after the break.
Continue reading “Baby’s First Star Light Projector And A Foil Slip Ring”

altoids-pocket-projector

DIY Film Projector Fits In The Palm Of Your Hand

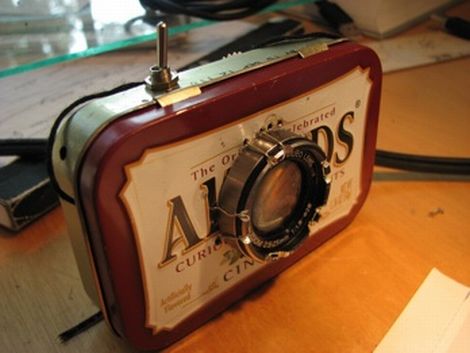
DSLRs aside, the price of digital cameras these days can make it easy to consider just tossing your old one out when it breaks. [Leonidas Tolias] had another idea, and with a few broken cameras he had on hand he constructed a slick little pocket-sized projector.

The project started out as a pair of lenses from busted cameras and an Altoids tin in which he mounted them. The larger lens from a video camera was installed on the exterior of the tin, while the smaller of the two was mounted inside. Bits from disposable cameras were used to create a set of film reels, which he supports with some hand cut scrap aluminum. He made some test photo slides by printing some images on transparency paper, which he can cycle through using a film advancement rig he built out of string and a couple of gears.

While you won’t be using this projector for your next boring PowerPoint presentation, it does work pretty well as you can see in pictures on [Leonidas’] site.

[Thanks, Taylor]

RGB Laser Projector Is A Jaw-dropping Build

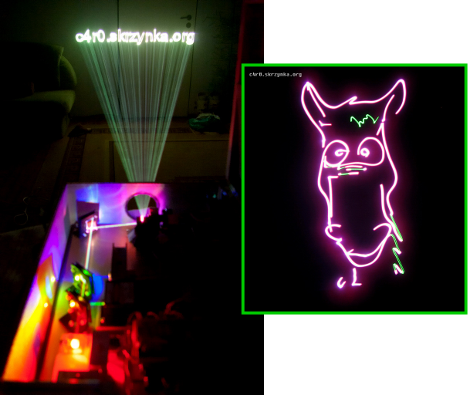
We can think of no better way to describe this laser projector project than Epic. [C4r0] is a student at Gdansk University of Technology and he’s been working on this projector for at least a couple of years. It uses several different laser diodes pulled out of DVD burners, Blu-Ray drives, and entertainment equipment (the green diode is from a disco laser).

In order to direct the beams he built a series of brackets that hold dichroic filters which reflect some wavelengths of light while allowing others to pass straight through. Each diode also needs a driver, most of which he built from scratch. And once the hardware has been designed and tested, what does one do with it? If you’re [C4r0] you build it into a money case with professional-looking results.

Don’t miss the video demo after the break. And make sure you have a rag ready to wipe up the drool before you look at his forum post linked above.

Continue reading “RGB Laser Projector Is A Jaw-dropping Build”

Old-school Projector Turned Digital

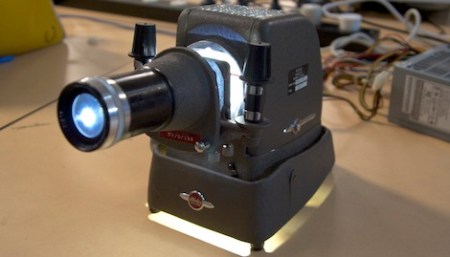
Who hasn’t thought about turning a 1950s slide projector into a digital projector? [Matt] did, but unlike most of us, he actually did it.

[Matt]’s friend [Angus] found an old, single-slide, sans-carousel slide projector in the trash. It’s a wonderful piece of ancient technology with a fabric insulated power cord and bakelite lamp socket. This projector was upcycled to the 21st century by adding a 10 Watt LED and a Nokia 1200 LCD.

For the electronics, [Matt] used an ATmega88 microcontroller. There’s an infrared receiver so the remote from an in-car CD player can be used to advance the slides and turn the projector on and off. The LCD is controlled by a bit of bit-banging from the Mega88, using hard-coded images of Che Guevara, Hendrix, Space Invaders and some old-school Macintosh/Lisa icons. Unlike the screen printed t-shirts at American Apparel, Che is the only authentic image in this project; this projector might have been made after Guevara came to prominence.

With a 10 Watt LED, it’s not the brightest projector on the planet and the picture is a little washed out in a bright room. With dim lighting, it’s a very good project even if the images are static.