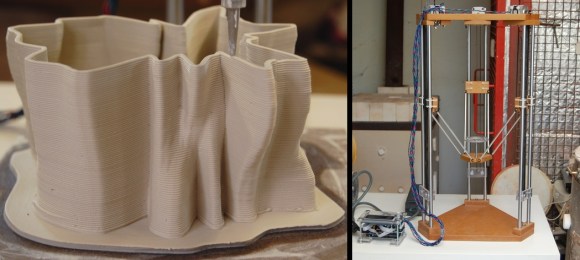
Artist [Jonathan] has built a 3D printer specifically for printing in clay. The part count is kept to a minimum and the printer was designed to be made with basic tools and beginner skills. The intent was to not require access to a plastic 3D printer in order to build this printer. Although this build’s goal was clay printing, the extruder could certainly be swapped out for a typical plastic printer version.
This Delta uses quite a bit of MDF. The top and bottom plates are MDF, as are the bearing carriages and extruder mount plate. 12mm rods are solely responsible for the support between the top and bottoms plates as well providing a surface for the LM12UU linear bearings. These bearings are zip tied to the MDF bearing carriages. The 6 arms that support the extruder mount plate are made from aluminum tubing and Traxxas RC car rod-ends. NEMA17 motors and GT2 belts and pulleys are the method used to move the machine around.
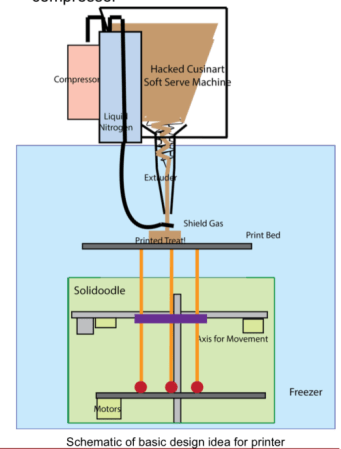
Getting the clay to dispense was a tricky task. Parts scavenged from a pneumatic dispensing gun was used. If you are unfamiliar with this type of tool, think: Power Caulk Gun. Clay is fed into the re-fillable syringes and an air compressor provides the 30 psi required to force the clay out of the nozzle. The pressure alone controls the rate of clay flow so it is a little finicky to get the extrusion rate correct. Depending on the size of the final sculpture, 1 to 2mm diameter nozzles could be used. For larger work, 1mm layer height works well. For the smaller pieces, 0.5mm is the preferred layer height.
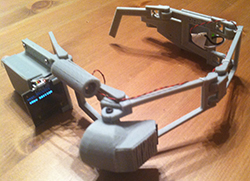 For [Tony]’s entry for The Hackaday Prize,