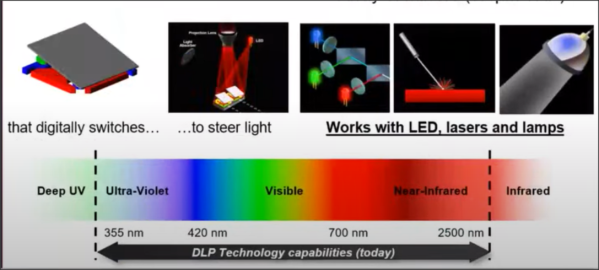
New Part Day: DLP300s The Next Big Thing For Low Cost Resin Printing?

The majority of non-SLA resin 3D printers, certainly at the hacker end of the market, are most certainly LCD based. The SLA kind, where a ultraviolet laser is scanner via galvanometers over the build surface, we shall consider no further in this article.

What we’re talking about are the machines that shine a bright ultraviolet light source directly through a (hopefully monochrome) LCD panel with a 2, 4 or even 8k pixel count. The LCD pixels mask off the areas of the resin that do not need to be polymerised, thus forming the layer being processed. This technique is cheap and repeatable, hence its proliferance at this end of the market.

They do suffer from a few drawbacks however. Firstly, optical convergence in the panel causes a degree of smearing at the resin interface, which reduces effective resolution somewhat. The second issue is one of thermal control – the LCD will transmit less than 5% of the incident light, so for a given exposure at the resin, the input light intensity needs to be quite high, and this loss in the LCD results in significant internal heating and a need for active cooling.  Finally, the heating in the LCD combined with intense UV radiation degrades the LCD over time, making the LCD itself a consumable item.

Continue reading “New Part Day: DLP300s The Next Big Thing For Low Cost Resin Printing?”

Repurposed UV Curer Makes Your Prints Hard As Nails

The price of resin printers has dropped significantly in the last couple of years, and it’s down to the point where you can pick up a fairly decent DLP machine for less than $500. While this is great news, you still need several things beyond resin for successful prints, like a way to do post-process UV curing.

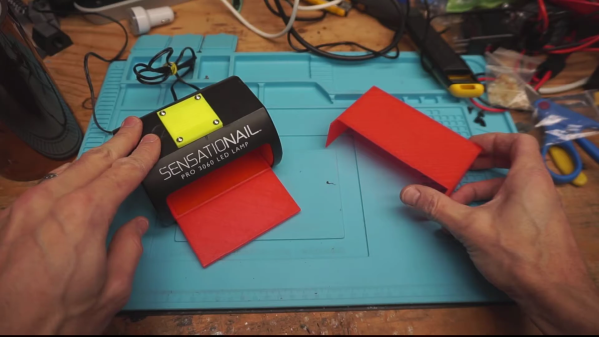
[Inhibit] picked up the formidably-priced Wanhao D7 awhile back. Rather than spending another printer’s worth of paper on a UV curing box, he rescued and repurposed a small commercial curing device meant for gel-based nail polish. You stick your fingertips in, switch it on, and it runs for 60 seconds and then shuts off.

It’s a great idea, but unfortunately prints don’t cure as fast as fingernails. So the first order of business was to bypass the dual 555-based timing system by wiring the UV LEDs directly to power. The manufacturer never intended for the lights to run continuously, so to keep the board from melting, [Inhibit] added in a small 12 V computer fan for cooling. There’s even a little printed grille with angled fins to keep UV light from leaking out and burning nearby retinas.

[Inhibit] also designed and printed a tray for the prints to sit on, and a front enclosure piece to focus as much light on the parts as possible. Files for both parts are floating around the Thingiverse, and we’ve got the build video all cured queued up after the break.

These little commercial boxes don’t cost all that much, but you could always just build your own.

Continue reading “Repurposed UV Curer Makes Your Prints Hard As Nails”

Copying High Security Keys With OpenSCAD And Light

The ability to duplicate keys with a 3D printer is certainly nothing new, but so far we’ve only seen the technique used against relatively low hanging fruit. It’s one thing to print a key that will open a $15 Kwikset deadbolt from the hardware store or a TSA-approved “lock” that’s little more than a toy, but a high-security key is another story. The geometry of these keys is far more complex, making them too challenging to duplicate on a consumer-level printer. Or at least, you’d think so.

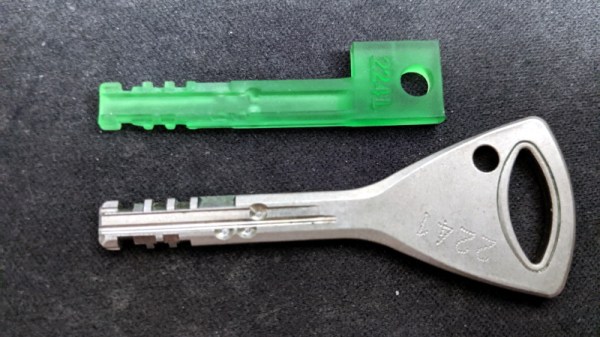
Inspired by previous printed keys, [Tiernan] wanted to see if the techniques could be refined for use against high security Abloy Protec locks, which are noted for their resistance to traditional physical attacks such as picking. The resulting STLs are, unsurprisingly, beyond the capabilities of your average desktop FDM printer. But with a sub-$300 USD Anycubic Photon DLP printer, it’s now possible to circumvent these highly regarded locks non-destructively.
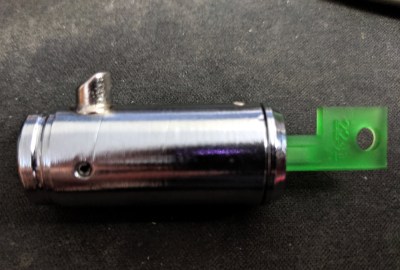
Of course, these keys are far too intricate to duplicate from a single picture, so you’ll need to have the physical key in hand and decode it manually. [Tiernan] wisely leaves that step of the process out, so anyone looking to use this project will need to have a good working knowledge of the Abloy Protec system. Hopefully this keeps bad actors from doing anything too nefarious with this research.

Once you have the decoded values for the key you want to duplicate, you just need to provide them to the OpenSCAD library [Tiernan] has developed and print the resulting STL on your sufficiently high-resolution printer. Generally speaking, the parts produced by resin-based printing have a high tensile strength but are very brittle, so perhaps not the kind of thing you want to stick in your expensive Abloy lock. That said, there are some “Tough Resin” formulations available now which produce parts that are at least as strong as those made with thermoplastics. So while the printed keys might not be strong enough for daily use, they’ll certainly work in a pinch.

LittleRP, The Latest Of The Resin Printers

LitleRP Over the last few years, a few resin / stereolithography printers have been made a few headlines due to print quality that cannot be matched by the usual RepRap style filament printers. These used to be extremely expensive machines, but lately there have been a few newcomers to the field. The latest is the LittleRP, an affordable DLP projector-based resin printer that can be put together for under a kilobuck.
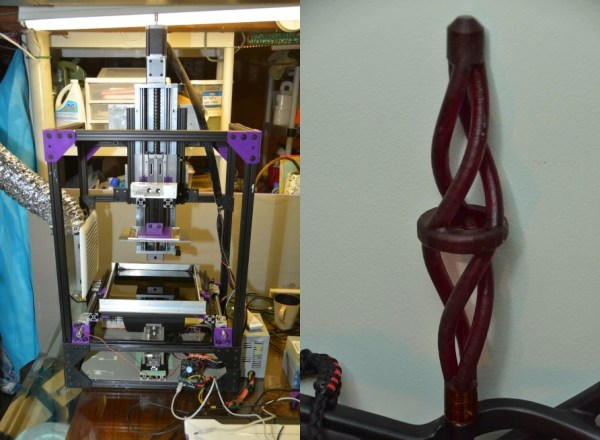
Instead of proprietary resins, the LittleRP is designed to use as many different formulations of UV curing resin as possible, including those from MadeSolid and MakerJuice. These resins are cured with a DLP projector, providing a print area of 60x40x100mm with the recommended 1024×768 projector, or 72x40x100mm with the alternative 1080p projector.

This isn’t the only resin printer that’s come out recently; SeeMeCNC recently announced their cleverly named DropLit resin printer kit, going with the same ‘bring your own projector’ idea as the LittleRP. With the price of the printer, both of these kits should cost less than $1000 USD. With the price of UV resin dropping over the last few years, it might be just the time to get in the resin printer game.

Home Made Resin Based 3D Printer Is Incredible

Resin based 3D printers (SLA) are the next big thing, and while they may seem daunting at first, in some ways they are actually simpler than FDM machines with less moving parts! Loosely following an Instructable, [Dan Beaven] has just finished putting together his own home-made 3D DLP Printer, and it’s bloody brilliant.

He owes a lot of thanks to [Tristram Budel] and his incredibly detailed Instructables guide on building  a 3D DLP printer, but [Dan] has also added quite a bit of his own flair to the build. Most notably is his method of separating layers from the vat of resin — most designs tilt the bed slightly to counter the suction forces, but his slides the vat back and forth along the Y-axis, which seems to work extremely well.

The printer is built out of 1″ T-slot aluminum and has a NEMA 17 motor that provides the Y-axis movement along two linear rods for the vat. The Z-axis stage uses a NEMA 23 motor and has a whopping 14″ of travel. Combined with a 104mm x 204mm build plate, this thing can print some decently sized parts!

Continue reading “Home Made Resin Based 3D Printer Is Incredible”

3D DLP Printer Builds An Orange TARDIS

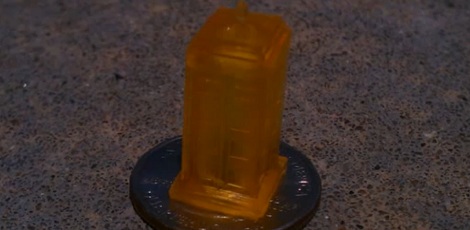
This micro-sized TARDIS is the latest print from [Ron Light]’s Sedgwick 3D DLP printer. Yes, it’s orange, but the print quality for such a small object is pretty astounding.

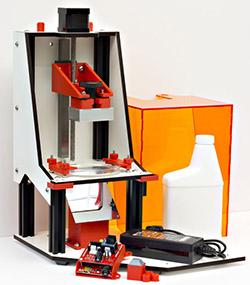
The Sedgwick 3D printer is currently available as a kit on Kickstarter. For five hundred bones, the Sedgwick provides all the parts – minus a DLP projector and resin – to make your own miniature Type 40 with a broken chameleon circuit. There’s a lot more this printer can do, from miniature cathedrals to hollow geodesic spheres.

This is the latest in what will be a long line of DLP projector / resin 3D printers, and the most affordable one to date. The last one we saw was an awesome $2400 machine that included a projector and resin. At $500 for a projector-less kit, the Sedgwick still handily beats even the cheapest option we’ve seen so far.

[Ron Light] is from Kansas City, and our boss man [Caleb] ran into him at the KC Maker Faire a few weeks ago. You can check out that little interview and a few videos of the Sedgwick doing its thing after the break.

Continue reading “3D DLP Printer Builds An Orange TARDIS”