On its face, 3D printing is pretty simple — it’s basically just something to melt plastic while being accurately positioned in three dimensions. But the devil is in the details, and there seems to be an endless number of parameters and considerations that stand between the simplicity of the concept and the reality of getting good-quality prints.
One such parameter that had escaped our attention is “pressure advance,” at least until we ran into [Mike Abbott]’s work on automating pressure advance calibration on the fly. His explanation boils down to this: the pressure in a 3D printer extruder takes time to both build up and release, which results in printing artifacts when the print head slows down and speeds up, such as when the print head needs to make a sharp corner. Pressure advance aims to reduce these artifacts by adjusting filament feed speed before the print head changes speed.
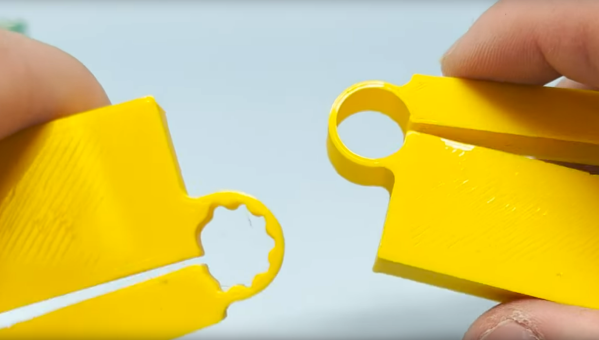
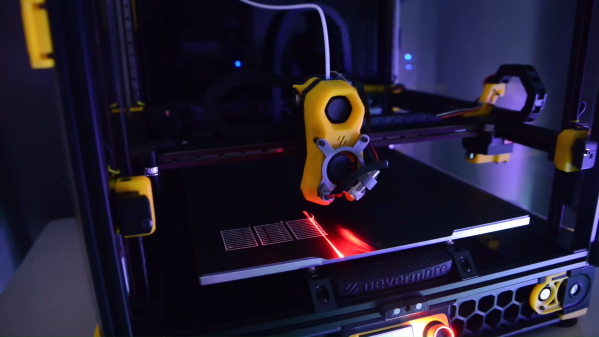
The correct degree of pressure advance is typically determined empirically, but [Mike]’s system, which he calls Rubedo, can do it automatically. Rubedo uses a laser line generator and an extruder-mounted camera (a little like this one) to perform laser triangulation. Rubedo scans across a test print with a bunch of lines printed using different pressure advance values, using OpenCV to look for bulges and thinning caused when the printer changed speed during printing.
The video below gives a lot of detail on Rubedo’s design, some shots of it in action, and a lot of data on how it performs. Kudos to [Mike] for the careful analysis and the great explanation of the problem, and what looks to be a quite workable solution.
Continue reading “Laser Triangulation Makes 3D Printer Pressure Advance Tuning Easier”