DIY SLS 3D Printer Getting Ready To Print

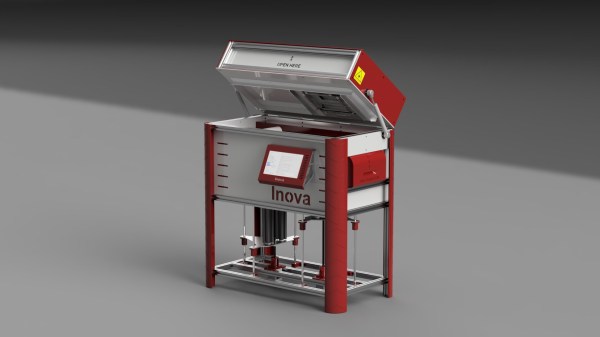
Ten years ago the concept of having on our desks an affordable 3D printer knocking out high quality reproducible prints, with sub-mm accuracy, in a wide range of colours and material properties would be the would be just a dream. But now, it is reality. The machines that are now so ubiquitous for us hackers, are largely operating with the FDM principle of shooting molten plastic out of a moving nozzle, but they’re not the only game in town. A technique that has also being around for donkeys’ years is SLS or Selective Laser Sintering, but machines of this type are big, heavy and expensive. However, getting one of those in your own ‘shop now is looking a little less like a dream and more of a reality, with the SLS4All project by [Tomas Starek] over on hackaday.io.

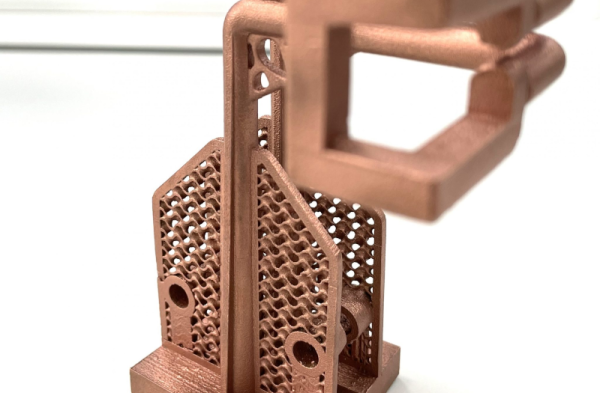
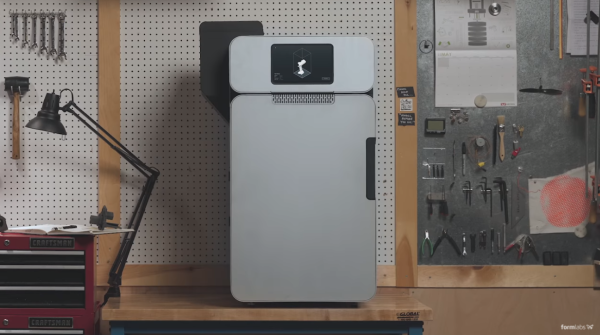
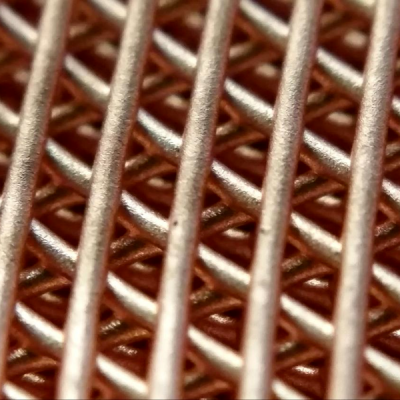
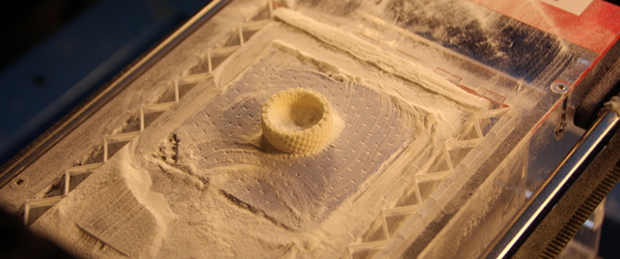
[Tomas] has been busy over the past year, working on the design of his machine and is now almost done with the building and testing of the hardware side. SLS printing works by using a roller to transfer a layer of powdered material over the print surface, and then steering a medium-power laser beam over the surface in order to heat and bond the powder grains into a solid mass. Then, the bed is lowered a little, and the process repeats. Heating of the bed, powder and surrounding air is critical, as is moisture control, plus keeping that laser beam shape consistent over the full bed area is a bit tricky as well. These are all hurdles [Tomas] has to overcome, but the test machine is completed and is in a good place to start this process control optimisation fun. Continue reading “DIY SLS 3D Printer Getting Ready To Print”

3D Printing Copper

People really want to 3D print metal, but while true metal printers exist, they still are expensive and out of reach of most hackers. However, even if you can afford an exotic printer or use metal-impregnated polymer, you don’t often see copper as a print material. Copper has high electrical and thermal conductivity which makes it very useful. But that thermal conductivity also makes it very difficult to print using any process that involves heating up the material and copper reflects common lasers used in the 3D printing process. However, a German company, Infinite Flex, is claiming a breakthrough that will allow printers that use a standard IR laser to produce copper parts. The material, Infinite Powder CU 01 is suitable for selective laser sintering and several other laser-based techniques.

The powder has 99.5% copper and particle sizes of between 10 and 45 microns. There are some copper alloys that reduce thermal conductivity to allow printing, but often the reason you want a copper part is for its thermal properties. A kilogram of the powder will set you back nearly $100, so it isn’t dirt cheap, but it isn’t astronomical, either.

Continue reading “3D Printing Copper”

Formlabs Announces A Desktop SLS 3D Printer

Formlabs have just announced the Fuse 1 — a selective laser sintering (SLS) 3D printer that creates parts out of nylon. Formlabs is best known for their Form series of resin-based SLA 3D printers, and this represents a very different direction.

SLS printers, which use a laser to sinter together models out of a powder-based material, are not new but have so far remained the domain of Serious Commercial Use. To our knowledge, this is the first time an actual SLS printer is being made available to the prosumer market. At just under 10k USD it’s definitely the upper end of the prosumer market, but it’s certainly cheaper than the alternatives.

The announcement is pretty light on details, but they are reserving units for a $1000 deposit. A few things we can throw in about the benefits of SLS: it’s powder which is nicer to clean up than resin printers, and parts should not require any kind of curing. The process also requires no support material as the uncured powder will support any layers being cured above it. The Fuse 1’s build chamber is 165 x 165 x 320 mm, and can be packed full of parts to make full use of the volume.

In the past we saw a detailed teardown of the Form 2 which revealed excellent workmanship and attention to detail. Let’s hope the same remains true of Formlabs’ newest offering.

Sintering Sand WIth A Laser Cutter

We are all used to Fused Deposition Modeling, or FDM, 3D printers. A nozzle squirts molten material under the control of a computer to make 3D objects. And even if they’re usually rather expensive we’re used to seeing printers that use Stereolithography (SLA), in which a light-catalysed liquid monomer is exposed layer-by layer to allow a 3D object to be drawn out. The real objects of desire though are unlikely to grace the average hackspace. Selective Laser Sintering 3D printers use a laser on a bed of powder to solidify a 3D object layer by layer.

The laser creating a ring.

While an SLS printer may be a little beyond most budgets, it turns out that it’s not impossible to experiment with the technology. [William Osman] has an 80 W laser cutter, and he’s been experimenting with it sintering beach sand to create 2D objects. His write-up gives a basic introduction to glassmaking and shows the difference between using sand alone, and using sodium carbonate to reduce the melting point. He produces a few brittle barely sintered tests without it, then an array of shapes including a Flying Spaghetti Monster with it.

The results are more decorative than useful at the moment, however it is entirely possible that the technique could be refined. After all, this is beach sand rather than a carefully selected material, and it is quite possible that a finer and more uniform sand could give better results. He says that he’ll be investigating its use for 3D work in the future.

We’ve put his video of the whole process below the break, complete with worrying faults in home-made laser wiring. It’s worth a watch.

Continue reading “Sintering Sand WIth A Laser Cutter”

3D Printing Metal From Rust

It seems backwards, but engineers from Northwestern University have made 3D printing metal easier (and eventually cheaper) by adding extra production steps to the procedure. (Paper available in PDF).

Laser sintering works by laying down a thin layer of metal powder and then hitting it with a strong enough laser to sinter the particles together. (Sintering sticks the grains together without getting the metal hot enough to melt it.) The rapid local heating and cooling required to build up 3D objects expands and cools the metal, and can result in stresses inside the resulting object.

The Northwestern team still lays down layers of powder, but glues the layers together with a quick-drying polymer instead of fusing them with a laser. Once the full model is printed, they then sinter it in one piece in an oven.

anewwaytopri_tn
3D-printed copper lattice. Credit: Ramille Shah and David Dunand

The advantages of adding this extra step are higher printing speed — squirting the liquid out of syringe heads can be faster than fusing metal particles with a laser — and increased structural integrity because the whole model is heated and cooled at one time. A fringe benefit is that the model is still a bit flexible before firing, opening up possibilities for printing a flat model and then bending it into shape before sintering.

And if that weren’t enough, the team figured that they’d add a third step to the procedure to allow it to be used with rust (iron oxide) as the starting powder. They print the rust and polymer model, then un-rust the iron using hydrogen, and then fire it as before. Why rust? Do you know anything cheaper to use as a raw material?

What do you think? The basic idea may even be DIYable — glue metal particles together and heat them up enough to stick. Not in my microwave oven, though. We’d love to see a more energy-efficient 3D metal printer.

Thanks to [Joe] for the tip!

Turning A Laser Cutter Into A 3D Printer With OpenSLS

STL

[Andreas Bastian] has been working on a device that turns an off-the-shelf laser cutter into something capable of selective laser sintering of powdered plastics into 3D objects. He’s put in a lot of work, but now he gets to see the fruits of his labor: he’s successfully printed a few objects out of wax and powdered nylon.

Unlike just about every other inexpensive 3D printer, [Andreas]’ design doesn’t rely on either squirting plastic onto a bed or curing liquid resin with UV light. Instead, a fine layer of powder is spread over a build platform and melted with a laser. The melted layer drops down, another layer of powder is applied, and the cycle repeats until the part is finished. It’s a challenge to build one of these machines, but [Andreas] had the great idea of retrofitting an off-the-shelf laser cutter, allowing him to focus on the difficult task of designing the powder and piston system.

It’s an extremely interesting project, and most of the custom parts are made from laser cut acrylic: easily cut to size on whatever laser cutter you’re retrofitting with 3D printing capability. There’s a lot of info over on the Wiki, and a few videos showing the sintering process and powder distribution below.

Oh. One last note. [Andreas] developed this while at [Jordan Miller]’s amazing lab at Rice University. There’s a lot of interesting things happening at this Advanced Manufacturing Research Institute, including bioprinting, DLP resin printers, and using inkjets for cell cultures. Check out this post for a great talk at the Midwest RepRap Festival.

Continue reading “Turning A Laser Cutter Into A 3D Printer With OpenSLS”

3D Printed Guitar

We’re not sure how we missed this one, but it definitely deserves a look. Professor of Mechtronics [Olaf Diegel’s] 3D printer must go to 12, because he’s printed these incredible electric guitar bodies. You probably won’t be making your own on your filament printer, however, because [Diegel] uses SLS (Selective Laser Sintering) to create the body out of nylon, then he dyes the resulting piece in a two-step process. You can read more about the construction specifics on his website.

And, they’re more than just eye-candy: the guitars sound brilliantly metallic. There are more than enough pictures and videos to keep you occupied on the site, where you can sift through all eight designs to your heart’s content. You’ll want to keep reading for a couple of videos embedded after the break, which feature some demonstrations of the guitar and comparisons to traditional electric guitars, as well as a brief history of its construction and build process.

Continue reading “3D Printed Guitar”