Detecting DTMF Tones From Scratch

If you’ve ever wondered about the best way to detect dial and DTMF tones from a phone line, [Debraj] is your man.

[Debraj] built a DTMF detector using the Goertzel algorithm. Normally, when we think about detecting tones, we pull FFT out of our bag of tricks. The Goertzel algorithm isn’t as computationally complex as FFT and can be implemented on even the smallest microcontrollers.

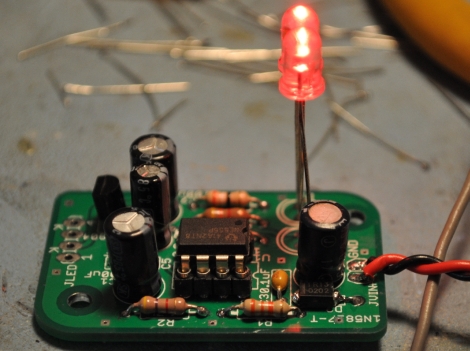
For the build, the first thing to solder is a nice audio transformer and some protection diodes. The ring tone from a phone line goes from +35 V to -35 V – a bit more than a microcontroller could handle. A PIC18F4520 dev board was used as the brain of the system with all the code is available on [Debraj]’s site.

Although implementations of the Goertzel algorithm are a little uncommon, [Debraj] has seen a few interesting projects using this technique. [Debraj]’s build could easily be modified into a guitar tuner with a few changes in the code, for example.

This project was built as the command and control for a home automation system and from the video after the break, we can’t wait for [Debraj] to get annoyed at the phrase, “To turn on the kitchen lights, please press 1…”

Continue reading “Detecting DTMF Tones From Scratch”

Building The Second Tiniest Tetris

A few years ago, [Richard] pulled a crushed camcorder out of a junk box at a hamfest. After pulling the half-inch CRT out of the viewfinder, he needed to find a project. [Richard] ended up building the second tiniest game of Tetris we’ve ever seen.

After futzing around with the CRT, [Richard] discovered that one of the pins would accept an NTSC input. He also found a similar project that used a dime-sized CRT to play Tetris. With ready to go code, [Richard] started assembling his project into a handsome wooden box.

There are two PCBs for the build – a CRT driver circuit, and a small custom board that handles the game and controller code. The circuit for the game board was found on this site, but the featured boards there were too large for the project. A stripped-down board was fabricated by BatchPCB and put into the box.

There aren’t any controls on the console itself, for that a standard DB-9 connector was installed so a vintage Atari joystick could be used. For a more ergonomic Tetris experience, a Sega Genesis controller could be used. For something that looks like it comes out a steampunk laboratory, playing Tetris is a bit unexpected. Check out the demo video of the screen at 20x magnification after the break.

Continue reading “Building The Second Tiniest Tetris”

Over Engineering A Game Of Lights Out

[Bertho] might have outdone himself this time. He built a Lights Out clone for the 7400 logic competition.

Lights Out is an electronic toy sold by Tiger in the mid 90s. The goal of the game is to turn a 5 by 5 grid of light up buttons off. There’s a catch, though – pressing a button toggles the state of the four surrounding buttons. Check out this Flash game that’s faithful to the original.

[Bertho] read a few Lights Out fan pages and set out to design the circuit. Most of the build is made up of shift registers: the ‘game state’ is saved in five 74hc164 shift registers and a 4557 programmable register. The board is set with a random number generator that toggles bits in the game register until a solvable puzzle is found. A truly spectacular build.

For the light-up buttons themselves, [Bertho] found an old Hack A Day post that describes putting tact switches underneath a LED. The project was put into a nice Plexiglas enclosure after 15 hours of soldering. [Bertho] was kind enough to put a video up of the game in action. Check it out after the break.

Continue reading “Over Engineering A Game Of Lights Out”

Retrofitting A 60-year Old Electric Heater

electric_heater_retrofit

[John] found an old Kenmore electric heater at a junk store one day, and thought it would look great in his bathroom. The only problem with the unit is that it was built back in the 1940s/1950s, so it lacked any sort of modern safeguards that you would expect from an indoor heater. There was no on/off switch, no fuse, no thermostat, and no tip switch – though it did have a nice, flammable cloth-covered power cord.

Since [John] wasn’t too keen on burning his house down in the name of staying warm, he decided to retrofit the old unit’s shell with a new ceramic heater. He found a $20 unit that looked like it would fit, so he disassembled both heaters and got to work. The Kenmore’s innards were scrapped, then he gave the unit a nice fresh coat of high-temp paint. The new heater was cut to fit inside the old unit’s shell, controls and safety features intact.

He says that it works very well, and that it looks great in his bathroom. If you’re considering doing something similar, be sure to check out his writeup – it is very thorough and has plenty of details that will help you along the way.

A Masochistic Video Card

Have a penchant for pain? Why not destroy your fingertips with a wire-wrap tool building a video card made entirely out of discrete components.

When [Chris] decided to build an entry for the Dangerous Prototypes 7400 logic competition he already had his hands full. The 74xx chips he had on hand had a maximum clock frequency of 25MHz, but the VGA pixel clock runs at 40MHz. dividing the H sync timing by 4 means the maximum speed required of the video card is only 10MHz, albeit with a reduced resolution.

The video card was constructed on perfboard with wirewrap sockets. An 8-bit DAC was included, allowing the card to display 256 separate colors but only the three primary lines were wired up to the VGA cable. As is, the card cycles through 8 different colors in a constant loop, not bad for a pile of chips.

VGA out has been done on everything from an ARM to an ATtiny, but rarely, if ever, has VGA been done with discrete components. While this video card may not be our first choice for bitcoin mining, it’s still a very impressive build. Check out the walk through video after the break.

Continue reading “A Masochistic Video Card”

Very Impressive Steampunk Keyboard

After spending more than 250 hours on his project, [Admiral Aaron Ravensdale]’s steampunk keyboard is finally done.

The keyboard mod was designed around a Model M. After removing the keycaps, [The Admrial] upcycled the keys from old Continental typewriters. Because his typewriters only had 47 keys and the Model M needs 104, three typewriters needed to be sourced off of eBay. Polishing the metal rings of the typewriter keys ate up more than 100 hours.

After building a brass frame from 8mm tubing and candle holders, the stained wood inlay was drilled for the keys. Status lights were installed and the PCB was connected. A pair of ‘gaslight’ keyboard lights were fabricated using 3mm tubing and very fitting “Golden White” LEDs.

[Admrial Ravensdale] put up an Instructable walking through the build process of his keyboard. There’s also a German-language PDF build log that shows every picture of every step.

This isn’t [Admrial Ravensdale]’s first Hack A Day feature, but with a build that might one-up the original steampunk keyboard we can’t wait to see what comes out of [The Admiral]’s workshop next.

Resurrecting An XT

The best laid plans of mice and men oft go awry. At least that’s what we’d tell ourselves if we couldn’t find a 30-year-old computer monitor. [Andrew] picked up an old IBM XT on eBay recently and tried to get the video working. He hasn’t seen any success yet, but the way he goes about solving this problem is very clever.

[Andrew] was stuck with a cool old computer with no way to output anything onto a screen. The XT had an MDA port but neither his TV nor his VGA monitor would accept MDA frequencies. As a workaround, [Andrew] connected an Arduino to the XT keyboard port. On the factory floor, IBM workers used the XT keyboard to load code onto the machines while POSTing. He was able to change the frequency of the MDA CRT controller to CGA frequencies, and with the help of some small components got some video working.

The Hsync and Vsync are still off, and [Andrew] hasn’t been able to get the machine to finish POSTing, but he figures he can use the XT keyboard port for bidirectional communication. He’s written a very small kernel to test out a few things, but unfortunately the XT’s power supply died recently. Once [Andrew] replaces that, we’re sure he’ll get his box up and running.