Microdistillery For Microchemistry

Much like radio operators being encouraged to use the least possible amount of power to make a contact, chemists have a similar rule encouraging using the least amount of materials in experiments. Not only is this rooted in economics, but in safety as well; if something goes wrong it’s generally good if there’s not excess amounts of reactants. With modern techniques, though, it’s possible to bring experimental chemistry down to incredibly small scales, and [Marb’s lab] found that they needed a custom built still for these new, diminutive experiments.

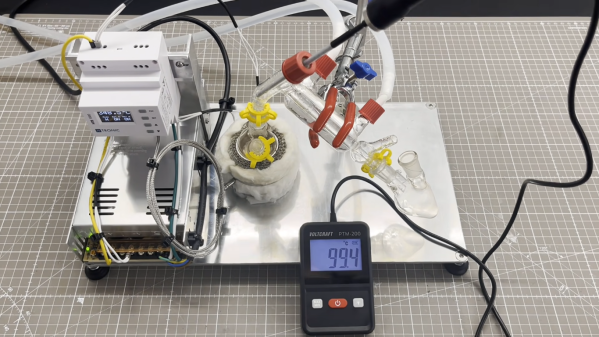
The first step is to build the heating component of the still. This is provided with a few custom aluminum parts for the base and a pair of heaters originally meant for 3D printers, with the assembled unit wrapped in insulation. The heater accomodates a 25 mL round-bottom flask. Temperature control of the heating mantle is provided by a controller mounted to a DIN rail which receives power from a 24V power supply, and an additional temperature probe is added to measure the temperature of the distillate. A test run with water shows the small still quickly and efficiently evaporating the water up to a condenser.

Although building a still doesn’t have to be technically difficult, building something this small that’s effective and safe is a bit more challenging than a backyard moonshining operation. Scaling chemical reactions down can often be a challenge but is possible with the right mindset and equipment. We’ve seen miniaturization of many things that we might not have expected including hydrogen production, aluminum smelting, and even the construction of a microscope.

Continue reading “Microdistillery For Microchemistry”

Heating A Woodshop With Sawdust

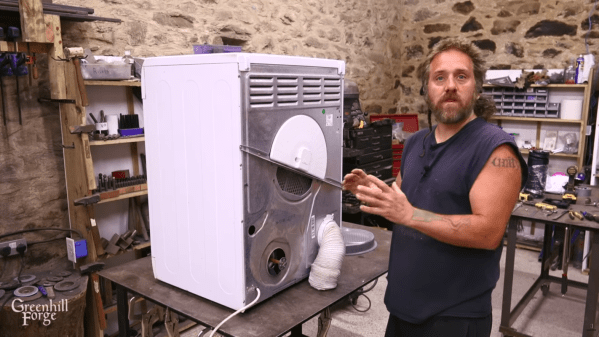
Most carpenters and woodworkers find themselves with the problem of disposing of all the sawdust they create when performing their craft. There are lots of creative solutions to this problem, such as adding it compost, using it as groundcover in a garden, adding it as filler in a composting toilet, or pressing it into bricks to burn in a stove. All of these have their uses, but involve either transporting the sawdust somewhere or performing some intermediate step to process it. [Greenhill Forge] wanted to make more direct use of it so he built this stove which can burn the sawdust directly and which provides enough heat for his woodshop.

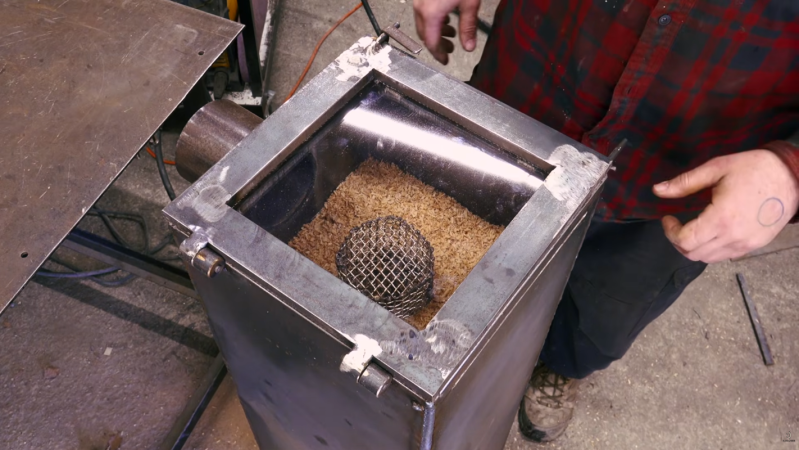
The design is based on one which is somewhat common in Japan and involves building a vessel with a central tube for airflow, with the sawdust packed around it. The tube is made from a hardware cloth or screen to allow air to reach the sawdust. The fire is lit from the top, closed, and then allowed to burn through the stack. [Greenhill Forge] welded the entire stove from various pieces of sheet metal and bar stock, with a glass plate at the top of the stove to close off the fire and a baffle to control the airflow and rate of burn.

Initially, [Greenhill Forge] thought that the fire would burn from the top down, but this turned out to create a smoldery, messy fire instead of a hot, clean burn. Eventually, though, an ember fell down to the bottom and let the stack burn from the top up, and then it started generating serious heat. He estimates that with around 5 kg of sawdust burning for three hours that it’s about equivalent to a 6 kW stove. While a woodworker might not have enough sawdust to run this stove every day, it could be good to have on hand to use once every few weeks when the sawdust builds up enough. [Greenhill Forge] has been hard at work building unique wood burning stoves lately, like this one we recently featured which generates and then uses charcoal as fuel.

Continue reading “Heating A Woodshop With Sawdust”

Heater Is Either A Miracle Or A Scam

[Big Clive] picked up a tiny heater for less than £8 from the usual sources. Would you be shocked to learn that its heating capacity wasn’t as advertised? No, we weren’t either. But [Clive] treats us to his usual fun teardown and analysis in the video below.

A simple test shows that the heater drew about 800 W for a moment and drops as it heats until it stabilizes at about 300 W. Despite that, these units are often touted as 800 W heaters with claims of heating up an entire house in minutes. Inside are a fan, a ceramic heater, and two PCBs.

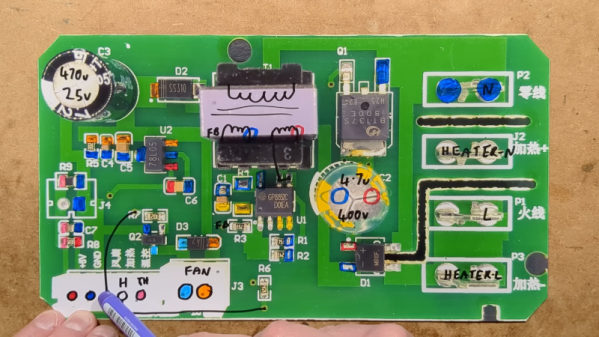
The ceramic heaters are dwarfed by metal fins used as a heat exchanger. The display uses a clever series of touch sensors to save money on switches. The other board is what actually does the work.

[Clive] was, overall, impressed with the PCB. A triac runs the heaters and the fan. It also includes a thermistor for reading the temperature.

You can learn more about the power supply and how the heater measures up in the video. Suffice it to say, that a cheap heater acts like a cheap heater, although as cheap heaters go, this one is built well enough.

Continue reading “Heater Is Either A Miracle Or A Scam”

Winter-Proof (And Improve) Your Resin 3D Printing

Was your 3D printer working fine over the summer, and now it’s not? With colder temperatures comes an overall surge in print failure reports — particularly with resin-based printers that might reside in outbuildings, basements, or garages. If you think this applies to you, don’t miss [Jan Mrázek]’s tips on improving cold-weather print results. His tips target the main reasons prints fail, helping to make the process a little more resilient overall. [Jan]’s advice is the product of long experience and experimentation, so don’t miss out.

With environmental changes comes the possibility that things change just enough to interfere with layers forming properly. The most beneficial thing overall is to maintain a consistent resin temperature; between 22 and 30 degrees Celsius is optimal. A resin heater is one solution, and there are many DIY options using simple parts. Some of the newer (and more expensive) printers have heaters built in, but most existing hobbyist machines do not.

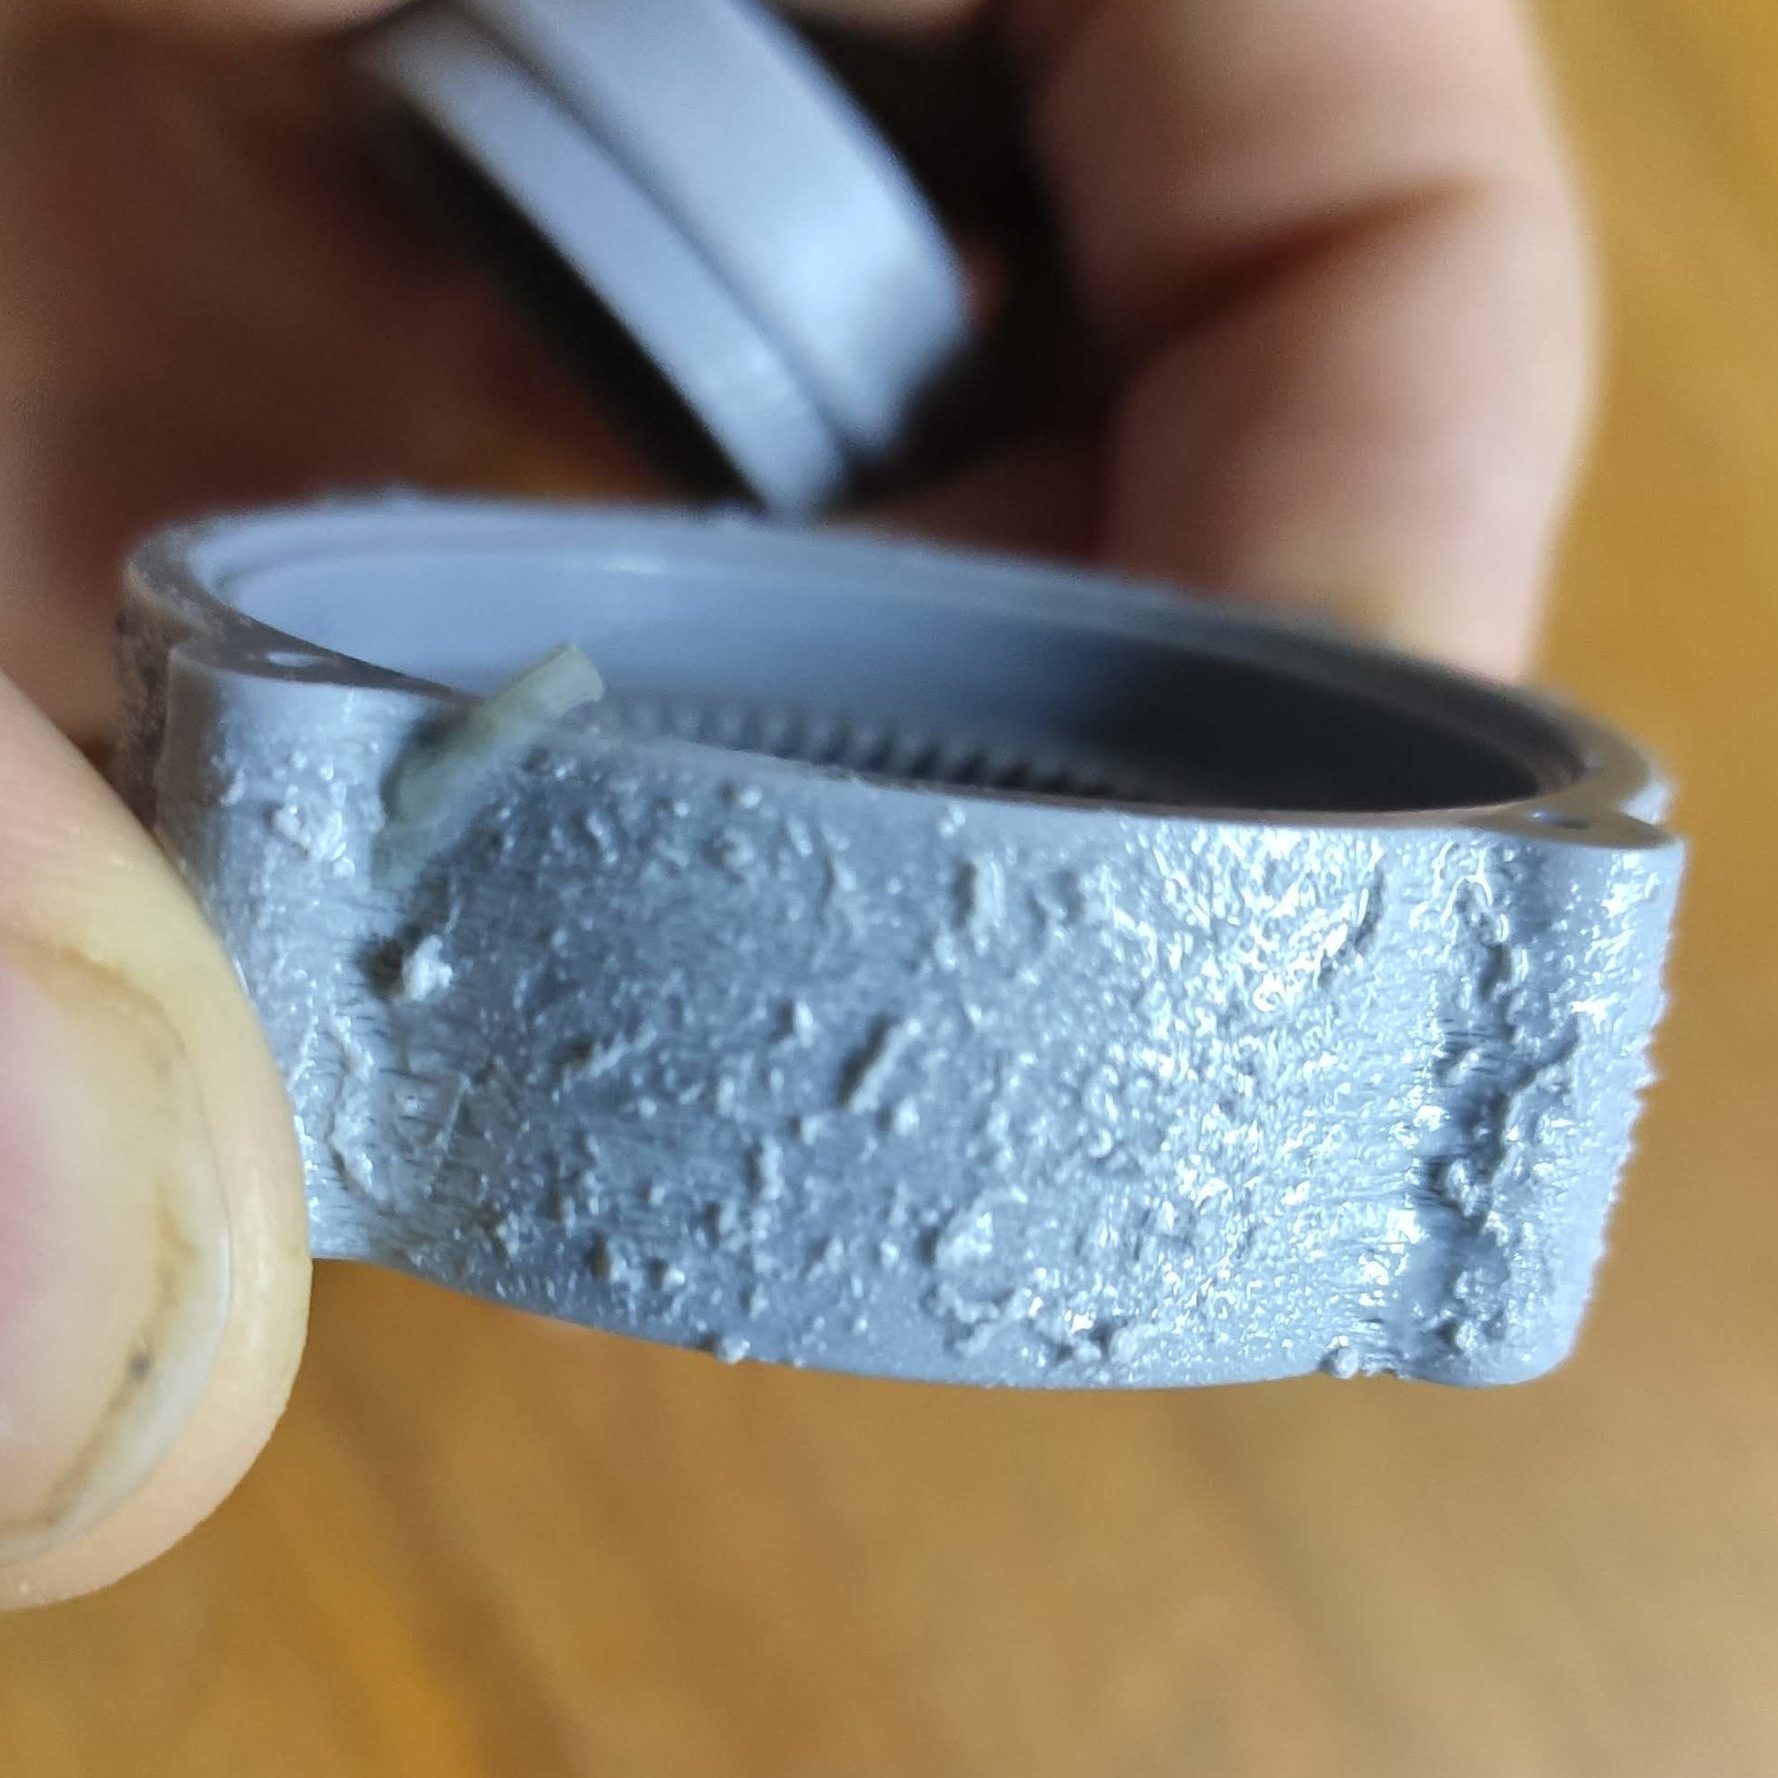
An extreme case of blooming.

Temperature control isn’t the only thing, either. Layer formation and build plate adhesion can all be improved by adding rest times between layers. Yes, this increases print time. It also allows resin to settle before the next layer, improving adhesion and preventing blooming (a rough texture caused by an imperfect cure.) Since resin flows less readily at lower temperatures, rest times can help improve results. The best setting depends heavily on your particular setup, so [Jan] gives tips on finding optimal rest times.

Most common knowledge and advice from well-meaning communities online focuses on increasing exposure time or blaming the build plate. [Jan] feels that these are ultimately the wrong way to go about addressing failures. Usually, an environmental change (like the arrival of winter) has simply pushed a printer that was not optimized in the first place outside of its narrow comfort zone. A little optimization can set things back on track, making the printer more resilient and reliable overall.

Electric Vehicle Charging Heats Up

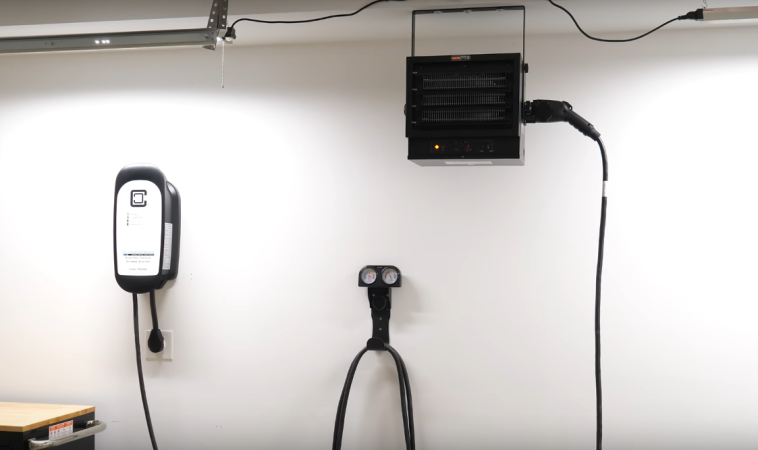
As the electric vehicle takeover slowly lumbers along, marginally increasing efficiencies for certain applications while entrenching car-centric urban design even further, there are some knock-on effects that are benefiting people and infrastructure beyond simple transportation. Vehicle-to-grid technology has applications for providing energy from the car back to the grid for things like power outages or grid leveling. But [Technology Connections] is taking this logic one step further. Since a large number of EV owners have charging stations built into their garages, he wondered if these charging stations could be used for other tasks and built an electric heater which can use one for power.

This project uses a level 2 charger, capable of delivering many kilowatts of power to an EV over fairly standard 240V home wiring with a smart controller in between that and the car. Compared to a level 1 charger which can only trickle charge a car on a standard 120V outlet (in the US) or a DC fast charger which can provide a truly tremendous amount of energy in a very short time, these are a happy middle ground. So, while it’s true a homeowner could simply wire up another 240V outlet for this type of space heater or other similar application, this project uses the existing infrastructure of the home to avoid redundancies like that.

Of course this isn’t exactly plug-and-play. Car chargers communicate with vehicles to negotiate power capabilities with each other, so any appliance wanting to use one as a bulk electric supply needs to be able to perform this negotiation. To get the full power available in this case all that’s needed is a resistor connected to one of the signal wires, but this won’t work for all cases and could overload smaller charging stations. For that a more complex signalling method is needed, but since this was more of a proof-of-concept we’ll still call it a success. For those wanting to DIY the charger itself, building one from the ground up is fairly straightforward as well.

Thanks to [Billy] for the tip!

Continue reading “Electric Vehicle Charging Heats Up”

Hot Water Heater Hacked To Run On Solar Juice

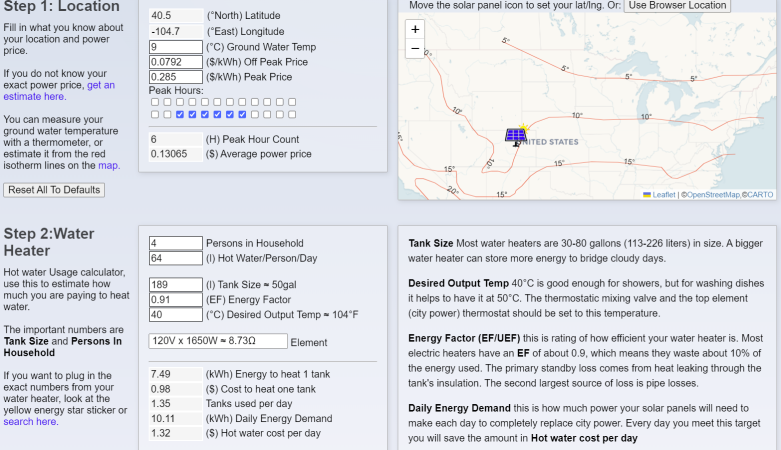
It’s 2024, and there’s no getting around it. Grid energy is expensive. [Darrell] realized that a lot of his money was going on water heating, and he came up with a neat solution. What if he could hack in some solar power to slash his bills at a minimum of fuss? It worked so well for him, he’s whipped up a calculator to help others do the same.

[Darrell]’s idea was simple enough. He hooked up solar panels to just the bottom heating element of his hot water heater. This cut his power bill in half. His calculator is now up at pvh20.com, and it’s designed to help you figure out if it’s feasible for you. It takes into account your location, local power prices, and the amount of sun your area tends to get on a regular basis. It also takes into account the solar panels you intend to use and your water heater to determine how many panels you’ll need for properly hot water. Key all that in, and you’re well on your way to speccing a decent solar hot water setup. From there you’ll just need to buy the right stuff and wire it all up properly.

If you live in an area where the sun shines freely and the power is more expensive than printer ink, this could be a project well worth pursuing. Cheaper hot water is a grand thing, after all. [Darrell’s] calculator is really only the first step, and it doesn’t deal with the practicalities of installation, but that’s half the fun of a good project, right? Happy hacking!

Baseboard Heaters Get Automated

If you’re lucky enough to have central heating and/or air conditioning, with an automatic thermostat, you probably don’t have to worry too much about the outside temperature. But central HVAC is far from the only way of maintaining temperature in a home. From wood stoves to boilers there are many options depending on your climate and home type, and [Murphy’s Law] has a decentralized baseboard system instead of something centralized. An ESP8266 solution was found that was able to tie them all together.

There are other types of baseboard heaters, but in [Murphy’s Law]’s case the heaters were electric with a separate thermostat for each heater. Rather than build a control system from the ground up to replace the thermostats, turnkey smart wall switches were used instead. These switches happened to be based on the popular ESP8266 microcontroller, like plenty of other off-the-shelf automation solutions, which meant less work needed to be done on the line voltage side and the microcontroller’s firmware could be easily customized for use with Home Assistant.

While [Murphy’s Law] doesn’t live in the home with the fleet of electric baseboard heaters anymore, the new home has a single baseboard heater to keep a bathroom warm since the central heating system doesn’t quite keep it warm enough. This system is able to scale up or down based on number of heaters, though, so it’s still a capable solution for the single room and has since been updated to use the ESP32. All of the code for this project is available on GitHub as well, and for those of you attempting to add other HVAC components to a home automation system this project that loops in a heat pump is worth taking a look at as well.