Never Miss A Roadside Photo-op With An Easy Camera Hack.

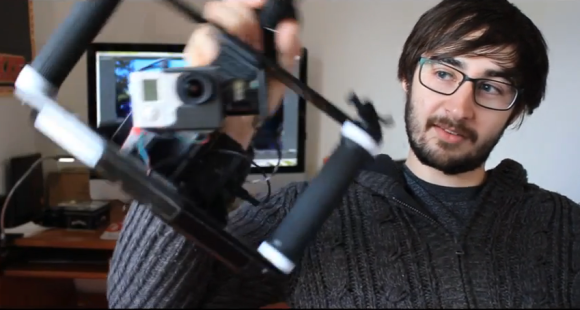
When you’re driving for days on the highway, you see some interesting things. If you’re like me, you usually don’t have the time to get your camera out and snap a picture. Especially if it is just a goofy looking car, or an interesting tree or something. This hack will make it really easy to get pictures of sights on the highway by allowing you to snap a picture at the press of a button.

Continue reading “Never Miss A Roadside Photo-op With An Easy Camera Hack.”

Reading Punch Cards With An Arduino And Digital Camera

[digitaltrails] wanted the data on a few old IBM 80-column punch cards he had lying around, but didn’t have decades old computer hardware in his garage. He decided to build his own out of LEGO, an Arduino, a digital camera, and a bit of Python.

The hardware portion of [digitaltrails] build includes a crank-operated feed mechanism made entirely out of LEGO. For each turn of the crank, the feed mechanism sends one card down a chute where a photodetector wired into an Arduino tells a camera to take a picture. After that, a servo is activated, sending the card into the ‘already scanned’ bin.

On the software side of the build, [digitatrails] used the Python Imaging Library to scan one row of pixels where each column is expected to be. The software outputs the code and data contained on the 80-column card as well as a very cool ASCII art version of each card.

Considering you just can’t go down to Fry’s and buy an IBM 80-column punch card reader, we’re loving [digitatrails]’ clever way of getting data off an otherwise unreadable storage medium. Check out the video of the card reader in action after the break.

Continue reading “Reading Punch Cards With An Arduino And Digital Camera”

New Cameras Learning Old Lens Tricks

[Michael H] tipped us off about this guide to using view camera lens parts with DSLR cameras and lenses. We weren’t familiar with the term ‘view camera’ but we certainly recognize the accordion-like bellows that define that type of camera. The idea is that modern cameras with their fixed lenses miss out on some types of shots. Why not work out a way to get the best from both old and new?

The concept behind the view camera is that there are two plates connected by the bellows. One plate holds the film and shutter, the other holds the lens. The two can be adjusted for focal length but can also be set at an angle to each other. This modern adaptation uses an adjustable frame to hold the two plates in position. Custom connectors were made by attaching lens rings to the plates. It’s pretty much the same connection technique as we’ve seen when trying to mate cameras with lenses from a different maker.

Simple Light Painting Bar Build

[SkyWodd] took the easy route when it came time to build this light painting bar. But he was still met with great success. Thanks to his well-documented work you should be able to throw this together for yourself in about an hour.

The idea here is to build a full-color display that will draw a picture in a long-exposure photograph. We’ve seen the concept used with 64 discrete RGB LEDs, but there’s almost no soldering to be done with this project. Instead, [SkyWodd] used an addressable RGB LED strip. It has 64 pixels, all taking commands via the SPI protocol. This helps keep the number of microcontroller connections to a minimum. He lashed the entire system onto a long hunk of wooden dowel and grabbed a camera.

You’ll need a DSLR as each image needs to have an exposure time approaching 10 seconds. One thing to note is that it may be best to leave the LED bar stationary and move the camera. If you use a tripod it should help keep the vibrations to a minimum.

Motorized Camera Rig Makes Panoramic Shooting Simple

diy-panorama-rig

Where some people might see a pile of junk, Hackaday reader and budget-conscious photo nut [FantomFotographer] sees inspiration. He was in search of a rig that would help him take better panoramic photos and found all that he needed to build one right around him.

He had an old tripod kicking around, which serves as the base for rig. At the top sits a pair of servos [FantomFotographer] attached to the tripod with some scrap wood, screws, and glue. The servos are driven by an Arduino Nano, which sits comfortably in a plastic enclosure he scavenged from trash heap. He uses an IR receiver to control the whole thing, which allows him to not only change shooting angles, but camera settings as well.

While it might sound like all is well with his upcycled camera rig, [FantomFotographer] says that like every project, there is some room for improvement. He’s keeping the source code under wraps at the moment, but once he gets everything working to his liking, he says that he’ll release it.

In the meantime, be sure to check out the cool panoramas he has put together.

High Speed Photography Controller Built To Catch Water Droplets

One high-speed photography controller to rule them all. If you’re looking to photograph droplets of water splashing on a still reservoir this is the ticket. But if you’re not, it still offers an incredible amount of flexibility for other high-speed needs. Inside you’ll find an Arduino Mega, which has plenty of room to bend to your will.

[Michael Ross] is the man behind this box. He wanted a system that did it all; timings, droplet control, camera shutter, etc. What you can’t see in the image above is the interface panel on the back of this enclosure (this shot shows the top of the box). The video after the break will give you a look at the overall setup. It has ports to control two different light sources, detectors to snap the images using an infrared sensor or via sound (we’re thinking bullet photography), and four ports to control solenoid valves.

He produced a mammoth PDF tutorial which will guide even the biggest noob through the entire build process. Find it at his site linked above.

Continue reading “High Speed Photography Controller Built To Catch Water Droplets”

Optical Fiber Twin-flash Adapter

[Marcell] has always been turned off by the price tag of commercially available double flash adapters. He decided to see what kind of performance he could get out of a flash adapter which he built himself.

The raw materials used should seem quite familiar. The optical fibers act as a conduit to redirect the light from the flash, but he needed a way to hold them in place. He chose to use locline. It’s a product we often see in CNC mill builds to blow debris away from the cutter head. It’s hollow, and holds its position. This is perfect because it allows for easy adjustment and provides a channel through which the fibers can be routed. The Y adapters used here run to a hard board base which connects to the mounting lug on the bottom of the camera. [Marcell] suggests using a T-piece if available because the Y fitting made it a bit more difficult to push the fibers through.