There are a lot of reasons to consider reproducing. Tax breaks are near the top of the list, and a bizarre obligation to ensure the survival of the species following closely behind. The pinewood derby, though… Where else are you going to get a chance to spend hours polishing axles and weighing down bits of wood so they can roll faster?
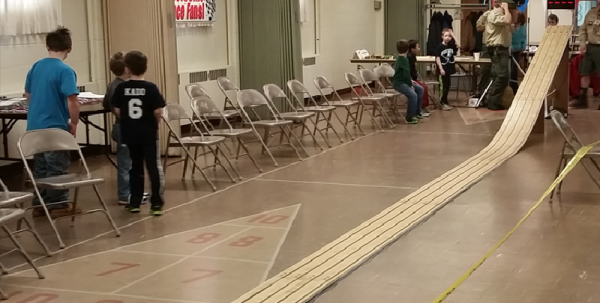
The Lansing Makers Network has cub scouts around the shop, most likely goofing off while their fathers spend hours building their son’s pinewood derby racers. Where there’s a pinewood derby manufactory, there’s a need for a track to test these racers out.
 The four-lane, 38-foot run was made out of five sections of cabinet plywood attached with 4″ lap joints. That’s the way to do it if you want a smooth running surface. The lanes are 1/4″ strips of maple plywood, and the last four feet of the track – after the finish line, of course – are a ramp that raises the lanes another 1/2″ above the ground. There’s very little need for a bunch of pillows or foam at the end of the track.
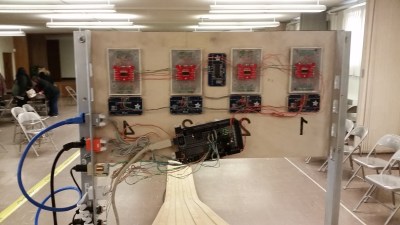
This is the 21st century, and no pinewood derby track would be complete without a few bits of electronics. The starting gate is activated with a push button. A solenoid keeps a quartet of pins in place until the race is started. When the start button is pressed, the solenoid releases, sending the cars on their way.
On their way down the ramp, the cars pass over an IR object sensor which records their starting time. Thanks to some more sensors at the finish line, the track records each car’s position in the race on a few seven-segment displays.