Infinity Mirror Guitar Shreds Forever

Just when we thought there was nothing left to make into an infinity mirror, [Burls Art] goes and builds something that seems obvious now that it exists — an infinity mirror guitar. Check out the build video after the break, where [Burls Art] gets right to it without wasting any time.

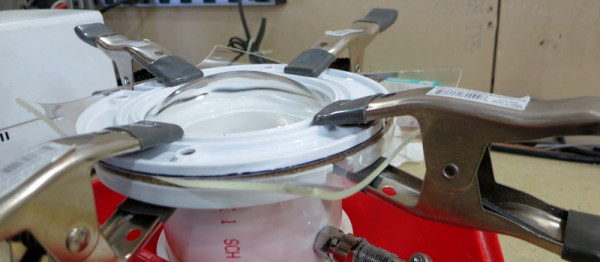
He started by making a 3/4″ wood frame for the body and the one-piece neck and headstock. The acrylic on the top has two-way mirror film, and the back piece is painted with mirror paint to get the infinity effect going. [Burls Art] also fashioned acrylic boxes for the pickup and the electronics. Those are both buffed to be frosty, so the lights reflect nicely off of them.

There’s nothing super-fancy going on with the electronics, just some app-controlled RGB LEDs. We would love to see a version where the LEDs respond in real time to the music. The effect is still quite cool, so if you don’t want to watch the whole build, at least check out the demo at the end where [Burls Art] plays a riff. Never has a delay pedal been so appropriate.

If you’re not much of a luthier, don’t fret about not being able to make a cover version. We’ve seen plenty of infinity mirrors, but if you want something useful, whip up some infinity drink coasters.

Continue reading “Infinity Mirror Guitar Shreds Forever”

Quick And Easy Pressure Forming Makes Plexiglas Domes

Thermoplastics are amazingly versatile materials. Apply some heat, add a little force, and within seconds you’ve got a part. It’s not always quite that simple, but as [maxelrad] discovered, sometimes thermoforming can be as easy as blowing up a balloon.

In need of a cowling for an exterior light fixture on an experimental aircraft, [maxelrad] turned to pressure forming of Plexiglas for the hemispherical shape he needed. His DIY forming rig was a plumbing-aisle special: PVC pipe and caps, some air hose and fittings, and a toilet flange for the pressure chamber. The Plexiglas was softened in a toaster oven, clamped over the business end of the chamber, and a few puffs of air inflated the plastic to form a dome. [maxelrad] points out that a template could be applied over the plastic sheet to create the streamlined teardrop shape he needs, and he notes that the rig would likely work just as well for vacuum forming. Of course, a mold could be substituted for the template to make this a true blow-molding outfit, but that would take away from the simplicity of this solution.

There have been a fair number of thermoforming projects featured on Hackaday before, from this DIY vacuum former to a scratch-built blow molder. And while we really like the simplicity of [maxelrad]’s technique, what we’d really love to see is some details on that airplane build.

Laser Engraved Business Cards With LEDs

Plexiglass-LED-Lit-Business-Card-1

Regular paper business cards are boring. They are flimsy and easily forgettable for the most part, and when stacked together or thrown in a pile, it’s hard to locate a specific one; like trying to find a needle in a haystack. Plastic cards aren’t much better either because they still fall into that ‘who cares’ category. But plexiglas business cards with laser cut etchings beautifully lit up by an LED?! Yes please.

The design was developed by Romanian engraving company called Gravez Dotro who fixed the problem of simply glancing at a business card, putting it in a wallet, and causally forgetting about it later, never to contact the person that gave it out. If someone hands away one of these though, the receiver is definitely going to remember it. The solution isn’t that high-tech and just about anyone with access to a laser cutter can make their own. It will be interesting to see what people come up with. If you feel like creating one, be sure to send us pictures. We would love to see them. Video of the design comes up after the break.

Continue reading “Laser Engraved Business Cards With LEDs”

Dad-Built Rocket Control Module

Like a lot of parents, [justbennett]’s kids like to play rocket and spaceship command. His kids’ imagination-assigned controls kept shifting from this LEGO to that banana to the dog’s tail, so [justbennett] did what he had to do: make this Dad-built rocket control module for them.

The module supports all of the vital sub-modules required for rocket and spaceship administration. There is a launch status indicator, an acceleration vector resonator (AVR), and a com-link. He used mostly parts on hand, and the Arduino count is zero. He built a NASA-grade Plexiglas enclosure to avoid juice box incidents. The two pieces are connected with aluminum angle bar so that he can make repairs or modifications.

The analogue joystick was a thrift store find. [Justbennett] wired the trigger and thumb buttons up as the AVR which activate a recycled PICAXE 08M project of his. The PICAXE senses the button pushes to flash an LED and play an ascending or descending tone. Long-pressing one button will result in an explosion noise as you might expect.

The launch status indicator is a potentiometer wired to a second PICAXE and three LEDs that light up in sequence. In the future, [justbennett] intends to add haptic feedback with a tiny vibration motor. The com-link packet messaging system is a Radio Shack recording module and two big, tempting buttons. The control module ships with a message from Star Command that explains the controls.

Cheap And Easy Top-down Camera Quadpod

camera-quad-pod

We keep waiting for evolution to give us that third arm but in the mean time, this may be the solution for holding the camera while you document your projects. [DHagen] has made a four legged tripod (quadpod) for his camera in order to use it as a digital copy machine. We’ve spent many a night trying to get a steady and sharp video of an LCD or array of LEDs in action to document our weekend tinkering and this will make that all a lot easier.

His build uses materials that will total between $10-$20 at the hardware store down the street. A chunk of scrap wood is connected to the camera using a bolt in the threaded tripod hole of the camera. Two L-brackets are attached to the wood so that one is on either side of the camera lens. This leaves two mounting holes on either side of the lens to attach threaded rod using nuts. The assembly is capped off with a square of acrylic (plexiglas).

Quick and clean. It’s not the cheapest camera mounting solution we’ve seen, but it sure does a good job.