Two-Wheel Balancing Robot Revived From The Dead

Capture

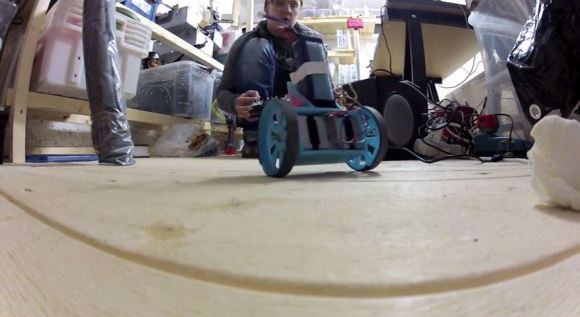
[Jouni] built a pretty nice little two-wheeled robot a while back — but he never got it working quite right. Taking inspiration and a bit of opensource code from another hacker featured here, he’s finished the bot, and it works great!

After seeing [Jose’s] 3D printed Air Hockey bot, he poked around the creator’s blog and discovered the B-Robot, a 3D printed, two-wheeled, stepper driven, balancing robot. As it turned out, it was incredibly similar to a robot [Jouni] had made himself previously!

[Jouni’s] robot features two NEMA-17 steppers, a 12v 2200mAh battery pack, an Arduino Pro Mini, a MPU6050 gyro and a FrSky receiver. Lucky for him, [Jose’s] B-Robot made use of the same steppers and gyro! Using some of [Jose’s] code from his GitHub, [Jouni] was able to bring new life into his little robot!

We’ve included videos of both the original project, and [Jouni’s] version. Aren’t opensource projects awesome?

Continue reading “Two-Wheel Balancing Robot Revived From The Dead”

Router Robot A Promising Playground For Young Hacker

router-robot-project

[Stephen Downward] has put together a very impressive Internet controlled robot. There are so many things about his video presentation (also embedded below) which we find delightful. Notably, it’s obvious that he knows what he’s talking about when discussing everything from the electronics chosen for the project, the mechanical assembly and the issues with its current state, as well as the software backend that gives him control of the rover.

The bulk of the rover is the Linksys WRT-54G router which he picked up at a thrift shop. This has been a popular model for building rovers for quite some time. [Stephen] is not driving directly from the router’s serial port, but that could be an adventure for him down the road. For now he’s using an Arduino Mega along with an Ethernet shield to connect the motors to his network. The IP camera on the front gives him the video feed to operate this completely over the Internet using his own program written in C#. He mentions that the CD wheels he has aren’t ideal because of their thin tread area (covered in masking tape) and the inaccurate mounting which leaves one of them at an angle. He’s hoping to design and print his own. He plans rent some time on a 3D printer at the local University when their 3D printing service comes back online.

We think the hardest part with robot building is getting your first platform up and running. Now that he’s got that it’s a matter of making improvements and add-ons. Since he’s got the I/O of the Mega at his disposal we’d like to see him implement a bunch of different sensor: line following, bump sensors, distance sensor, heck… maybe someday he’ll scavenge some Lidar for it!

Continue reading “Router Robot A Promising Playground For Young Hacker”

Meet ‘Raspberri’, Your Personal Voice Controlled Assistant

raspda

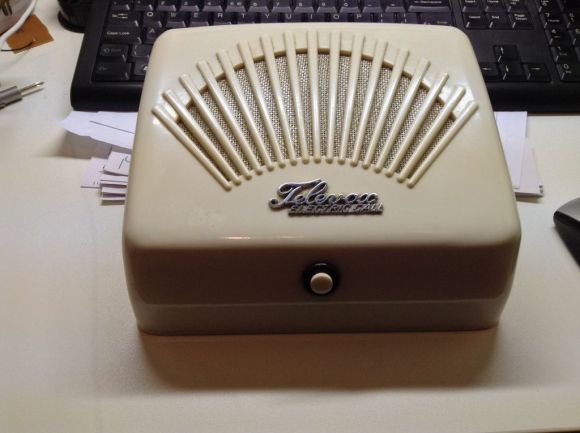
We’ve all seen the old movie scene where the executive calls his assistant on the intercom for some task or other. [Jan] may not be an executive, and he may not have an assistant. He does have Raspberri, his voice controlled personal digital assistant. Raspberri started life as a vintage Televox intercom box. [Jan] found it at a second-hand store, and snapped it up in hopes of using it in a future project. That project eventually happened when [Jan] got a Raspberry Pi and learned how to use it. He decided to build the Televox and Pi together, creating his own electronic assistant.

[Jan] started by adding a cheap USB sound card and WiFi module to his Pi. He also added a small 3 Watt audio amp board. The Televox used a single speaker as both audio input and output. [Jan] didn’t want to make any modifications to the case, so he kept this arrangement. Using a single speaker would mean dead shorting the audio amplifier and the sound card’s microphone input. To avoid this, [Jan] added a DPDT relay controlled by the original push-to-talk button on the Televox. The relay switches between the microphone input and the audio output on the USB sound card. Everything fit nicely inside the Televox case.

With the hardware complete [Jan] turned his attention to software. He went with PiAUISuite for voice input. Voice output is handled by a simple shell script which uses google voice to convert text to speech. For intermediate processing, such as scraping a weather website for data, [Jan] created custom python scripts. The end result is pretty darn good. There is a bit of lag between saying the command and receiving an answer. This may be due to transferring the audio files over WiFi. However,  [Jan] can always get away with saying his assistant was out getting him more coffee!

Continue reading “Meet ‘Raspberri’, Your Personal Voice Controlled Assistant”

Reverse Engineering A Bank’s Security Token

app

[Thiago]’s bank uses a few methods besides passwords and PINs to verify accounts online and at ATMs. One of these is a ‘security card’ with 70 single use codes, while another is an Android app that generates a security token. [Thiago] changes phones and ROMs often enough that activating this app became a chore. This left only one thing to do: reverse engineer his bank’s security token and build a hardware device to replicate the app’s functionality.

After downloading the bank’s app off his phone and turning the .APK into a .JAR, [Thiago] needed to generate an authentication code for himself. He found a method that generates a timestamp which is the number of 36-second intervals since April 1st, 2007. The 36-second interval is how long each token lasts, and the 2007 date means this part of the code was probably developed in late 2007 or 2008. Reverse engineering this code allowed [Thiago] to glean the token generation process: it required a key, and the current timestamp.

[Thiago] found another class that reads his phone’s android_id, and derives the key from that. With the key and timestamp in hand, he figured out the generateToken method and found it was remarkably similar to Google Authenticator’s implementation; the only difference was the timestamp epoch and the period each token lasts.

With the generation of the security token complete, [Thiago] set out to put this code into a hardware device. He used a Stellaris Launchpad with the Criptosuite and RTClib libraries. The hardware doesn’t include a real-time clock, meaning the date and time needs to be reset at each startup. Still, with a few additions, [Thiago] can have a portable device that generates security tokens for his bank account. Great work, and great example of how seriously his bank takes account security.

Hackaday Retro Edition: Retro Roundup

retro

We’ve rebooted the Hackaday Retro Edition and again we’re getting a few submissions for retro successes – old computers that somehow managed to load our crappy, pure-HTML, no-javascript edition.


Inspired by the Palm Lifedrive in the previous retro roundup, [Bobby] dug out his Palm TX and loaded up the retro edition with the Blazer browser. Given this device has WiFi and a browser, it’s not much, but [Bobby] did run in to a bit of a problem: Palm never released WPA2 for personal use, and this device’s WPA abilities are buried away in a server somewhere. Interesting that a device that’s relatively young could run into problems so easily.

How about another Palm? [nezb]’s first smartphone, back in 2003, was a Treo 600. He dug it out, got it activated (no WiFi), and was able to load the retro edition. Even the Palm-optimized edition of Slashdot works!

How about some Xenix action? [Lorenzo] had an Olivetti 386 box with 4MB of RAM with Xenix – Microsoft Unix – as the operating system. The connection was over Ethernet using a thinnet card. Here’s a video of it booting.

[Eugenio] sent in a twofer. The first is a Thinkpad 600, a neat little laptop that would make for a great portable DOS gaming rig. It’s running Mandrake Linux 9, his very first Linux. Next up is the venerable Mac SE/30 with a Kinetics Etherport network card. It’s using a telnet client to talk to a Debian box.

Here’s one that was cool enough for its own post: [Hudson] over at NYC Resistor salvaged an old Mac SE with a BeagleBone Black connected to the CRT. This effectively turns the SE into a modern (if low powered) ARM Linux box. Emulators are always an option, though, as is loading our retro edition in xterm.

Links to the pics below, and you’re always welcome to dust off your old boxxen, fire it up, and load up the retro edition. It’s new and improved! Every half hour or so, five classic hacks from the first 10,000 Hackaday posts are converted to pure HTML. Take a pic and send it in.

Continue reading “Hackaday Retro Edition: Retro Roundup”

Thumbs-Down Songs On Pandora With Your Mind

[Steven] likes music. Like many of us, he uses Pandora to enjoy the familiar and to discover new music. Now, Pandora means well, but she gets it wrong sometimes. [Steven] has had a Mindwave Mobile EEG headset lying around for a while and decided to put it to good use. With the aid of a Raspberry Pi and a bluetooth module, he built a brainwave-controlled Pandora track advancing system.
The idea is to recognize that you dislike a song based on your brainwaves. The Mindwave gives data for many different brainwaves as well as approximating your attention and meditation levels. Since [Steven] isn’t well-versed in brainwavery, he used Bayesian estimation to generate two multivariate Gaussian models. One represents good music, and the other represents bad music. The resulting algorithm is about 70% accurate, so [Steven]’s Python script waits for four “bad music” estimations in a row before advancing the track.

[Steven] streams Pandora through pianobar and has a modified version of the control-pianobar script in his GitHub repo His script will also alert you if the headset isn’t getting good skin contact, a variable that the Mindwave reports on a scale of 0 to 200.

Stick around for a demo of [Steven] controlling Pandora with his mind. If you don’t have an EEG headset, you can still control Pandora with a Pi, pianobar, and some nice clicky buttons.

Continue reading “Thumbs-Down Songs On Pandora With Your Mind”

Hacking The Linksys WRT120N

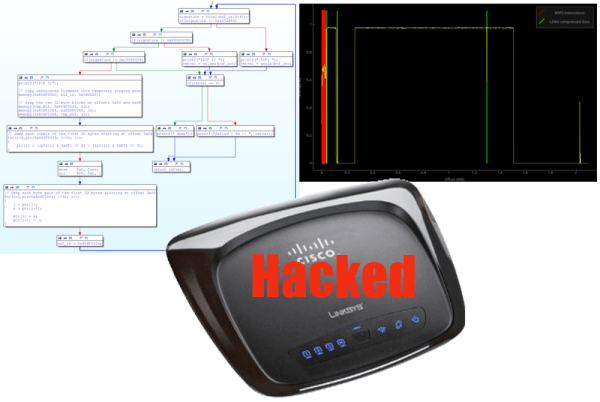
[Craig Heffner] recently found himself on the case of the Linksys WRT120N router. The router’s firmware was using some previously unknown form of obfuscation, causing headaches for those wishing to run their own software. The WRT120N, being a 2009 model is somewhat out of date at this point. That didn’t stop [Craig] though, as he dove into reverse engineering the firmware obfuscation.

[Craig] started by running the firmware through his own Binwalk tool. Binwalk analyzes firmware files for known data, be it embedded filesystems, raw compression streams, or binary files. In this case Binwalk only found a small LZMA block which contained the compressed html files for the router’s web interface. The rest of the firmware was unknown data with a high level of entropy. [Craig] couldn’t do anything more with the firmware update file alone, so he ordered a router to attack from the hardware side. Inside he found typical low-end router components:  An Atheros AR7240 SoC, a 2MB SPI flash chip, 32MB of RAM. He also found serial and JTAG headers.

[Craig] connected to the serial port and was greeted with a boot menu. This allowed him to run some commands on the router, but didn’t give him any way to dump memory. He had to go straight to the source – connecting directly to the router’s SPI flash with an FTDI C232HM cable. Using libmpsse, another of his open source tools, [Craig] was able to dump the flash. He now had the un-obfuscated bootloader code, albeit in MIPS assembly. [Craig] was then able to go after the bootloader with IDA Pro. After a bit of work, the obfuscation system was exposed. The system was simple – several byte and nibble swaps had been performed between the LZMA header block and the first few bytes of data. [Craig] finished out this part of his hack by writing a simple C program to de-obfuscate and decompress the firmware.