3D Printing Minecraft Worlds

If you’ve ever wanted to build an awesome tabletop game or model train layout scenery, you probably couldn’t do better than printing Minecraft worlds on a RepRap. This guide comes courtesy of [Nudel] who figured out how to use Mineways with his RepRap. While [Nudel]’s landscape print doesn’t have the full color of something from Shapeways, he only spent $3 in materials. Not bad if you’d like to print out your server’s world.

We have to give a shout out to [erich666] for his amazing work on Mineways. He bills his work as a bridge between Minecraft and a 3D printer or Blender. You can check out [erich]’s demo of Mineways after the break.

Of course the state of printing voxels wouldn’t be where it is today without the work of two guys at the MIT Media Lab and their work on Minecraft.Print(). If you manage to print out your base/castle/village, add it to the Mineways Flickr group.

Continue reading “3D Printing Minecraft Worlds”

Printing With Clear Polycarbonate

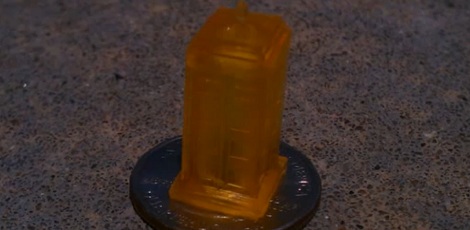
Those of us with 3D printers have had two major choices when selecting a material to print with – ABS, a very hard plastic, and PLA, a more brittle plastic with a lower melting point. [Alex] and [Luke] have been experimenting with printing polycarbonate and creating clear crystalline objects on a standard 3D printer.

The first foray into printing polycarbonate didn’t go so well for [Luke]. Objects came out looking very milky and there was a bit of popping during filament extrusion. The guys solved this problem by putting the polycarbonate filament in a food dehydrator overnight to get rid of the moisture. Polycarbonate has a higher melting temperature than other plastics – around 260 degrees Celsius – which can cause some problems with Teflon insulators in the hot ends of extruders. The guys didn’t have any problems with fumes, though.

If you’ve ever wanted to print something clear, it looks like it’s now possible. Check out the video after the break to see a Makerbot Thing-O-Matic printing with clear polycarbonate.

Continue reading “Printing With Clear Polycarbonate”

Welding And Casting ABS

Anybody who has a 3D printer always has a ton of useless plastic lying around. Some of that plastic may be from useless baubles, but most of it is in bad prints, short bits of filament, and general scraps. [Luke] found an interesting way to put those ABS scraps to use, and ended up turning trash into valuable plastic parts.

Commonly sold as nail polish remover, acetone will turn anything made out of ABS into a puddle of plastic. [Luke] makes glue using the same process – he fills a small container half full of acetone and half with small bits of ABS. After a day or so, he has a nice thin glue that dries into solid ABS. [Luke] used this to create a 400mm long piece of extruded t-slot. We don’t know if it would be suitable to build a child RepRap from, but it would sure be an interesting experiment.

[Luke] also did a little bit of casting with his ABS glue. With a thicker solution of ABS and Acetone, he managed to make this ‘thing’. The entire process is explained over at Thingiverse, We can’t wait to see what can be done with this stuff.

The Cheapest And Easiest 3D Printer We’ve Seen So Far

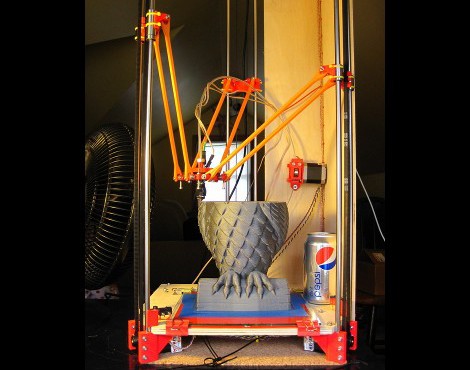
3D printers are awesome, but boy are they frustrating. If you’ve built a RepRap Mendel, Prusa or Huxely, you know there’s nothing quite like trying to get a washer off of a threaded rod without disassembling the entire machine. This frustration in part sourcing, assembling and correctly aligning a printer is where printers like the Makerbot find their niche. There’s a new printer on the block that promises a 45 minute assembly time and less than 2 hours from starting the build to first print. It will do all this for under $500, electronics and motors included.

From the Flickr photoset, we can see that the Printrbot has 2 motors for the z-axis, uses sanguinololu electronics, and uses a derivative of Wade’s extruder – all proven design choices. Unlike the RepRaps, most of the frame is actually printed, and not built out of threaded rods. This drastically reduces the assembly and calibration time.

The inventor of the Printrbot, [Brook Drumm], has a Kickstarter up where he’s selling complete kits (electronics, motors and vitamins) for $499. This beats the very inexpensive SUMPOD in affordability. We haven’t been able to find the 3D design files for the Printrbot (although you can buy these printed parts for $75), and there’s no word on the build volume of the stock printer. That being said, the printrbot does have pretty good resolution. Check out the video of a Printrbot in action after the break.

Continue reading “The Cheapest And Easiest 3D Printer We’ve Seen So Far”

A Technique To Avoid Warping On Large 3D Prints

[Jamie Mantzel] figured out his own way of 3D printing large objects without fear of warping. First a bit of background information. When using a 3D extrusion printer like the RepRap or Makerbot, prints that span a large area tend to warp. That’s because these printers lay down one thin layer of plastic at a time. If the first layer cools too much, it will shrink a bit before the next layer is laid down. As that second layer cools it pulls the part toward the center, eventually bowing the part which causes it to hit the extruder head.

After having several prints encounter this issue [Jamie] decided to alter his design so that it wouldn’t cause these stresses. The first thing that he did was to add alternating voids to a layer between the raft and the actual part. You can see these as notches on the bottom the piece pictured above. This takes care of the initial stresses from the first layer. Next, he adds holes wherever he can in the main body of the part. This is especially important on the edges of the piece where the warping forces will be the greatest.

He also moved the starting position of the bed closer to the extruder head. His hope is that this will help the raft bond better, and resist pulling away from the bed during printing.

See his video explanation of his adventure after the break.

Continue reading “A Technique To Avoid Warping On Large 3D Prints”

Build Your Own Stereolithographic 3D Printer

[Andy’s] 3D printer build uses lasers to create objects from goo. The Stereolithographic process uses resin that is cured by UV light to create the finished product. A single laser mounted to a CNC gantry is able to precisely target a point on the surface of the resin to begin the printing process. As the layers are built up, the stage, which is mounted on the Z axis, slowly sinks into the resin vat. So basically you’re printing from the bottom up but the laser never moves up or down. There’s a time-compressed video of an object being printed embedded after the break. It illustrates the process better than we can describe it.

We think [Andy] really went all out with his write-up of the build process. The quality he achieves in his prints is quite excellent, but you must consider the cost versus an extrusion-based 3D printer. One liter of the UV resin he prints from can cost over $200.

If this sounds familiar it’s because we got a sneak peek at it back when we looked in on his Delta robot work.

Continue reading “Build Your Own Stereolithographic 3D Printer”

3D Printed Electromechanical Computer

A few nights ago, [Chris Fenton] was hanging out at NYC Resistor putting in some time on his electromechanical computer project. You might remember [Chris] from his tiny Cray that he’s putting an OS on. It seems [Chris] is going back in time about 150 years and has set his sights on a 3D printed version of [Babbage]’s Analytical Engine.

The Analytical Engine was is a remarkable feat of engineering and machining. It was the first programmable computer. Shame, then, that it was never built in the 1800s. [Chris] isn’t building a glorified calculator like [Babbage]’s polynomial-computing Difference Engine – he’s going all out and building something with conditional looping.

[Chris] calls his device an electromechanical computer, so we’re assuming it won’t be crank driven like the version in the British Science Museum. Right now, he’s constructed the decade-counting gears that are vitally important for the ALU of his design. All the parts were printed on a Thingomatic, so we’re betting [Chris] is going to be relying heavily on the MakerBot automated build platform for the thousands of parts he’ll have to fabricate.

Check out the video from NYC Resistor after the break.
Continue reading “3D Printed Electromechanical Computer”