Print The Best Mascot, Win A Shiny New Makerbot

If you’ve always wanted a 3D printer, here’s your chance to win one. Makerbot Industries wants the Internets to design a new mascot for them. The contest winner will receive a Makerbot Thing-o-matic.

Don’t worry about a chicken or egg situation with this contest. You don’t actually need to print your design (although printability is a quality considered when judging). All you need to do to enter is upload your design files before the deadline on September 28th. Designs must be robot themed, and anything uploaded as Private will be made Public after contest results are announce. It should be fun looking through all of the submissions. There’s several other design restrictions so make sure to read carefully before you get to work.

Those that would rather work with a soldering iron than design plastic robot parts need not despair. You haven’t missed the deadline for the 7400 Logic contest, which is accepting entries through October 21st.

super_sized_3d_printer

Huge DIY 3D Printer Predictably Prints Huge 3D Items

Well, if we ever need something huge built on a RepRap, now we know who to call. [Jim] over at Grass Roots Engineering wrote in to share a large 3D print he just finished, which was extruded by an equally impressive home-built 3D printer.

The part he built consists of a bunch of hollow green tubing in a criss-cross pattern and was printed in just under 2 days. He never mentions what the part is going to be used for, but at 376 x 376 x 250mm (14.8 x 14.8 x 9.84in), he estimates that this is the biggest single part printed with a DIY 3D printer.

The printer itself is based on the RepRap, but is obviously far larger. It prints using ABS plastic utilizing a maximum build area of 403 x 403 x 322.7mm (15.86 x 15.86 x 12.7in). Built over the course of 3 years, it was fully operational in 2010 but has undergone several improvements as [Jim’s] needs have changed.

It’s a fantastic looking machine, and it seems to print quite nicely. We would sure love to have one of these in our workshop.

Continue reading to see [Jim’s] 3D printer in action.

Continue reading “Huge DIY 3D Printer Predictably Prints Huge 3D Items”

Delta Robot 3D Printer

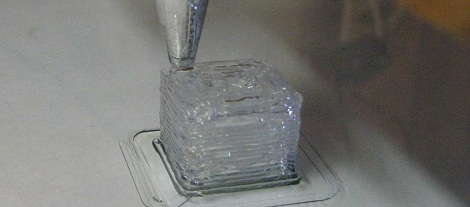
Sometimes, not all our builds work out the way we hoped. That’s what happened to [Rob] and his attempt at a Delta robot that does stereo lithography. A Delta robot is capable of very fast and precise movements, so [Rob] slapped a laser module on the end of the arms. After putting some UV curing resin in front of the laser, he was left with a blob of goo and we’re trying to figure out why.

[Rob] thinks the admittedly terrible print quality was due to diffraction and the reflective build plate. If this were the case, we’d agree with the assessment that adding some dye to the resin would help. Some commentors on [Rob]’s blog have suggested that he’s running the laser too slowly. It’s a shame [Rob] scrapped his build and turned it into a plain-jane X & Y axis build. Delta robots can be really damn fast, and adding a printer to one might mean prints that take minutes instead of hours. There are a few people working to get a Delta RepRap off the ground, but this project still has another prototype or two before that happens. Check out [Rob]’s attempt at Delta robot stereolithography after the break.

Thanks to [techartisan] for sending this one in.

Continue reading “Delta Robot 3D Printer”

A 3D Printed Aerial Drone

Drones come in many shapes and sizes, but now they can also be 3d printed! To make these drones, the [Decode] group used a selective laser sintering process which is pretty interesting in itself. Once the printing process is done, these little planes are built with only five structural and aerodynamic components. Because of their simplicity, these drones can reportedly be assembled and ready to fly with no tools in only ten minutes!

This design was done by the [Engineering and Physical Sciences Research Council] at the University of Southampton in the UK by a group of students. Besides this particular plane, they concentrate their efforts on building autonomous drones under 20 Kilograms. Using a 3D sintering process with this design allowed them to make this plane how they wanted, regardless of the ease of machining the parts.

This group has several videos of their planes on their website to download, but check after the break for an embedded video of the [Newscientist] piece about their project. Continue reading “A 3D Printed Aerial Drone”

3D Printed Singularity Drive Platform

[Silas] is a student at Olin College and came up with a platform using the singularity drive system in his spare time.

We covered a LEGO build of a singularity drive earlier this month. Instead of wheels, treads or legs, this drive system has a hemisphere spinning along its vertical axis. Interestingly, the robot does not change the speed or direction of its drive motor at all. IEEE is now calling this drive system a “singularity drive,” because math.

Continue reading “3D Printed Singularity Drive Platform”

Re-manufacturing Inkjet Cartridges For 3d Printing


[Nullset] uses inkjet printer technology for his 3D printing needs. We usually think of hot-plastic printing like the RepRap or Makerbot when we hear about rapid prototyping, but this setup uses a liquid bonding agent to turn powder into a solid structure. Standard inkjet cartridges can be used to precisely place the bonding agent, but it’s hard on the heads and you have to replace them often. [Nullset] is getting pretty good at it, and decided to write a tutorial on the modifications necessary to print with bonding liquid.

At its core, the method injects binder into the cartridge through one port while using a second for drainage. [Nullset] found that the needle fittings used to inflate a basketball work great for this. He drills a couple of holes that the threaded end of the needles fit into. That connection is sealed with some epoxy, and the tubing that delivers the binder is zip-tied to the needles. A bit of purging is necessary to get rid of any old ink, but after the initial flush you’ll be up and running pretty quickly. He figures the whole process can be one in around 10 minutes once you get the hang of it.

Building A Stepper Driver

[TBJ] is building what he calls a junkbox 3D printer. You can probably guess that he’s trying to salvage most of the parts for the device, and after pulling a stepper motor from an old printer he was in need of a way to control it. What he came up with is a stepper driver that uses discrete components that are easy to acquire and inexpensive. The design calls for two inputs, one that toggles the direction in which the motor will spin, and the other that triggers one step of the motor. A CD4013 dual flip-flop takes care of both of these inputs in one chip package.

The motor is driven by a pair of H-bridges that he built using six transistors each. The trick with a stepper motor is that you need to drive the four poles of the motor to a specific logic level at a specific time. For this [TBJ] uses a CD4017 decade counter. A network of diodes grounds half of the output lines based on the flip-flop that controls direction. Our friend the 555 timer provides a clock for the circuit, keeping everything moving at a predefined rate. Check out the video after the break for an explanation and demonstration.

Continue reading “Building A Stepper Driver”