Printing With Clear Polycarbonate

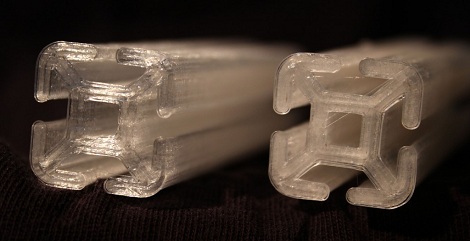
Those of us with 3D printers have had two major choices when selecting a material to print with – ABS, a very hard plastic, and PLA, a more brittle plastic with a lower melting point. [Alex] and [Luke] have been experimenting with printing polycarbonate and creating clear crystalline objects on a standard 3D printer.

The first foray into printing polycarbonate didn’t go so well for [Luke]. Objects came out looking very milky and there was a bit of popping during filament extrusion. The guys solved this problem by putting the polycarbonate filament in a food dehydrator overnight to get rid of the moisture. Polycarbonate has a higher melting temperature than other plastics – around 260 degrees Celsius – which can cause some problems with Teflon insulators in the hot ends of extruders. The guys didn’t have any problems with fumes, though.

If you’ve ever wanted to print something clear, it looks like it’s now possible. Check out the video after the break to see a Makerbot Thing-O-Matic printing with clear polycarbonate.

Continue reading “Printing With Clear Polycarbonate”

Doomsday Keg Of Radness Helps Ring In The New Year

doomsday-keg

Lots of people buy noise makers for New Year’s eve, others opt to sing Auld Lang Syne – then there’s these guys.

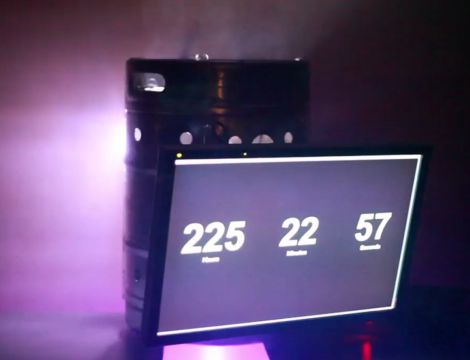
The crew at Stone Brewing Company throw an annual bash at their brewery in celebration of New Years, and while [Dino’s] countdown timer is great for intimate settings, they needed something bigger to wow the crowd. A busted half barrel was all the inspiration they needed to build the “Doomsday Keg of Radness”.

[Mike Palmer], the Creative Director at Stone handed the keg off to the maintenance crew for some remodeling, and got ready to fit it with all sorts of lights and other goodies. Holes drilled in the keg were fitted with bright pulsing LEDs, while additional LED light strips were laid out around the perimeter. The bottom was cut out to accommodate a Moonflower LED module, and a 24” monitor was strapped to the side in order to display a countdown timer. An old Macbook jammed inside the keg runs the video display, while the rest of the lighting is remotely controlled with an RF transmitter.

Now mind you this all went down last year, but since the display was such a hit, they will be busting it out again for the 2011 celebration.

Check out the short demo video below to get a look at the Doomsday Keg in action.

Continue reading “Doomsday Keg Of Radness Helps Ring In The New Year”

So You Wanna Learn FPGAs…

FPGAs are the bee’s knees. Instead of programming a chip by telling it what to do, FPGAs allow you to tell a chip what to be. Like everything though, a new skill set is needed to fully exploit the power of FPGAs. [Mike Field] decided to give back to the internet community at large and put up a crash course in FPGA design.

Right now, [Mike] has a couple of modules up that include subjects like binary math, busses, counting, and of course setting up the FPGA hardware. The recommended hardware is the Papilio One, although the Digilent Nexys2 is what [Mike] has been using so far.

We’ve seen a ton of awesome stuff that uses FPGAs, like the emulated Mac Plus, breaking HDCP, and an Ocarina of Time. [Mike]’s tutorials look like a great starting point for some FPGA work. [Mike] is also looking for some feedback on his tutorials, so if you’ve got an idea of what he should cover be sure to drop him a line.

EDIT: The server was running on an FPGA and we can’t find a cache anywhere. If you’ve found a mirror, send a message. Apparently Amazon’s EC2 runs on an FPGA.

Programming An Arduino Using An Audio File

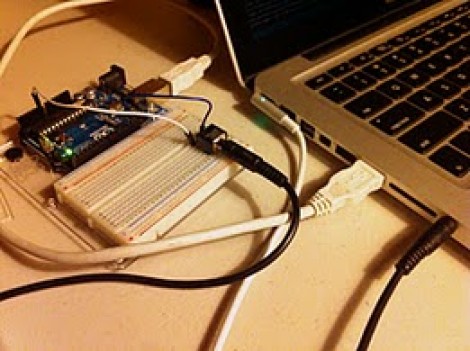
This proof-of-concept is just waiting for you to put it to good use. [Mike Tsao] wrote an Arduino sketch that lets him decode incoming audio data which could be used to program the device. He’s calling the project TribeDuino because it decodes an audio file which is actually the firmware update for a Korg Monotribe.

Earlier in the month [Mike] read our feature on a project that reverse engineered the audio-based firmware update for the Korg hardware. He wanted to see if he could write some code to read that file on his own hardware. All it took was an audio jack and two jumper wires to get the Arduino ready to receive the audio file. His firmware reads the Binary Frequency-Shift Keying encoded data as the audio is played, then echos a checksum to prove that it works.

This would be a fantastic addition to your own projects. Since the audio connection only needs to be mono, it only takes just one Arduino pin to add this jack (the other is a ground connection). Having just played around with alternative ways to push data to a microcontroller ourselves, we might give this a try when we have some free time.

Focus Fix For Non-reflex 35mm Camera

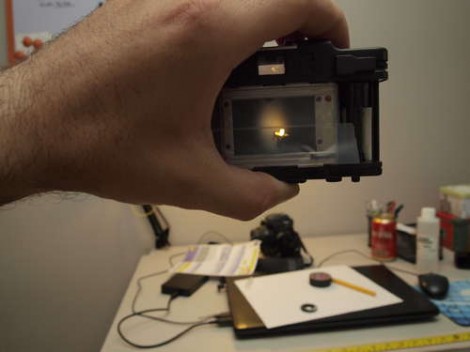
For camera fanatics the acquisition of an old camera is a thrilling event. But if you’re going to collect them, you’d better have some repair skills so that you can also use them. [Fernando’s] latest find was this Minox 35mm camera. The aperture needed cleaning, and after reassembling the unit he realized the he had not marked the focus ring when taking it apart. This is not a reflex camera, so you can’t look in the view finder to adjust focus. He came up with his own method to get the focus ring calibrated.

The focal point needs to focus on the film. He simulated this plane using some magic tape, which removes easily without leaving a residue. When the shutter is open, you can see the image projected on this translucent surface. He then set up the camera with the lens 90 cm from a bright light bulb. By adjusting the focus to create a sharp image on the temporary screen, he knows the focus is calibrated, and can reset the focus ring to the 0.9m mark.

Need some help developing that exposed film? You could always give the coffee and vitamin C hack a try.

Spring Clamp Tripod Mount Has Potential

Admittedly this post is flirting with flamebait, but we think the concept of using a spring clamp as an iPhone tripod mount has a lot of hacking potential. Hear us out, and if we havn’t made our case you can rant about it in the comments.

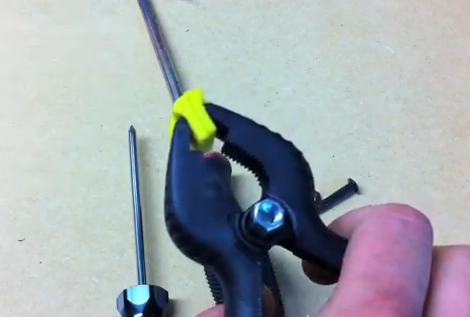
[Joe] wanted an easy way to mount his iPhone on a standard tripod. We’ve seen some creative solutions for this, like using Sugru to make a removable bracket. But he went a different route, using a cheap spring clamp to grip the phone body. These plastic clamps are like over-powered clothespins, and use a screw as the pivot point. [Joe] replaced the stock screw with a longer one, then used a coupling nut which will attach to the tripod. A bit of foam on the pads of the clamp protect your device from the plastic teeth.

It’s a fine solution (if you don’t mind putting that pressure on your smart phone). But we think this would be a great way to build your own heavy-duty third hand. It would be right at home with this modular solder platform. See [Joe’s] how-to video embedded after the break.

Continue reading “Spring Clamp Tripod Mount Has Potential”

dinos-new-years-ball-drop

Build Your Own Mini Ball Drop For New Year’s Eve

[Dino] wanted to make this New Year’s celebration a bit more interesting, but he can’t make it to New York for the ball drop. Instead, he decided to make his own mini display in his workshop. Obviously he’s working with a slightly smaller budget than the folks at Times Square, but we think his display is pretty neat. If anything, [Dino] can at least guarantee that his New Year’s is 100% Seacrest-free.

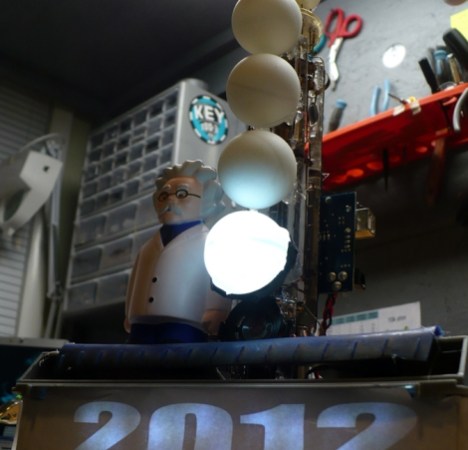
The ball drop is made up of five ping pong balls, each backlit by a 10mm LED. The LEDs and ping pong balls were mounted on the electron gun from a broken oscilloscope, giving it a cool look. The balls are lit one at a time by an Arduino, which illuminates each one for 15 seconds while the final minute of 2011 is counted down. Once midnight hits, a flashing “2012” sign illuminates while Auld Lang Syne plays from a tiny speaker.

The musical part of this build is something that [Dino] spent a lot of time on. He thoroughly explains how he translated the song from sheet music into its digital form, a process that would be helpful for beginners to watch.

Continue reading to see how the display was built, and if you’re just antsy to see the ball drop in action, a short demo can be found at 12:13.

Continue reading “Build Your Own Mini Ball Drop For New Year’s Eve”