Build Your Own Stereolithographic 3D Printer

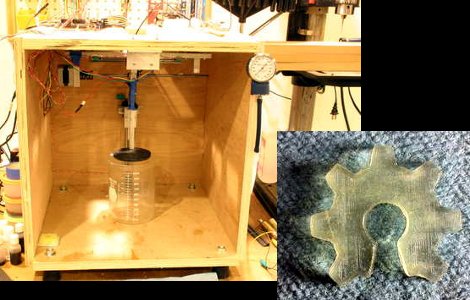
[Andy’s] 3D printer build uses lasers to create objects from goo. The Stereolithographic process uses resin that is cured by UV light to create the finished product. A single laser mounted to a CNC gantry is able to precisely target a point on the surface of the resin to begin the printing process. As the layers are built up, the stage, which is mounted on the Z axis, slowly sinks into the resin vat. So basically you’re printing from the bottom up but the laser never moves up or down. There’s a time-compressed video of an object being printed embedded after the break. It illustrates the process better than we can describe it.

We think [Andy] really went all out with his write-up of the build process. The quality he achieves in his prints is quite excellent, but you must consider the cost versus an extrusion-based 3D printer. One liter of the UV resin he prints from can cost over $200.

If this sounds familiar it’s because we got a sneak peek at it back when we looked in on his Delta robot work.

Continue reading “Build Your Own Stereolithographic 3D Printer”

Nixie Clock Exhibits Well Fabricated Metal Bezel

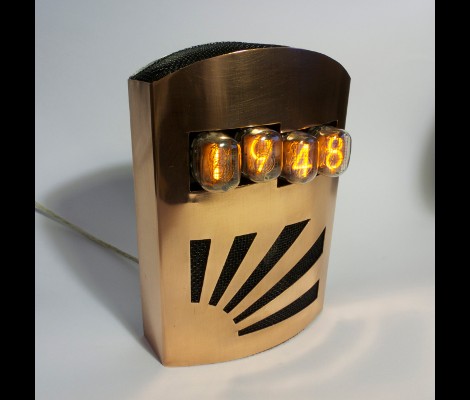
[Matt Evans] achieves a total win with his Nixie clock. Not only does he have the benefit of the retro display hardware, but he really catches our eye with the enclosure he built for it.

The project had its genesis when he came across a set of the Nixie Tubes in a surplus store. This was back in 2007, and with parts in hand he built the high-voltage driver circuit and a control board. The thing kept time, but was housed in a temporary case that was a bit rough looking. There it sat, waiting to become the focus of his attention once again.

When it did finally come time to build a proper case [Matt] started with a small sheet of recycled copper. He made the cutouts and bends by hand. He mentions that it’s a little uneven; maybe, but we don’t think it detracts from the design. Some black screen (like would be used on a porch door) covers the openings, giving texture and contrast to the facade.

We love the look, and the ATmega48 with a clock crystal for the RTC functions should make this a reliable time source.

FT-2232 Bridges Python And I2C/SPI

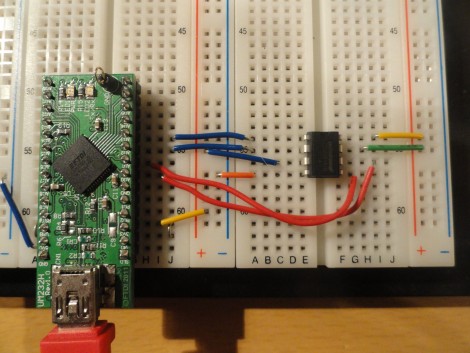
You might already have the hardware on hand to easily interface I2C and SPI devices with Python scripts on your computer. The board seen above is an FT-2232 breakout board. These chips are often used to facilitate JTAG programming via USB, but they have other features that might be useful to you as well. The chip has a Multi-Protocol Synchronous Serial Engine (MPSSE) which can speak the I2C and SPI protocols, you just need to know how to active them in your code.

[Craig] makes this easy with his MPSSE Python wrapper. Simply install his module, and you’ll be able to import all the commands you need. He demonstrates reading the data out of a 1 MB SPI flash memory chip. This could be used for a lot more, including debugging peripherals à la the Bus Pirate, or reprogramming chips to add to your projects (we’re thinking font arrays and sprites for displays, or look-up tables).

If you’re not aware, these FTDI chips were the go-to for USB support for a long time. We’ve got a guide for bit-banging using this hardware. Lately more chips have become available with USB hardware built-in. They’re quite useful and cost-effective, especially with the availability of open-source stacks like the LUFA project.

There’s A Lot Packed Into This BeagleBoard Controlled Rover

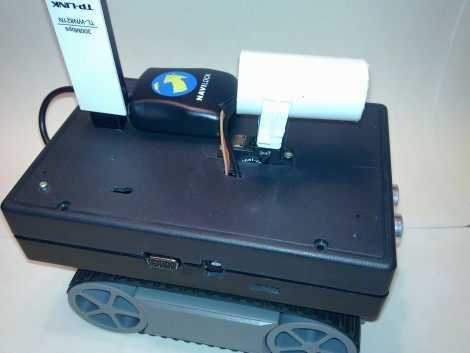
That black box is hiding all kinds of goodies that make this rover a hacking playground. [Andrey] built the device around a BeagleBoard, which offers the processing power and modules that he needed to make the rest of it work.

The control unit shrinks the pilot down to the rover’s size, using a cockpit that has a steering wheel and other controls, and a monitor playing the stream from the camera on the front of the bot. It has a WiFi adapter which allows control via the Internet. The camera, which can be rotated thanks to its servo mounting, feeds the video to the BeagleBoard where it is compressed using the h264 codec (more about that and the cockpit here) to lighten the streaming load. You’ll also find an ultrasonic rangefinder on the front for obstacle avoidance, and a magnetic compass for orientation information. Finally, a GPS bolsters that data, allowing you to plot your adventures on the map.

It’s great, but it will cost you. Material estimates are North of five hundred Euros!

Taking GPS Where No Man Has Gone Before

[Willem] has a friend that wanted to take a GPS datalogger up an unclimbed mountain the wilds of Kyrgyzstan. The GPS logger built for the expedition made it to the summit of Eggmendueluek, but it didn’t work the whole way up. Since the logger came back to London, [Willem] was able to do a complete teardown and failure analysis.

The data logger was built around a Jeenode with a GPS unit and MicroSD card reader added on. A few breakout boards were made and two of these bad boys were ensconced in water and dust proof enclosures. Powered by four AA batteries, the data loggers were able to handle the rigorous testing of being thrown down a staircase and also the harsh temperatures of London. Things changed in the wilds of Kyrgyzstan, though.

The data retrieved from the mountaineering expedition wasn’t the greatest – a few wires came loose after being thrown into the back of a Russian truck and jostled around. The AA batteries only powered the data loggers for three days, compared to the 12 day battery life in London. There are a few improvements needed for the next trip – some thermal insulation and not using solid core wire – but not that [Willem] has figured out the bugs he’s ready for his friend’s next expedition.

The International Obfuscated C Code Contest Is Back

The International Obfuscated C Code Contest is back. The stated goals of the IOCCC are to, “Write the most obscure C program, show the importance of programming style (by doing the opposite), stress the preprocessor to the breaking point, and illustrate some subtleties of the C language.” If you think you’re up to the task of abusing your compiler, check out the rules and guidelines for the contest.

There’s nothing quite like having the code for a flight simulator look like a plane, or calculating pi by measuring the area of C code. The submissions to the IOCCC are classic hacks; very clever things that shouldn’t work, but do despite themselves.

There hasn’t been an IOCCC competition since 2006, and no one knows if it will be around next year. We’ve already seen a few potential entries for this year, like piping chars into /dev/audio to generate a song and hyperlinks all the way down. If you’ve got something you’re working on, feel free to send it in.

via /.

Insane Macro Photography Rig

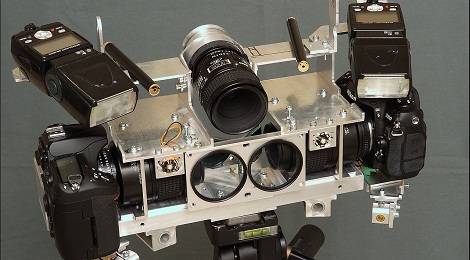
[fotoopa] just put up a Flikr build log of his 3D macro photography rig he uses to take pictures of insects in flight. Outside Hollywood or National Geographic, we’ve never seen a crazier photography rig.

[fotoopa]’s build is based around two cameras – a Nikon D200 and D300. These cameras are pointed towards the subject insect with two mirrors allowing for a nice stereo separation for 3D images. Of course, the trouble is snapping the picture when an insect flies in front of the rig.

For shutter control, [fotoopa] used two IR laser pointers pointed where the two cameras converge. A photodiode in a lens above the rig detects this IR dot and triggers the shutters. To speed up the horribly slow 50ms shutters on the Nikons, a high-speed shutter was added so the image is captured within 3ms.

[fotoopa]’s 2011 rig took things down a notch; this year he’s only working with one camera. Even though he didn’t get any 3D images this year, the skill in making such an awesome rig is impressive.

via (diyphotraphy.net)