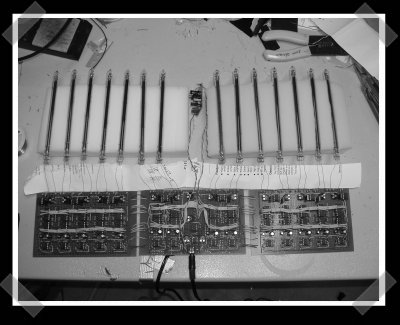
[Daniel] sent in his Nixie tube VU meter. It uses 14 Russian IN-13 Nixie bar-graph tubes. He built a custom circuit to amplify, filter, smooth and feed a voltage divider to assign signal levels to segments and finally some high voltage transistors to drive the tubes. The circuit looks pretty big, but it’s repeated for each tube – so he worked hard to keep the cost down as much as possible. Now this just needs to live on the front of a massive tube amplifier.
audio396 Articles
DIY Home Theater Preamplifier

[Dane] built this excellent home theater pre-amplifier. He used [Mark Hennesy]’s pre-amp design to start with, and added selectable XLR, RCA, SPDIF and even USB audio inputs. Discrete inputs from his DVD player provide surround input, and an analog matrix creates 7.1 surround from the 5.1 input. The design is very elegant, and even uses a VFD display that appears blue with some filters. I usually just buy my HT gear, but projects like this make me seriously consider re-building my entire HT from scratch.
Optical Headphone Amp
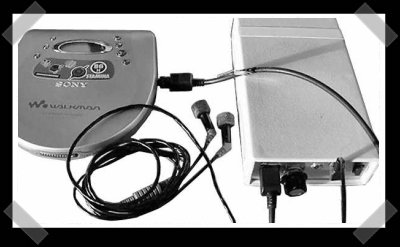
It looks like this one’s been out there for a while, but it doesn’t make it any less awesome. [Andrija] built this combination portable DAC/headphone amp. It takes optical audio input, feeds it through an analog devices AD1866 16bit/96khz decoder. After that, the audio is brought up to volume by an op-amp style headphone amp circuit.
Side note: I wrote up a few short notes on the Sidekick LX I got today, if you dig that sort of thing.
Roasting Pan Audio Amplifier
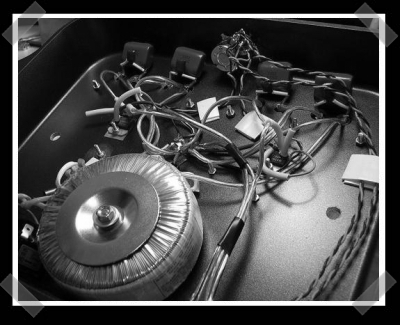
When you need a rigid, vibration-free chassis for your amplifier, look no further than a roasting pan. I’ve used cast cement for subwoofers, but using a cooking pan bolted to a heavy wooden chopping board is a cheap way to get a rigid surface on which to build audio gear. The amp circuitry used by [Mark] is not complex, but it gets the job done. The “oxygen free copper cable” and “pure silver wire” are not needed, just make sure you have a solid mechanical connection. In other words, just tin your wires, bend small “u” shapes at each end, hook them together, and apply solder to the heated ends. Alternatively, hold the ends of stranded wires parallel to each other and twist the ends together before tinning, then solder. Test everything with a multimeter while moving wire joints to make sure you have no weak connections. Now you won’t waste your money on hyped-up cabling materials.
Thanks to [Gio] (who seems to have some personal audio projects as well) for the tip.


