A True 4K Projector From Scrap EBay Components

Cinemas all over the world have become no-go zones with COVID-19 around, but watching the latest blockbuster on the small screen at home is simply not the same. You could bring the big screen home, but buying a quality projector is going to set you back a small pile of cash. Fortunately [Matt] from [DIY Perks] has an alternative for us, demonstrating how to build your own true 4K projector with parts bought off eBay, for a fraction of the price.

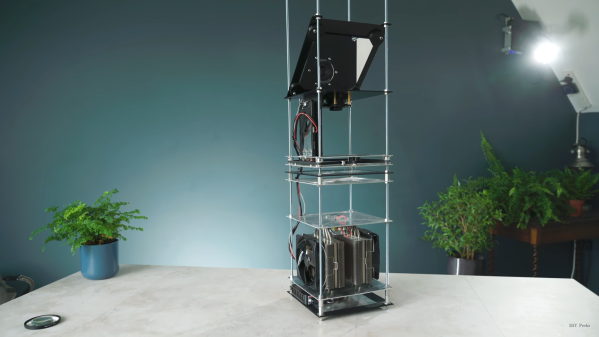
The core of the projector is a small 4K LCD panel, which is from a modified Sony smartphone. [Matt] disassembled the phone, removed the backlight from the LCD, which leaves it semi-transparent, and mounted it at a right angle to the rest of the phone body. The battery was also replaced with a voltage regulator to simulate a full battery. To create a practical projector, a much brighter backlight is needed. [Matt] used a 100W 10 mm diameter LED for this purpose. The LED needs some serious cooling to prevent it from burning itself out, and a large CPU cooler does the job perfectly. Two Fresnel lenses in series are used to turn the diverging light from the LED into a converging light source to pass through the LCD. An old 135 mm large format camera lens is placed at the focal point of light to act as a projection lens. The entire assembly is mounted on a vertical frame of threaded rods, nuts, and aluminium plates. [Matt] also used these threaded rods with GT2 pulleys to create a simple but effective moving platform for the projection lens that allows the focus of the projected image to be adjusted. The frame is topped off by a 45-degree mirror to project the image against a wall instead of the roof, and the frame is covered with aluminium panels.

The video after the break goes into incredible detail on how projector functions and how to build your own down. It definitely looks like a doable build for most hackers. [Matt] will also be releasing a complete PDF build guide in the next few weeks. Continue reading “A True 4K Projector From Scrap EBay Components”

Subwoofer Gets Arduino Brain Transplant

The Samsung PS-WTX500 subwoofer is designed to be used as part of a 5.1 channel home theater system, but not just any system. It contains the amplifiers for all the channels, but they’ll only function when the subwoofer is connected to the matching receiver. [Alejandro Zarate] figured there must be some way to unlock the system’s full functionality without being limited to the original receiver, he just needed to reverse engineer how the subwoofer worked.

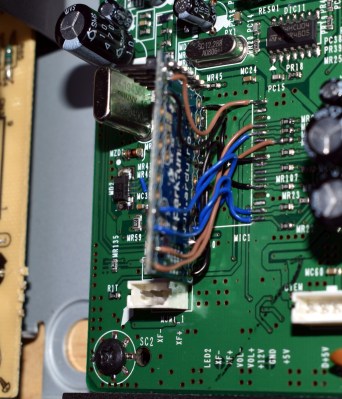
All the wires tuck underneath the Arduino

The result is a fantastically well documented write-up that covers the whole process, starting with how [Alejandro] identified and researched the Pulsus PS9829B Digital Audio Processor (DAP). Documentation for this particular chip seems hard to come by, but he was able to find a similar chip from the same manufacturer that was close enough to put him on the right track. From there, he started studying the SPI communications between the DAP and the subwoofer’s S3P70F4 microcontroller.

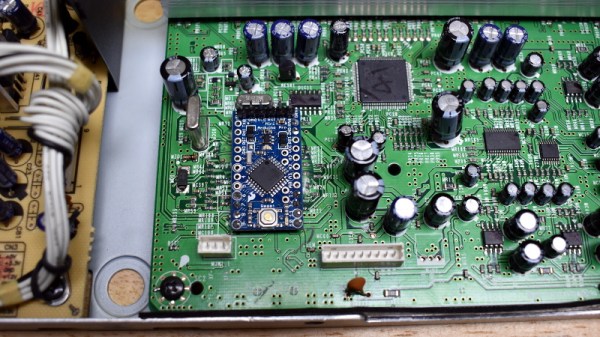
After analyzing the communication between the two chips, [Alejandro] pulled the S3P70F4 off the board and wired an Arduino Pro Mini 328 in its place. The Arduino was quite a bit larger than the original microcontroller, but with some careful wiring, he manged a very professional looking installation. Short of coming up with a custom PCB adapter, we don’t think it could look much better.

With some relatively straightforward code and a listing of the captured byte sequences, the Arduino was able to power up the PS-WTX500’s amplifiers and handle the incoming audio signal as a stand-alone device.

In the past we’ve seen a similar trick done with the ESP8266, which had the added benefit of enabling WiFi control of the speakers. We’re all for adding modern functionality to older hardware, even if you’ve got to hang it off the back as an external module.

Continue reading “Subwoofer Gets Arduino Brain Transplant”

ESP8266 Adds Web Control To Old Home Theater

There was a time when you could hold onto a TV or A/V receiver for the better part of the decade and not feel as though you were missing out on the latest and greatest features. But today you’re lucky to get three years out of a “smart” TV before it’s either supplanted by a vastly improved version, or falls victim to some weird issue that (surprise, surprise) means you need to buy a new one.

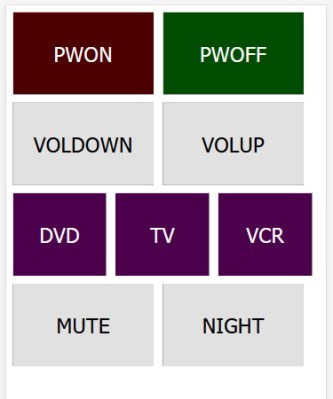
A simple touch interface hosted on the ESP8266

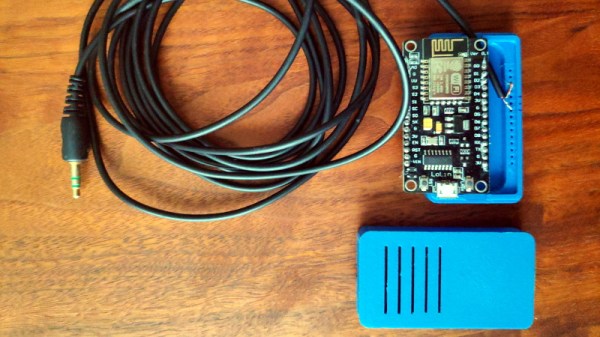
Not content with the status quo of planned obsolescence, [aamarioneta] recently set out to add a sprinkling of modern convenience to a circa 2008 Denon AVR 2308 home theater receiver. Like any good A/V receiver, the AVR 2308 features a dizzying array of ports on the back panel, one of which happens to be for an external infrared receiver. This turned out to be the perfect place to jack in an ESP8266, earning this 12 year old receiver an honorary membership into the Internet of Things.

The interesting thing about this hack is that there’s actually no IR involved. Sure, the code could be used to drive an IR LED attached to the ESP8266’s GPIO pins, and the AVR 2308 would respond as if the original remote was being used; but where’s the fun in that? Thanks to the receiver port, they’re able to inject the IR codes directly into the device. It’s the same protocol, just without the photons.

With a simple web-interface running on the ESP8266, they can control the AVR 2308 from a smartphone’s browser anywhere in the house. From here it would only take a few more lines of code to tie it into an existing home automation system or add in support for Alexa voice control.

We love seeing projects that add modern features to older hardware, as that’s one less piece of gear sent to an early grave because its owner felt they were behind the curve. It’s getting a bit unfriendly out there for consumers, and anything that puts the power back into the owner’s hands is a step in the right direction.

Home Theater, Tribute To A Friend

The Greg Williams Theater

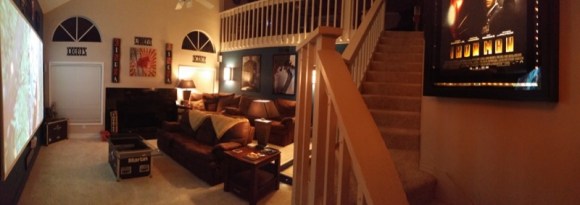
Ever since purchasing this house, [Ed] Always wanted a to turn his living room into a home theater, but not just any old projector and a white wall would do. He wanted the whole experience. [Ed] Started with a slightly damaged 12′ wide 4:3 roll up projector screen, he removed the damaged bottom portion and built a static frame to support the now 16:9 screen. Before he could mount the screen, he needed to drywall over a window that was inconveniently located. With the screen now in place, [Ed] framed out the elevated seating platform and steps with some 2×12 topped off with plywood. Next, the carpet that was sitting directly below the platform and steps was removed and then secured on top. Down firing LED fixtures were installed in the steps, to give them that movie theater look and feel. To provide the image, a refurbished HD projector acquired from the Bay of Electronics, was installed in the loft above the living room.

With the theater functional, [Ed] turned his attention to theater decorations. Dimmable ambiance lighting fixtures, using laser cut acrylic and CNC routed starboard (a marine-grade polymer), were made to resemble a film strip. Next a coffee table was crafted out of an equipment road case filled with movie props. Studio logos were painted on the sides with the use of laser cut stencils, and with a glass top, gives the illusion it came off the set of a hollywood movie. The addition of a rebuilt movie poster marquee, movie posters, candy stand, pop corn machine, and with the existing soda fountain and the arcade in the loft, the home theater was almost complete.

In a fitting tribute, [Ed] designed and built a marquee sign to dedicate and name the theater after his cousin Greg, one of his closest friends and avid movie watcher, who had sadly passed away. Video overview of all the hard work after the break.

Continue reading “Home Theater, Tribute To A Friend”

Eloquent Universal Receiver For Your Home Entertainment Equipment

home-entertainment-universal-receiver

We’re really starting to enjoy the home entertainment control hacks which use a universal receiver to act on commands from any remote. This one is especially interesting as it uses a single remote to control the system but rolls in lots of extras.

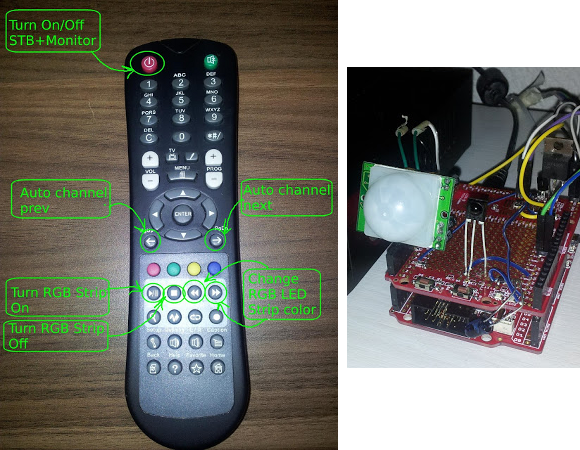
Looking at the receiver itself the white plastic dome of the PIR sensor should raise an eyebrow. Since the cable box takes a while to turn on [Ivan] included the motion sensor to switch that component on when you walk into the room. This way it’ll be ready to go by the time you sit down. It does this by sending IR signals from the PIC32 dev board. Of course the board has its own receiver to listen for the remote control commands. The remote buttons have been mapped a bit differently than originally intended. You can see in the diagram above that the normal VCR/DVD/DVR buttons have been set to control the room’s LED strips. There’s even a power consumption monitor rolled into the project. All of these features are demonstrated in the clip after the break.

This is a nearly perfect base setup. But we’d love to see it with a web interface at some point in the future.

Continue reading “Eloquent Universal Receiver For Your Home Entertainment Equipment”

Frankenstein, An All-tube Home Theater Amplifier

amp

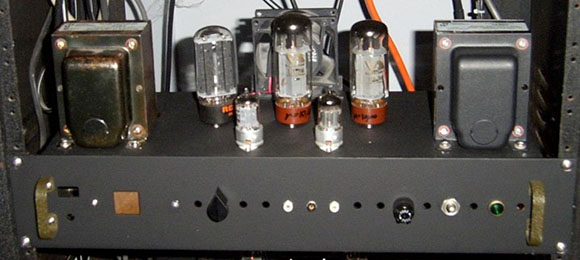
Here’s an exercise in excess if we’ve ever seen one. While working on his undergrad at Michigan State, [Gregory] thought it would be a great idea to build an all-tube home theater system. He calls his seven-foot tall rack of amplifiers ‘Frankenstein,’ and we’ve got to agree this build is an impressive monstrosity of engineering prowess.

[Gregory]’s Frankenstein is a complete 5.1 home theater system. In the interests of sanity, the majority of the equipment in the rack is off-the-shelf gear including a CD player, surround sound processor, and a beautiful McIntosh solid state preamp. The power amps, though, are where this build really shines.

For the sub, [Gregory] built a wonderful monoblock tube amp, able to push nearly 300 watts into a subwoofer. The other channels for this home theater system are amplified with a huge four channel tube amp providing 480 watts per channel. In total, there are 23 tubes in [Gregory]’s amplifier system, enough to consume 20 amps of filament current.

You can check out [Gregory]’s demo video of his system after the break.

Continue reading “Frankenstein, An All-tube Home Theater Amplifier”

A Folded Horn Enclosure To Make The Most Out Of A Subwoofer

To make the most out of his home theater sound system [Baccula] built this folded horn enclosure for as much bass sound as possible. The design was conceived by [Bill Fitzmaurice] who thought there needed to be a better way to use the subwoofers which are typically used in home systems. His design is called the Tuba HT and it is aimed at a 15″ speaker. [Bill] charges for the building plans, but we don’t mind living vicariously through [Baccula’s] construction album.

As you can see, there are a lot of wood parts that went into the cabinet. It starts with a base of 2×4 framing. From there the plywood sawdust really starts to fly as each component is produced. During assembly [Baccula] is careful to fully glue each joint — you don’t want to find out that your sub cabinet vibrates after you get everything installed. All together the new piece of living room furniture stands three feet tall and deep and two feet wide.

The album has no captions but you can read a bit more about the project in the Reddit comments.