Reverse Engineering The Web API Of An Akaso EK7000 Action Camera

Recently, [Richard Audette] bought an Akaso EK7000 action camera for his daughter’s no-smartphones-allowed summer camp, which meant that after his daughter returned from said camp, he was free to tinker with this new toy. Although he was not interested in peeling open the camera to ogle its innards, [Richard] was very much into using the WiFi-based remote control without being forced into using the ‘Akaso Go’ smartphone app. To do this, he had to figure out the details of what the Android app does so that it could be replicated. He provided a fake camera WiFi hotspot for the app in order to learn its secrets.

Normally, the camera creates a WiFi hotspot with a specific SSID (iCam-AKASO_C_1e96) and password (1234567890) which the Android app connects to before contacting the camera’s IP address at 192.72.1.1. The app then shows a live view and allows you to copy over snapshots and videos. Initially, [Richard] tried to decompile the Android app using JADX, but the decompiled code contained so many URLs that it was hard to make heads or tails of it. In addition, the app supports many different Akaso camera models, making it harder to focus on the part for this particular camera.

Continue reading “Reverse Engineering The Web API Of An Akaso EK7000 Action Camera”

These Lessons Were Learned In Enclosure Design, But Go Far Beyond

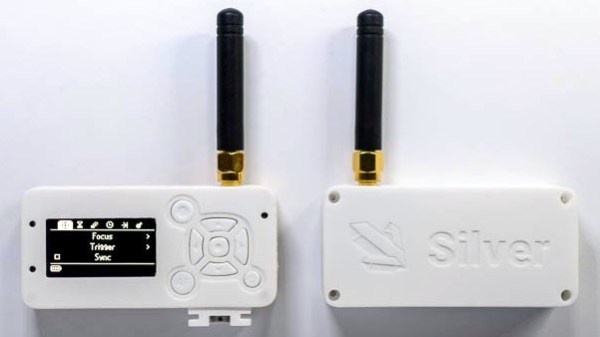
[Foaly] has been hard at work making an open-source long range camera remote, and recently shared a deeply thoughtful post about how it is never too early to consider all aspects of design, lest it cost you in the end. It all started with designing an enclosure for a working prototype, and it led to redesigning the PCB from scratch. That took a lot of guts, and we recommend you make some time to click that link and read up on what he shared. You’ll either learn some valuable tips, or just enjoy nodding sagely as he confirms things you already know. It’s win-win.

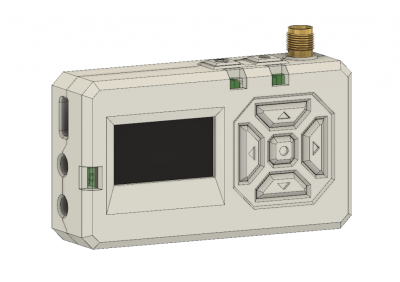
Note the awkward buttons right next to the antenna connector, for example.

The project in question is Silver, and calling it a camera remote is selling it a bit short. In any case, [Foaly] had a perfectly serviceable set of prototypes and needed a small batch of enclosures. So far so normal, but in the process of designing possible solutions, [Foaly] ran into a sure-fire sign that a project is in trouble: problems cropping up everywhere, and in general everything just seeming harder than it should be. Holding the mounting-hole-free PCB securely never seemed quite right. Buttons were awkward to reach, ill-proportioned, and didn’t feel good to use. The OLED screen’s component was physically centered, but the display was off-center which looked wrong no matter how the lines of the bezel were sculpted. The PCB was a tidy rectangle, but the display ended up a bit small and enclosures always looked bulky by the time everything was accounted for. The best effort is shown here, and it just didn’t satisfy.

[Foaly] says the real problem was that he designed the electronics and did the layout while giving some thought (but not much thought) to their eventual integration into a case. This isn’t necessarily a problem for a one-off, but from a product design perspective it led to so many problems that it was better to start over, this time being mindful of how everything integrates right from the start: the layout, the components, the mechanical bits, the assembly, and the ultimate user experience. The end result is wonderful, and we’re delighted [Foaly] took the time to document his findings.

Enclosure design is a big deal and there are many different ways to go about it. For a more unique spin, be sure to check out our how-to make enclosures from the PCBs themselves. For a primer on more traditional enclosure manufacture and design, take a few minutes to familiarize yourself with injection molding.