Want to do a bit of good this holiday season without leaving your couch or battle station? Well step right up and try your hand at Santa Claws, the charitable claw machine created by UK-based firm Liberty Games. For every toy you can maneuver to the chute, Liberty Games will donate money to Crisis, a national charity devoted to ending homelessness.
The machine is filled with special Christmas-themed stuffed animals that represent different cash values from £1 to £5. And these toys are doing double duty — after the holiday, they’ll all be donated to a good cause. In order to make this playable worldwide, Liberty used a Raspberry Pi, two Pi Face boards to interface the claw machine’s controls, and a Pi Face rack to everything together. They have the machine set on ‘generous’, so go have fun.
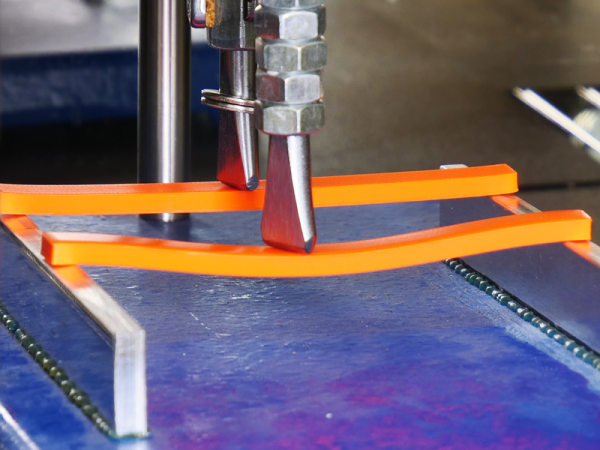
We’ve all been taught the scientific method: Form a hypothesis, do some experiments, gather some data, and prove or disprove the hypothesis. But we don’t always do it. We will tweak our 3D prints a little bit and think we see an improvement (or not) and draw some conclusions without a lot of data. Not [Josef Prusa], though. His team printed 856 different parts from four different materials to generate data about how parts behaved when annealed. There’s a video to watch, below.
Annealing is the process of heating a part to cause its structure to reorganize. Of course, heated plastic has an annoying habit of deforming. However, it can also make the parts firmer and with less inner tension. Printed parts tend to have an amorphous molecular structure. That is to say, they have no organization at all. The temperature where the plastic becomes soft and able to reorganize is the glass transition temperature.
Sand-casting metal parts is a technique that has been around for a very long time, but it can be educational to see the process from start to finish. That’s exactly what [Frederico] shows us with his sand-cast slingshot of his own design, and it’s not bad for what he says is a first try!
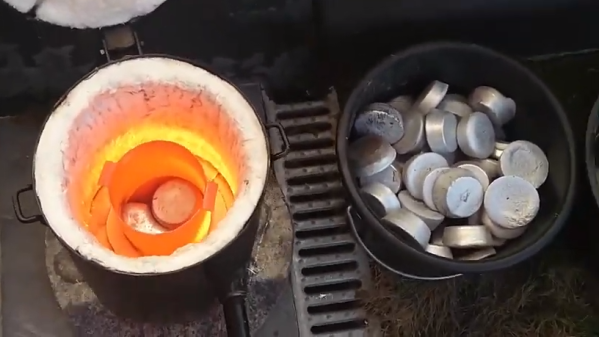
First, [Frederico] makes a two-part green sand mold of the slingshot body. Green sand is a sand and clay mix, and is only green in the sense that it is wet or “raw” and not further processed. After the mold is made, it’s time to melt aluminum in the propane-powered furnace, and the molten aluminum is then poured into the mold.
After cooling, [Frederico] breaks up the sand to reveal the rough cast object. There is post-processing to do in the form of sprues to cut and some flashing around the seams to remove, but overall it looks to have turned out well. You can watch the whole process in the video, embedded below.
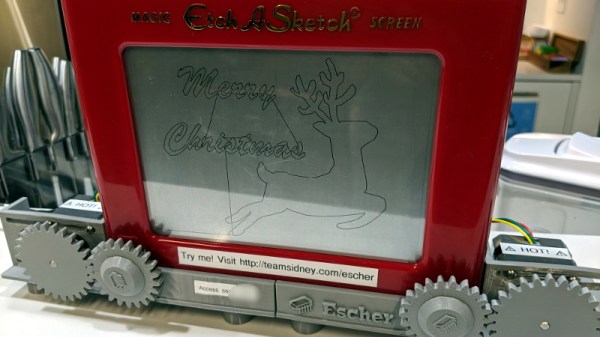
For better or for worse, the tech world has fully committed to pushing as many of their products into “The Cloud” as possible. Of course, readers of Hackaday see right through the corporate buzzwords. It’s all just a fancy way of saying you have to poke some server over the Internet every time you want to use the service. In a way, [Matt Welsh] has perfectly demonstrated this concept with Escher. It’s a normal Etch-a-Sketch, but since somebody else owns it and you’ve got to have an active Internet connection to use it, that makes it an honorary citizen of the Cloud.
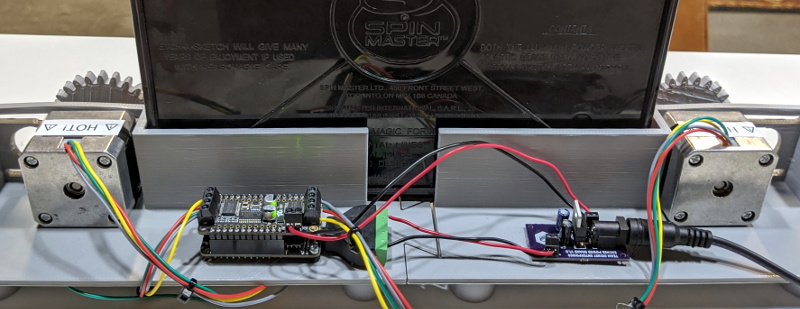
Escher takes the form of a 3D printed mount and replacement knobs for the classic drawing toy that allow two NEMA 17 steppers to stand in for human hands. Thanks to the clever design, [Matt] can easily pull the Etch-a-Sketch out and use it the old fashioned way, though admittedly the ergonomics of holding onto the geared knobs might take a little getting used to. But who wants to use their hands, anyway?
In terms of the electronics, the star of the show is the the Adafruit Feather HUZZAH32 development board, paired with a motor controller that can provide 12 V to the steppers. [Matt] even went through the trouble of making a custom voltage regulator PCB that steps down the stepper’s voltage to 5 V for the Feather. Totally unnecessary, just how we like it.
For the software folks in the audience, [Matt] goes into considerable detail about how he got his hardware talking to the web with Google Firebase. Even if the Internet of Sketches doesn’t quite tickle your fancy, we imagine his deep-dive on pushing G-Code files from the browser into the Feather will surely be of interest.
By now we are all used to the role of the printed circuit board in artwork, because of the burgeoning creativity in the conference and unofficial #BadgeLife electronic badge scenes. When the masters of electronic design tools turn their hand to producing for aesthetic rather than technical reasons, the results were always going to be something rather special.
Nick Poole is an ace wrangler of electrons working for SparkFun, and as such is someone with an impressive pedigree when it comes to PCB design. Coming on stage sporting a beret with an awesome cap badge, his talk at the recent Hackaday Superconference concerned his experience in pushing the boundaries of what is possible in PCB manufacture. It was a primer in the techniques required to create special work in the medium of printed circuit boards, and it should be essential viewing for anybody with an interest in this field.
Though he starts with the basics of importing graphics into a PCB design package, the meat of his talk lies in going beyond the mere two dimensions of a single PCB into the third dimension either by creating PCBs that interlock, or by stacking boards.
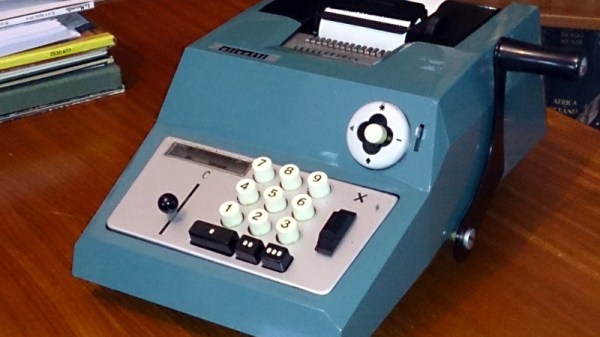
Last month we carried a piece looking at the development of the 8-bit home computer market through the lens of the British catalogue retailer Argos and their perennial catalogue of dreams. As an aside, we mentioned that the earliest edition from 1975 contained some of the last mechanical calculators on the market, alongside a few early electronic models. This month it’s worth returning to those devices, because though they are largely forgotten now, they were part of the scenery and clutter of a typical office for most of the century.
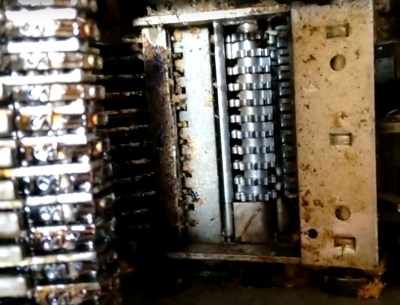
The Summa’s internals, showing the register on the right and the type wheels on the left.
Somewhere in storage I have one of the models featured in the catalogue, an Olivetti Summa Prima. I happened upon it in a dumpster as a teenager looking for broken TVs to scavenge for parts, cut down a pair of typewriter ribbon reels to fit it, and after playing with it for a while added it to my store of random tech ephemera. It’s a compact and stylish desktop unit from about 1970, on its front is a numerical keypad, top is a printer with a holder for a roll of receipt paper and a typewriter-style rubber roller, while on its side is a spring-loaded handle from which it derives its power. It can do simple addition and subtraction in the old British currency units, and operating it is a simple case of punching in a number, pulling the handle, and watching the result spool out on the paper tape. Its register appears to be a set of rotors advanced or retarded by the handle for either addition or subtraction, and its printing is achieved by a set of print bars sliding up to line the correct number with the inked ribbon. For me in 1987 with my LCD Casio Scientific it was an entertaining mechanical curiosity, but for its operators twenty years earlier it must have represented a significant time saving.
The history of mechanical calculators goes back over several hundred years to Blaise Pascal in the 17th century, and over that time they evolved through a series of inventions into surprisingly sophisticated machines that were capable of handling financial complications surprisingly quickly. The Summa was one of the last machines available in great numbers, and even as it was brought to market in the 1960s its manufacturer was also producing one of the first desktop-sized computers. Its price in that 1975 Argos catalogue is hardly cheap but around the same as an electronic equivalent, itself a minor miracle given how many parts it contains and how complex it must have been to manufacture.
We’ve put two Summa Prima videos below the break. T.the first is a contemporary advert for the machine, and the second is a modern introduction to the machine partially narrated by a Brazilian robot, so consider translated subtitles. In that second video you can see something of its internals as the bare mechanism is cranked over for the camera and some of the mechanical complexity of the device becomes very obvious. It might seem odd to pull a obsolete piece of office machinery from a dumpster and hang onto it for three decades, but I’m very glad indeed that a 1980s teenage me did so. You’re probably unlikely to stumble upon one in 2019, but should you do so it’s a device that’s very much worth adding to your collection.
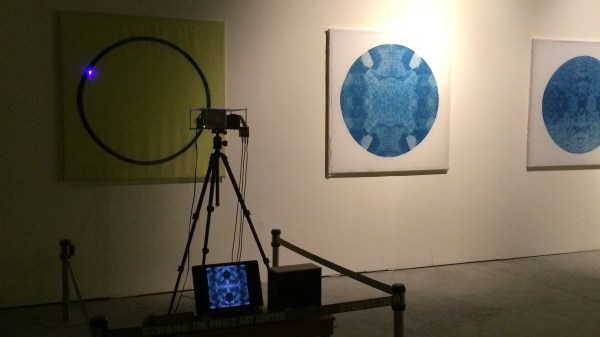
How do you get an inkjet head on a shoe or a couch? Most printing processes require a flat surface to print. But hearkening back to the days when a blueprint was a blueprint, a mixture of an iron salt and an acid are mixed and applied to a surface an interesting reaction occurs when the surface is exposed to UV light. The chemicals react to form, of all things, prussian blue. After the reaction occurs simply washing away the remaining chemicals leaves a stable print behind.
[Shih Wei Chieh] uses two galvanometers and a laser to cure the fabric. He uses a slightly newer process which reduces the exposure time required. This lets him print very large pictures, but also on uneven surfaces. As you can see in the video, viewable after the break, the effect is very pretty. There’s a new way to have the coolest pen plotter on the block.