Multicolor Drawbot Highlights Importance Of Limit Switches

Plotters and drawing robots are fun projects that let you create art with all the precision and perfection that computer numerical control can deliver. [TUENHIDIY] demonstrates that ably with the Multicolor DrawBot.

The build relies on a simple XY Cartesian design, using a pair of NEMA 17 stepper motors. It’s built in the typical CoreXY fashion, running GRBL firmware on an Arduino Uno.

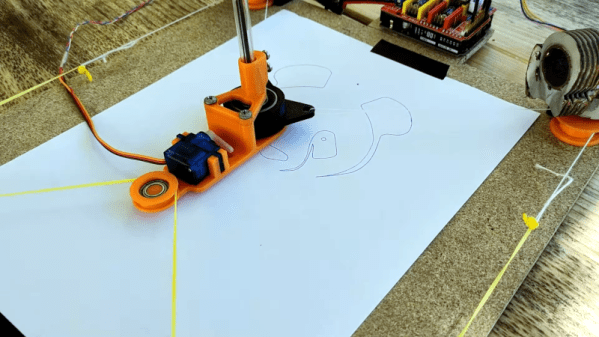
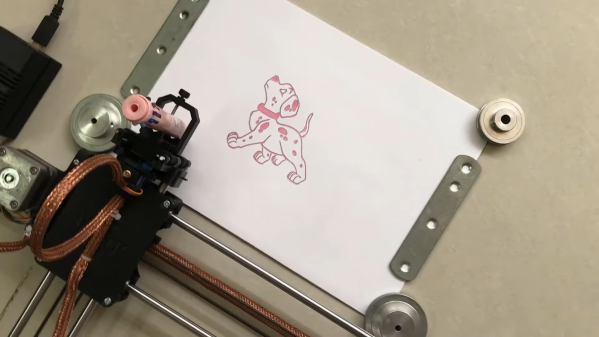
Where [TUENHIDIY] gets creative is in the pen itself. Rather than using a simple ballpoint or marker, instead, a retractable multicolor pen is used instead. With the multicolor pen on board, [TUENHIDIY] notes the importance of limit switches in the design. These allow the the ‘bot to make multiple passes, each time in a different color, to build up a multicolor image. Without the limit switches in place, it would be impossible to line up each following pass.

We’d love to see the build taken even further with a servo-based system for switching colors automatically. As it is, though, [TUENHIDIY] has a capable plotter that can deliver tidy multicolor artworks.

One of the more curious applications of plotters of late are those used to send faux handwritten letters through the postal system.  Video after the break.

Continue reading “Multicolor Drawbot Highlights Importance Of Limit Switches”

Pen Plotter Is About As Simple As It Can Get

Sure, we see quite a few plotters and other motion machines, but the one from [DAZ Projects] has the virtual of looking dead simple. The Arduino and CNC shield are old hat, of course. But some 3D printed pulleys and a very simple-looking core XY arrangement looks like this could be a pretty quick build.

You might ask; if you have a 3D printer, why you wouldn’t just mount a pen on it and call it a day? Well, you could do that, of course, but what fun is that? Besides, that will tie up your printer, too. You can see a video of the project, below.

Continue reading “Pen Plotter Is About As Simple As It Can Get”

A 3D Printer With An Electromagnetic Tool Changer

The versatility of 3D printers is simply amazing. Capable of producing a wide variety of prototypes, miscellaneous parts, artwork, and even other 3D printers, it’s an excellent addition to any shop or makerspace. The smaller, more inexpensive printers might do one type of printing well with a single tool, but if you really want to take a 3D printer’s versatility up to the next level you may want to try one with an automatic tool changing system like this one which uses magnets.

This 3D printer from [Will Hardy] uses an electromagnet to attach the tool to the printer. The arm is able to move to the tool storage area and quickly deposit and attach various tools as it runs through the prints. A failsafe mechanism keeps the tool from falling off of the head of the printer in case of a power outage, and several other design features were included to allow others to tweak this design to their own particular needs, such as enclosing the printer and increasing or decreasing the working area of the Core-XY printer as needed.

While the project looks like it works exceptionally well, [Will] notes that it is still in the prototyping phase and needs work on the software in order to refine its operation and make it suitable for more general-purpose uses. It’s an excellent design though and shows promise. It also reminds us of this other tool-changing system we featured a few months ago, albeit with a less electromagnetic twist.

Continue reading “A 3D Printer With An Electromagnetic Tool Changer”

Core XY Explained

If you are building a CNC machine, a 3D printer, or even a plotter, you have a need for motion in both the X and Y directions. There are many ways to accomplish this, for example, some printers move the tool in the X direction and the bed in the Y direction while others move the entire X carriage in the Y direction and yet more use a delta mechanism. However, one of the oldest means of doing this is the Core XY method. It is interesting because both motors remain stationary and the business end moves entirely on belts or cords. This is similar to the H-Bot technique, but with some differences. [Michael Laws] has a video (see below) that explains how two stationary motors can move a tool anywhere in an XY region.

The idea behind Core XY goes back to at least old drafting tables. You can think of it as an object held by two ends of the same belt. As one end of the belt gets shorter the other end gets longer. The belts are arranged so that motion of one motor causes the tool to move at a 45 degree angle. That means you have to move both motors to go in a straight line.

Continue reading “Core XY Explained”