Repairing A Self-Destructing SRS DG535 Digital Delay Generator

There’s a lot of laboratory equipment out there that the casual hobbyist will never need to use, but that doesn’t mean you wouldn’t snap it up if the price is right. That’s what happened when [Tom Verbeure] saw a 1980s digital delay generator at a flea market for $40. Not only is it an excellent way to learn something about these devices, but it also provides a fascinating opportunity to troubleshoot and hopefully fix it. Such was also the case with this Stanford Research Systems (SRS) DG535 that turned out to be not only broken, but even features an apparently previously triggered self-destruct feature.

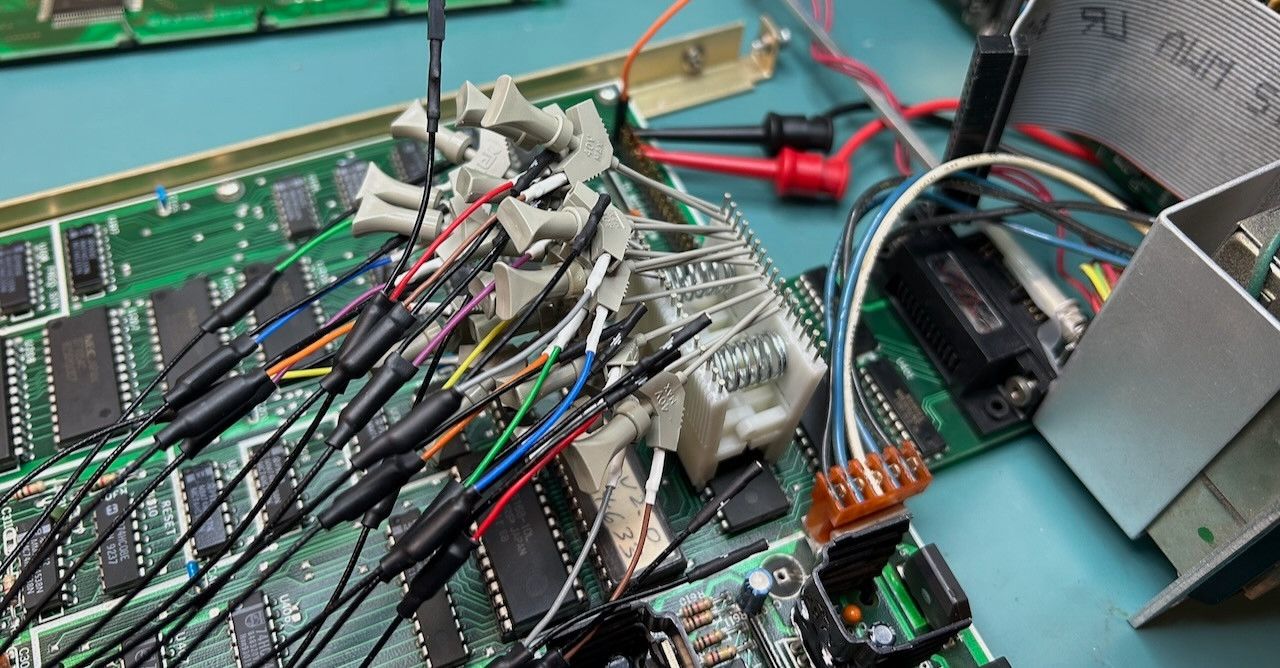
These devices are pretty basic, with this specimen incorporating a Z80 MPU in addition to digital and analog components to provide a programmable delay with 12.5 nanosecond resolution on its output channels after the input trigger is sensed. For that reason it was little surprise that the problem with the device was with its supply rails, of which a few were dead or out of spec, along with a burned-out trace.

Where the self-destruct feature comes into play is with the use of current boosting resistors around its linear regulators. Although these provide a current boost over what the regulator can provide, their disadvantages include a tendency towards destruction whenever the load on the supply rail decreases. This could for example occur when you’re debugging an issue and leave some of the PCBs disconnected.

Unsurprisingly, this issue caused the same charred trace to reignite during [Tom]’s first repair attempt, but after working up the courage over the subsequent 18 months the second repair attempt went much better, also helped by the presence of the mostly correct original board schematics.

Ultimately the fixes were relatively modest, involving replacing a discrete diode bridge with an integrated one, fixing the -9 V rail with a bodge wire, and replacing the LCD with its busted AC-powered backlight with a modern one with a LED backlight. Fortunately running the 5 V rail at 7 V for a while seemed to have caused no readily observable damage, nor did flipping connectors because of SRS’ inconsistent ‘standards’ for its connector orientations.

Sadly, when [Tom] emailed SRS to inquire about obtaining an updated schematic for this unit — which is currently still being sold new for $4,495 — he merely got told to send his unit in for repair.

The PT2399 Delay/Echo Chip Data Sheet You Never Had

If you are fortunate enough to have had the opportunity to play with an analogue-reel-to-reel tape recorder in a well-equipped studio, you probably looped the tape around to create an echo, or a delay in the audio. It was a desirable effect to have, but not a practical one for a guitar pedal or similar portable accessory. Silicon alternatives for creating delays have been in production since the 1960s, first the so-called bucket brigade delay lines that used a switched chain of on-chip capacitors, and more recently all-digital chips that process the delay by storing samples in RAM. One of the more popular of those is the Princeton Technology PT2399, but it comes with something of a snag for the experimenter in the form of a sparse data sheet. Thankfully the folks at [Electrosmash] have come to the rescue on that front with a thorough technical examination of the chip that should fill in any gaps in the official documentation.

After a brief examination of the range of chips of which the 2399 is a part, they dive right into the chip’s internals by rearranging the internal circuit diagram from the data sheet to the point at which it makes more sense. At which point the difference between the chip’s delay and echo functions becomes obvious, through the inclusion of a feedback path.

We then are taken through the pins, examining what lies behind the power supply and analog inputs and outputs. We are somewhere between a data sheet and an app note here, as some of this is information rarely present even in really good data sheets. Finally, we are taken through the chip’s performance, with real-world distortion and noise measurements. Armed with this page, the would-be PT2399 designer really can say they know what they are working with.

Surprisingly few PT2399s have appeared on these pages, however one did pop up in the Synthbike.

Better Car Audio With Guitar Effects

Automotive sound is a huge deal; for many people, it’s the place to listen to music. Back in the 80s, you were lucky to get anything more than two door speakers in the front of the car. Fast forward to today, and you can expect a 10-speaker system in an up-spec’d family sedan.

[Josh] has a car, and wanted to improve the sound. In particular, the aim was to improve the sense of space felt when listening. A car is a relatively small space, and the driver sits in close proximity to the front speakers, so it’s difficult to get a good soundstage.

[Josh]’s approach was to create a “surround” effect for the car stereo, by feeding a left/right difference signal to the rear speakers. This was achieved by the use of a series of op-amps that buffer and then generate a mono signal that represents the difference between the left and right channel. For optimum results, [Josh] wanted to delay the signal being sent to the rear speakers, with a longer delay making the soundstage feel bigger, as if reflections are coming from farther away in a bigger room. To do this, [Josh] simply hooked up the signal to a Boss DD-3 Digital Delay guitar pedal – an off-the-shelf solution to an otherwise sticky problem. The DD-3 gives [Josh] a variable delay time with reasonably high fidelity, so it’s a perfect way to get the project done quickly.

The final piece of the puzzle is a filter. The difference signal doesn’t actually sound all that pleasant to the ears by itself, especially when it comes to transient high-pitched sounds like cymbals, so a lowpass filter is implemented to cut these higher frequencies down.

[Josh] made everything adjustable, from the filter to the delay, so it’s simple to dial things in until they’re just right, rather than relying on calculation or guesswork. The general idea is to feed the difference signal into the rear speakers at a low enough volume and with a subtle delay so that it adds to a general feeling of being in a larger room with the sound coming from all around, as opposed to listening to very loud point sources of audio.

It’s a cool project that we imagine would be very satisfying to dial in and enjoy on the road. What’s more, it’s a fairly straightforward build if you want to experiment with it yourself on your own car. Perhaps your problem is that you need an auxiliary input to your head unit, though – in that case, check out this Subaru project.