Simple Solution Makes Rocket Fin Alignment A Breeze

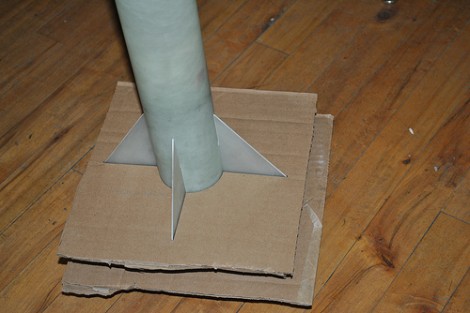
If you’re building model rockets you want to make sure they fly straight, and most of that is dependent on the stabilizer fins. It has long been a problem come assembly time. How can you make sure that they’re being aligned without any variation? [Rrix] mentioned that one technique is to use a square to position them perfectly perpendicular to the bench on which the rocket is being assembled. But this is still prone to error. His method uses a couple of precision jigs made out of cardboard.

He designed this pair of jigs in Inkscape, then used the files to fabricate them out on a laser cutter. It worked like a charm, but led him to another issue that can be solved in a similar way. Model rockets have rail guides that travel along a rod attached to the launch pad as the craft accelerates to a point where the fins have enough effect to keep it going in a straight line. If those guides aren’t straight, your fin alignment will be all for naught. His second version of the jigs includes a cut out for these guides.

Flimsy Pi Case Still Provides A Level Of Protection

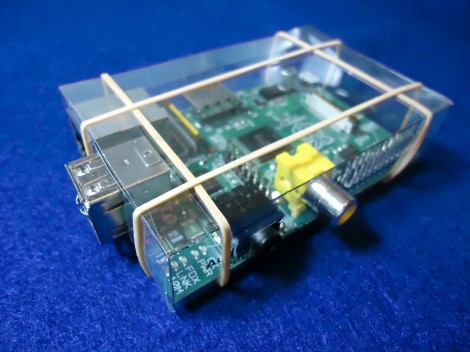
This flimsy case isn’t going to protect your Raspberry Pi if you knock it off the workbench. It will provide a level of protection against shorting out from contact with metal objects, or from liquids spilled in the near vicinity. [CGPatterson] ended up making this case from a single sheet of transparency film.

The project is basically papercraft. He started with the dimensions published on the Raspberry Pi FAQ, which turned out to be wrong. Not having a caliper available to help with the precision of the measurements, he grabbed his ruler and did the best he could. The first two cases were a poor fit, but as you can see the third is like a glove. Luckily you don’t have to go through this same trial and error as he release the design. Both A4 and US Letter sized PDFs are available for download. Print them out on the transparency, cut along the lines, apply transparent double-sided tape to the tabs and you’re in business. If you wish to alter the design he has also posted the SVG source he made in Inkscape.

This is certainly a good option for those of us without the ability to produce laser cut parts.

How To Add Flair To A Webpage That Shows Your Project Data

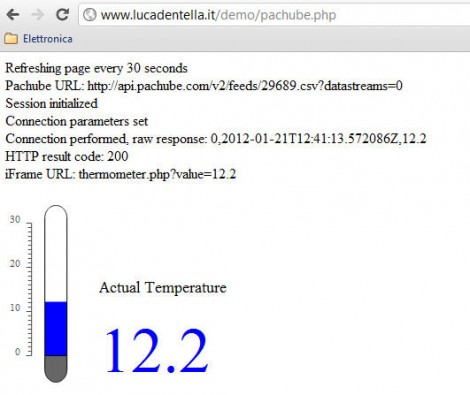
This temperature display may not knock your socks off, but it’s a simple demonstration of how you can used vector graphics as a web readout for data (translated). [Luca] wrote this four page tutorial to help others, he makes it look really easy, and the sky’s the limit on eye candy once you get he basics in place.

The first step is to create the dynamic SVG (vector graphic) file using Inkscape that will be used by the webpage. This starts with a static background, in this case the grey parts of the thermometer which will not change. Over the top the blue parts were added, with just a bit of XML editing to give those parts a hook which will be used in the next step. The demo above will have a moving blue bar and changing numeric output to match data coming in from a temperature sensor.

An SVG file is just a text file that is rendered as a graphic when loaded. [Luca] shows you how to used the identifiers set up when making the graphic to dynamically change the size and value of the blue parts with server-side PHP before sending the graphic to the browser. With that in place you just need to give the PHP file access to the data. He shows how to use the Pachube API but you could just as easily get this via serial or otherwise.

Inkscape Plugin For Engraving Fonts

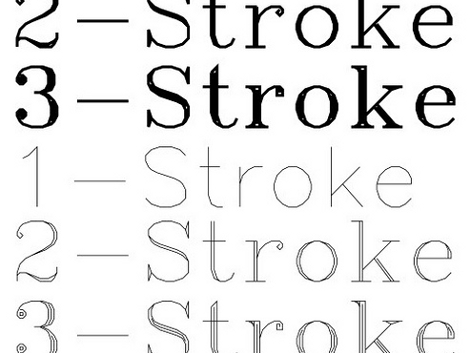
[Windell] developed an Inkscape extension called Hershey Text that helps you process fonts into vector representations. If you’ve tried to 3D print, plot, or mill text in the past you may have run across the problem of generating vector paths that deal with the outline and fill of the text appropriately. The problem stems from how fonts are defined; either by the area that they enclose, or by the path that is used to draw the outline. Check out [Windell’s] tutorial for this extension where he explains each of these issues and shows how to overcome them.

The image above illustrates the stroke options, which allow you to vector multiple paths to best fill in the correct parts of each character using path-based hardware. The package includes a wide variety of interesting font sets that are in the public domain, and includes tools such as a glyph map generator that make it very user friendly.